Whilst this is the smallest of the bedrooms, and probably going to be the least used, I wanted to make sure this still got the full treatment and what was needed was quite extensive.
The main issue was the crack in the ceiling and this was picked up on the survey as “non structural” but still needed investigating and fixing before the room was finished off. As well as this, the room needed painting and a new carpet fitting.
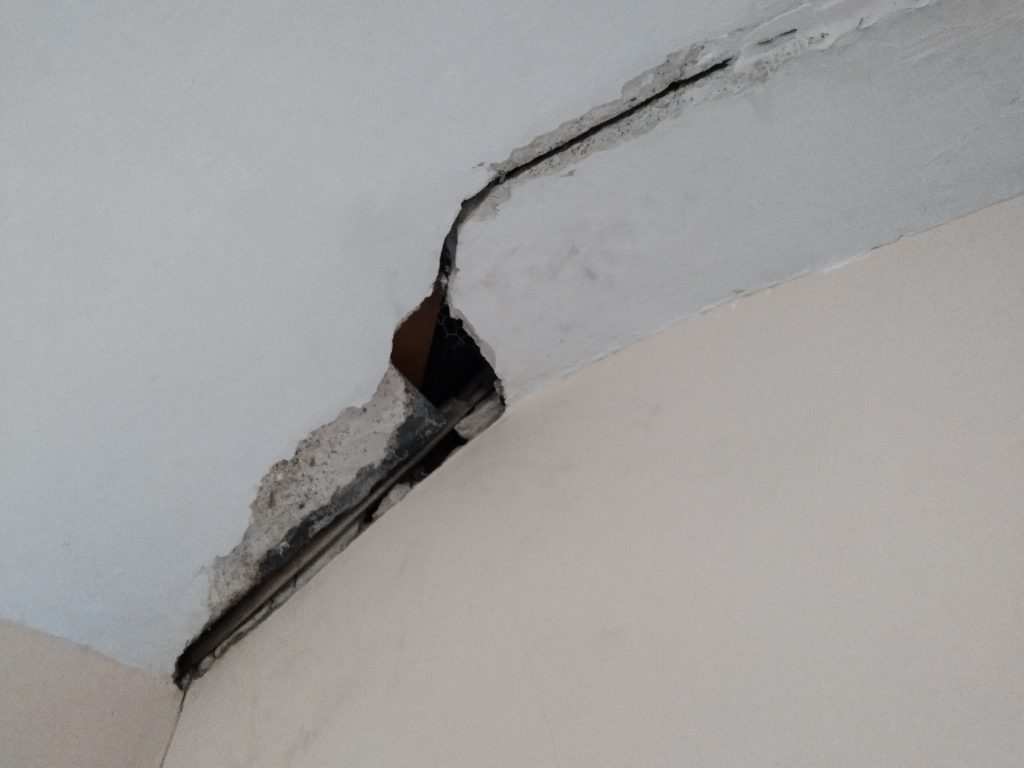
So lets start with the ceiling. Basically it was a crack running the width of the room about 18 inches away from the outside wall. My original plan was to scrape out a broad V, fill it, sand it back and then paint but as I reached the corner in the left hand side of the room the plaster became unstable and started to come off in small chunks. Suspecting it was something that needed investigation, I allowed it to break away to see the full extent of the damage.

From what I can see, the structure used to bond the plaster to the ceiling was either compromised or not present. I could see some wire meshing but not over the extent of the hole so either it had perished or was never there. Interestingly, the place of the compromise was also over the roof valley (not the main one I knew was leaking but the one on the other side of the building), so it could have been that there has been a leak on this side which had caused the base structure to rot away or become detached?
And that seems to be the reason. When the guys were up on the roof assessing the leaking valley (and I had this validated by a second roofing company), I got them to check the whole roof over and surprise surprise, a compromise on the other valley was evident Not as bad as the main leak but enough to allow some form of water ingress to affect the ceiling integrity so whilst they were fixing the main leak I got them to sort this valley as well.
At least now I can get it re-plastered and the plan is to strip the damaged section out and then get that re-plastered and feathered in.
The next step was to get the wall painted and I had originally purchased a colour from Homebase called Granada for the dining room. Well, once we put a sample up (in the dining room) it was clear it was going to be too overpowering (I wont write what my daughter actually said)! But I did like the colour and actually it has suited this bedroom really well. The walls are a natural plaster as opposed to wallpaper in the dining room and it seems to have absorbed in a lot more and taken the sharp edge off of the colour and toned it down significantly.

The shelf you can see above with the pictures on it is actually the old window cavity from when this wall was the original external wall. There is no information regarding the extension but as the extension is built of very similar stone (and not modern built and rendered), plus the wear on the slate floor you can only assume it has had some longevity.
So what is left?
Well the room is useable but before I make it available to guests it needs the plastering done, a new carpet and a new matress on the bed (as the current one is a thin Ikea one which is not the most comfortable and is slightly smaller than the bed frame).
The room has no central heating fed radiator but the room does have electrics so the plan is to has an oil filled electric radiator in there to ensure any guests are comfortable!
I’m off carpet shopping tomorrow, so hopefully once the plastering is done I can get the carpet down and tick this one off as done….