Gosh they grafted!

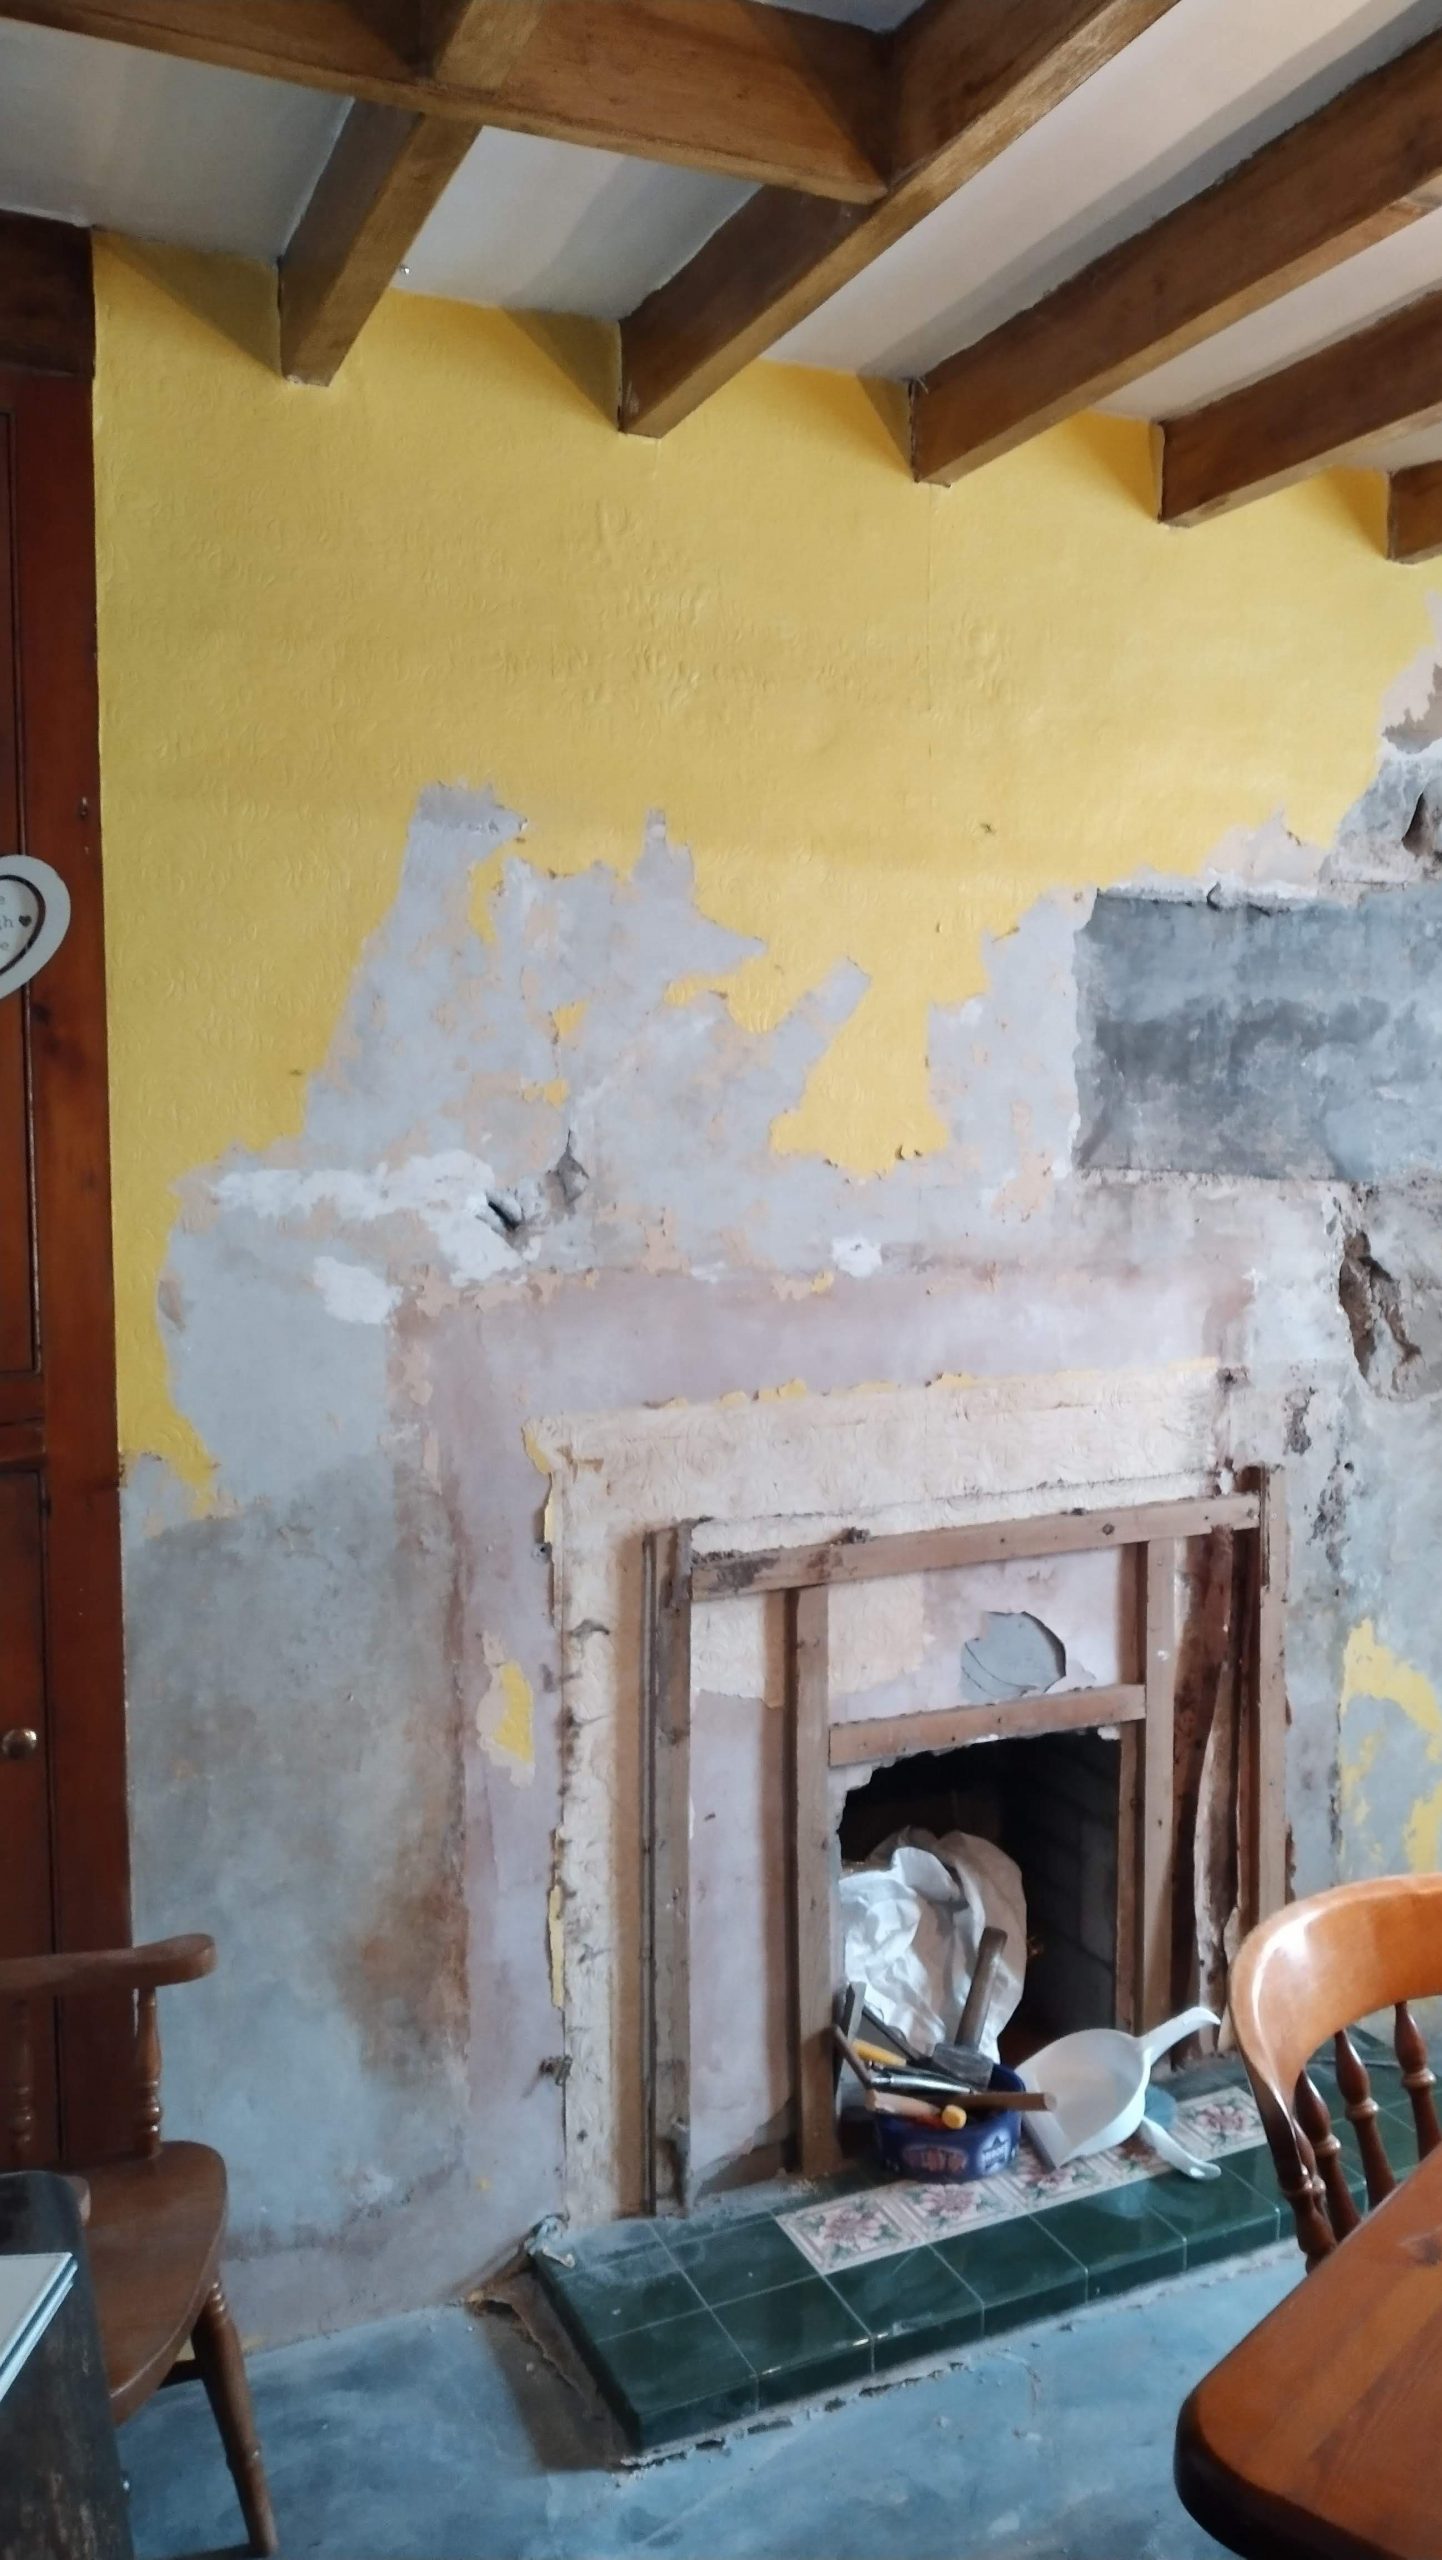
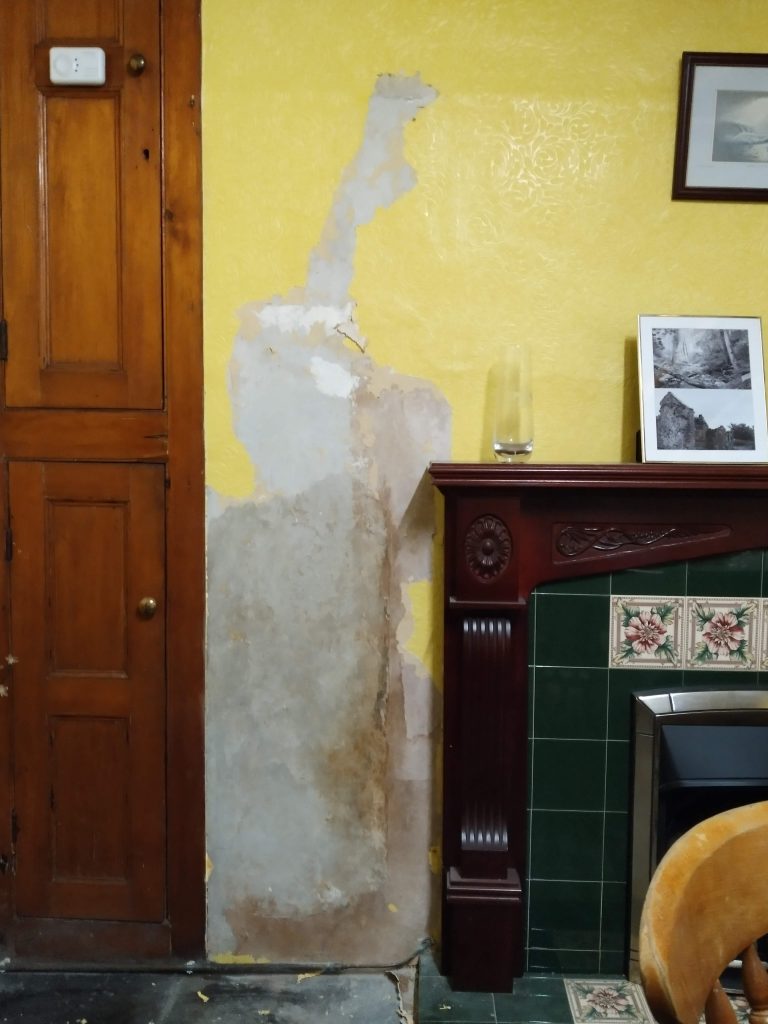
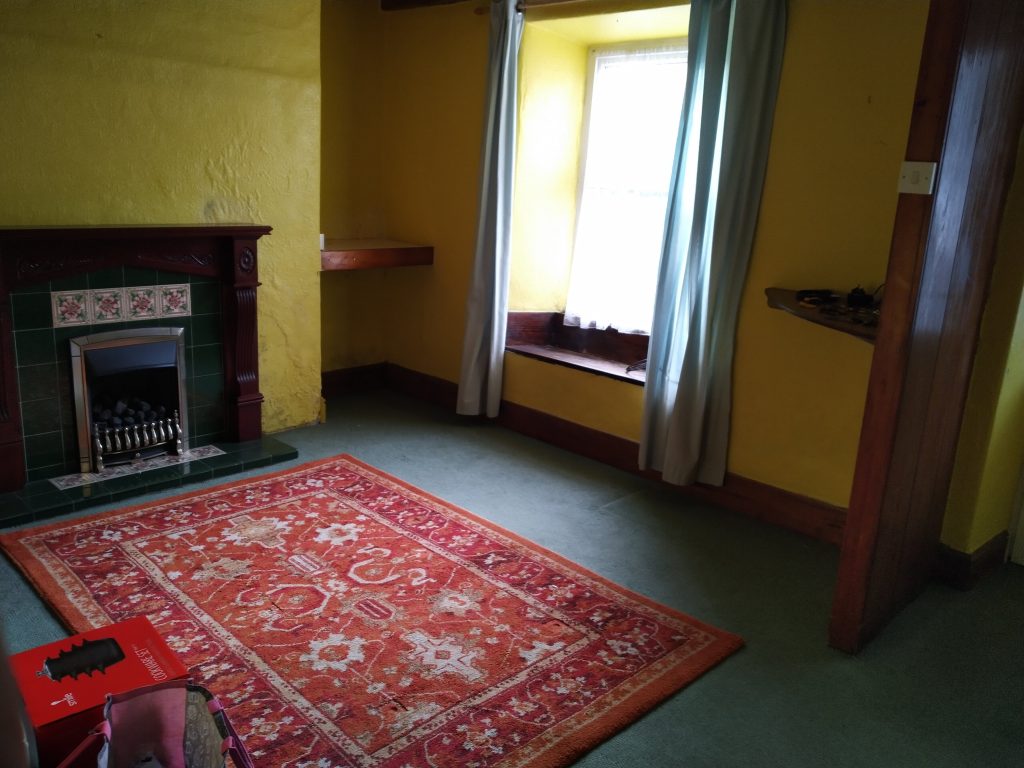
So the time had come to tackle the fireplace in the dining room. If you recall, what we knew to date is that there was a large slate lintel and that’s about it.

The first exposure of the lintel where we knew we had potentially something special

What lies behind the brickwork, how deep does it goes, is there an old range behind there, is all undiscovered territory. Once again, trying to use local companies, I had contacted Bryn at Gwynedd Safeflu Specialists Ltd who had visited the property a number of times to guide me on what was needed.

Due to the amount of opening up in both the dining room and the lounge he put me in contact with Shaun and with support from Caron, they set about dismantling the existing fireplace.

You would never of guess what we found behind this and why you would ever brick it up is beyond me.

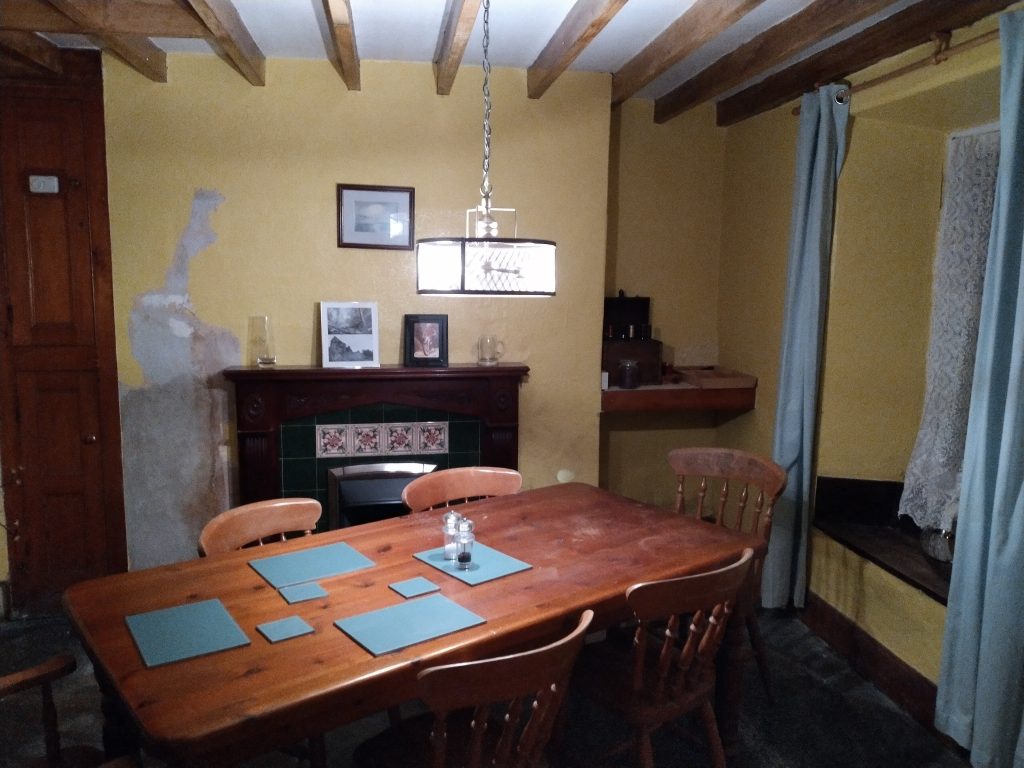
A number of people have commented as this blog has developed that it is good to see me taking the house back to a more “original” state and not making it a modern home. My attitude toward Glan Gors is that it is my home first but also it is a piece of local history and I am purely a custodian of it for a period of time. I have a duty to maintain some of that heritage (plus I think it looks cool as well)!

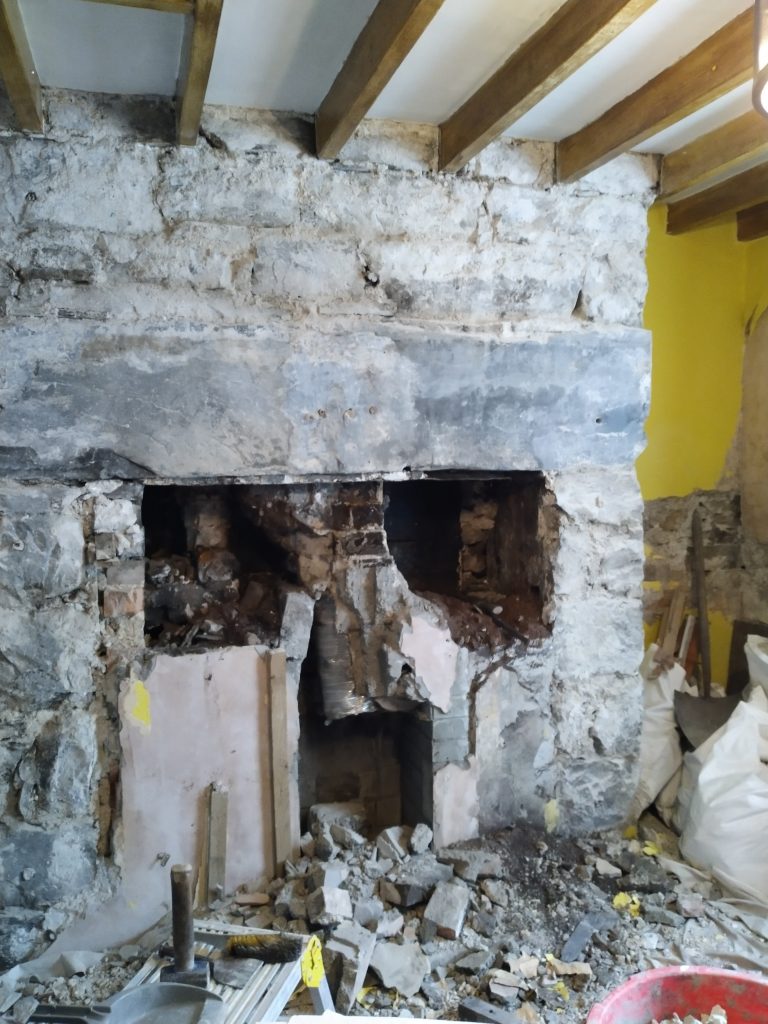
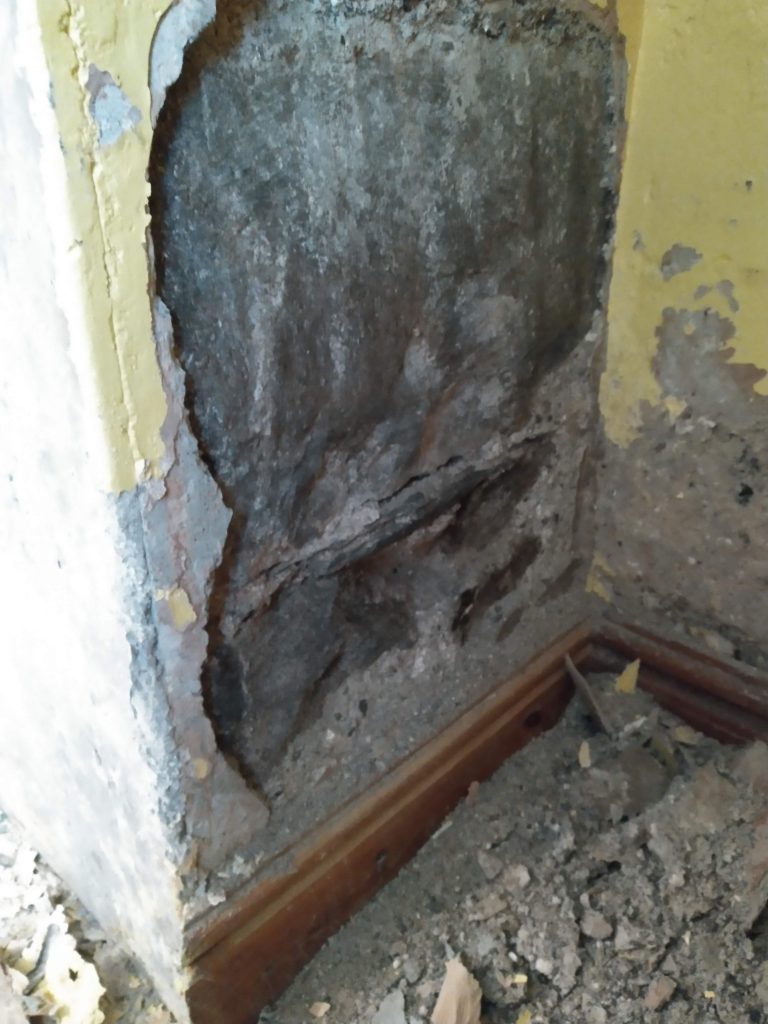
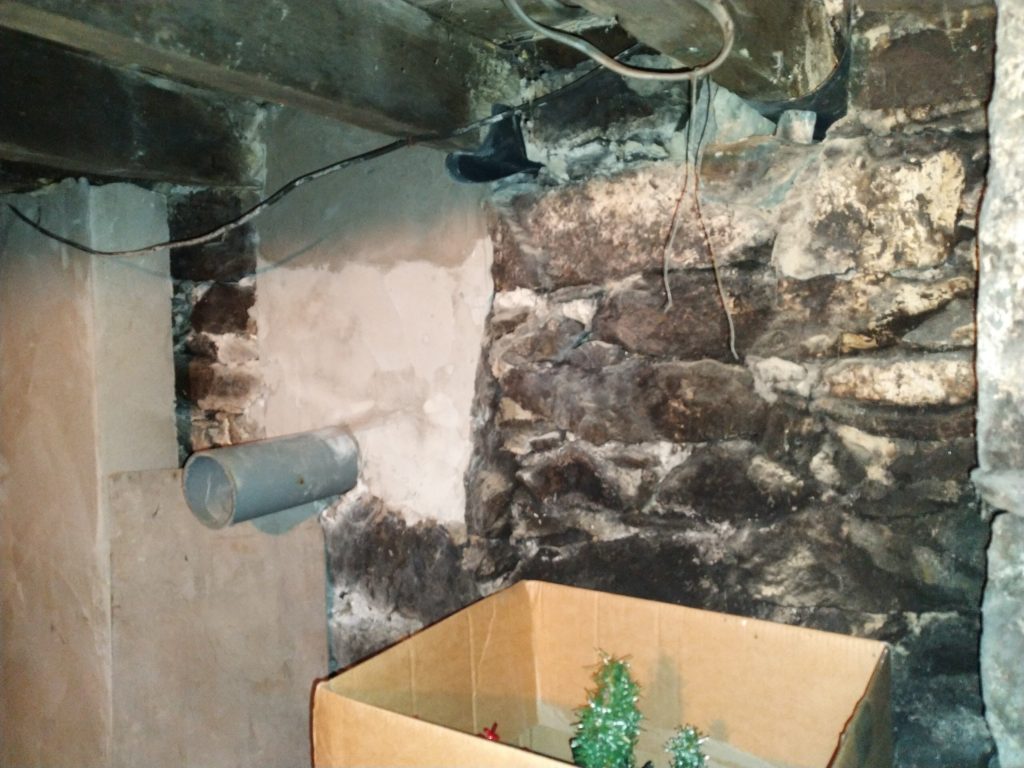
After stripping back the plaster layer, an initial inspection of the lintel showed no cracks and also that the supporting pillars were not compromised so the removal from the middle part took place. The silver liner you can see in the middle was for a gas fire and was encased in concrete which took them a great deal of work. You can also see a build up of sooty sand where at some point we suspect their has been a compromise. It is good to get all of this removed as it was probably contributing to the damp.

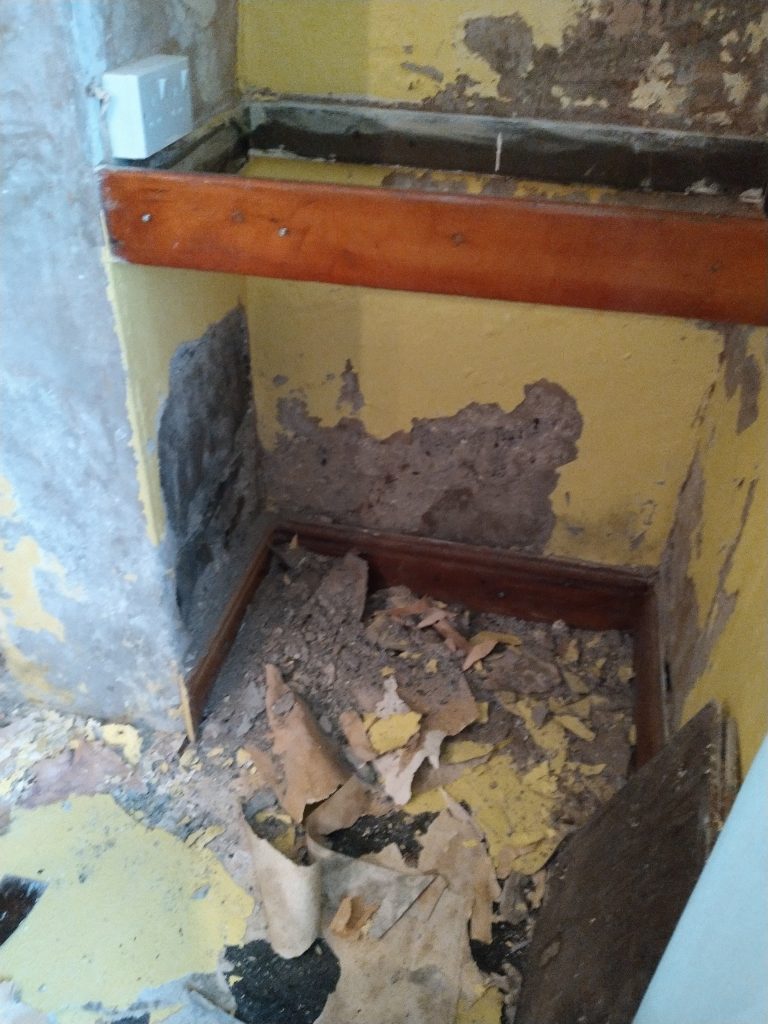
By the end of the day the main central section was removed with just some layers of brick at the bottom / back left to remove.

Even though they were coming back the next day, the standard of the end of day cleaning was impeccable

So not bad for a full days graft! and Shaun and Caron got an early start the next day finishing the dining room excavation off and then once it was all cleared, Caron continued removing some of the mortar to allow the sandblast cleaning to take place, whilst Shaun made a start on the lounge.

It is incredible when you see the final opened up fireplace below and once again you wonder why it was originally filled up the way it was?

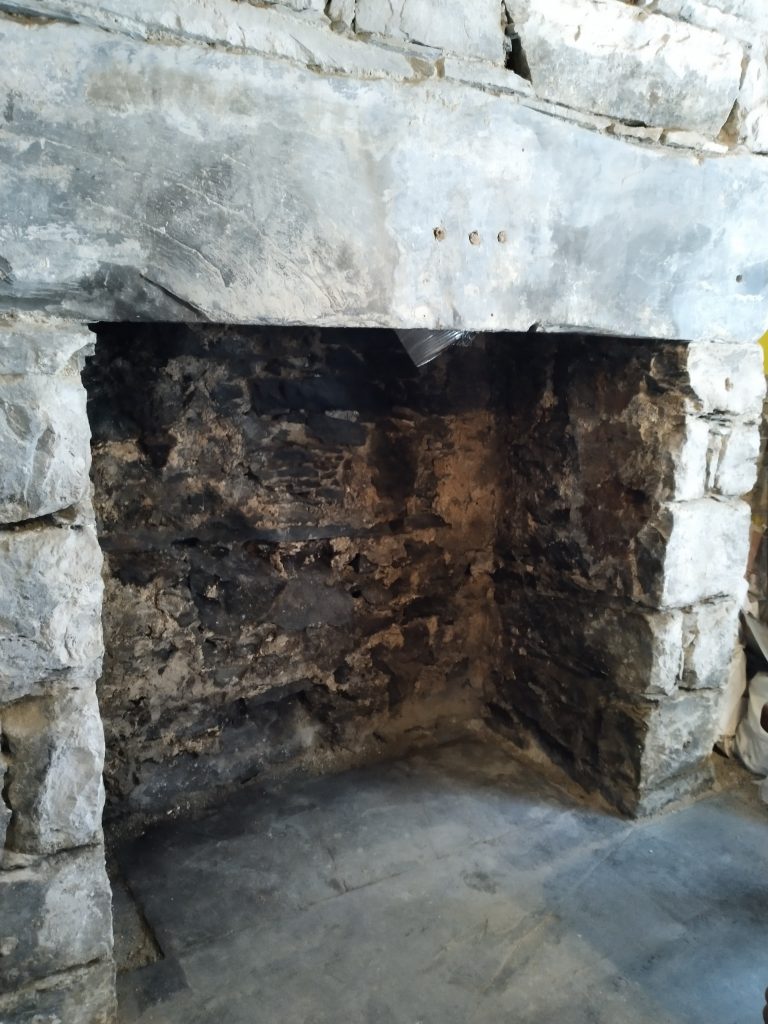
I thought I would finish this off with a side by side view…

The next steps are:

  • Get the stonework sandblast cleaned – currently trying to find someone
  • Repoint the stonework – Shaun and Caron
  • Replacement liner fitted to take a log burner – Bryn at Gwynedd Safeflu Specialists Ltd
  • Select and purchase log burner – currently trying to work out whats best to put in here
  • Get log burner fitted – Bryn at Gwynedd Safeflu Specialists Ltd

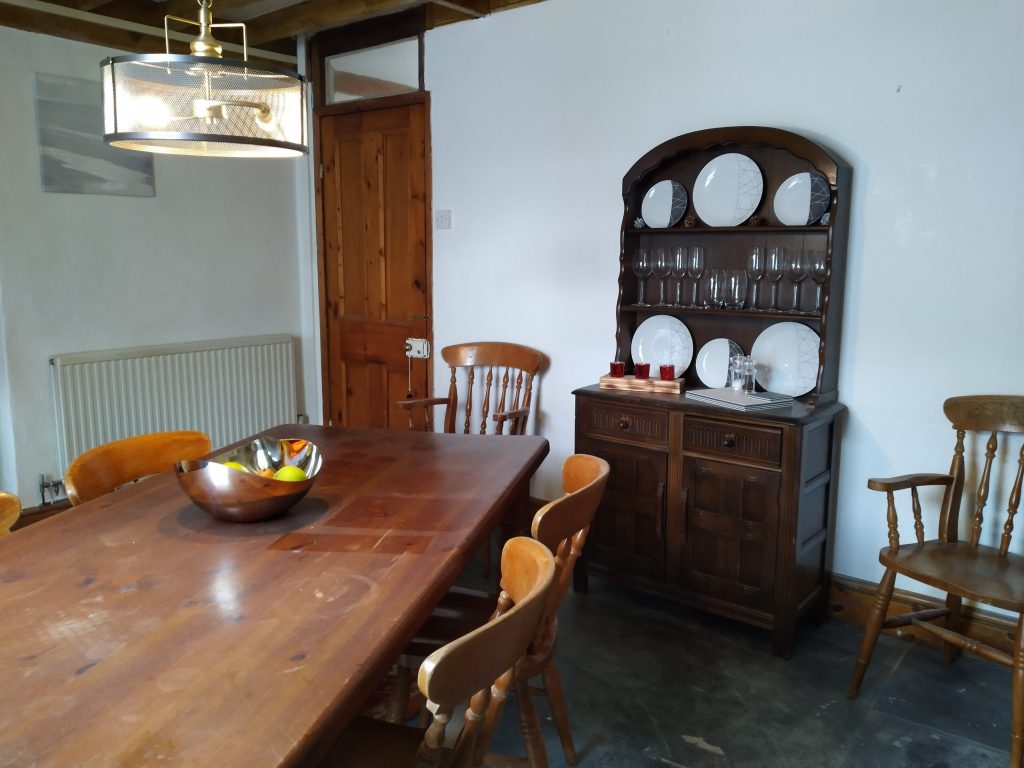
I think its going to be a lovely dining room and can’t wait for family gatherings especially Christmas 2021!

Dining room taking shape

We left the dining room blog last time at the stage where we were starting to get a feel for the inglenook. The slate beam had been exposed to give a basic outline and really what was needed next was to get the fire disconnected so I could take this and the surround out and get the cavity opened up. First step was to get the gas fire capped and this was completed at the same time as the lounge one was gone. I decided to get the piping removed all of the way back to the adjacent room as no piping would be needed in dining room going forward.

Once that was clear, it was just a simple case of slowly dismantling the fire (which was reported as not working so that will go straight to the recycling centre) and then remove the fire place surround. This was popped onto a social media market place for free collection and was gone within a few days!

Once all of this was out, the cavity could be inspected and basically did not really give any greater indication. The fire was slotted into a breeze block cube which will need to be removed to get a better view.

With the lounge fire being capped off as well, I was able to make a quick call to the company fitting the log burner in the lounge to see if they wanted to take a look if they were in the area. A few days later, Bryn popped around and talked positively about our options in the dining room. After chatting about knocking the opening out I basically had two options. Save some money by doing it myself or pay an associate of Bryns’ who specialises in this type of work. As it is new territory to me and the fabric of the lintel and its load bearing capability needs careful monitoring as the lower brickwork is removed, I have opted to get an experienced team to do it. It also means that the time I would have spent doing this can be focused on getting the kitchen finished now that the water in there has been capped off.

Now if you recall, the colour scheme in the dining room was yellow and there were a number of spots where damp needs to be monitored as well as the underlying theme being woodchip which at some time has to go!

The plan was to do a fresh colour scheme but as the timeline for the fireplace is currently unknown and there is likely to be a lot of dust and disruption, I have decided just to get a white emulsion coat on the walls to make it look fresh. I have already completed two walls and it certainly look a lot better already. It was clear as the paint was going on that in some places the paper is compromised and underneath is going to need attention but that was the reason for approaching it this way. Basically get it looking fresh in parallel to the major works then monitor the damp for 12 months and tackle that the following year.

The space to the right of the fireplace originally had a shelf build in with a double plug socket on the chimney breast side. As I wanted the shelf removed to allow the walls to breath and hopefully this is where the Christmas tree is going to be placed, I have had the sockets moved up onto the ceiling on the beams.

The hole in the floor still needs to be sorted, but for now the false floor is working a treat, especially with the rug over it.

I will keep you all updated once the removal of the inglenook has been completed.

Fingers crossed

The last article on the dining room was titled “Hoping for a hidden gem” as my initial suspicions was that the original fireplace was present in the dining room. I was hoping for something similar to what we have in the snug (ie a very large open inglenook) and the high ridge started to indicate this. Also in the corner of the room was an area which had very strong signs of damp which needed attention so I knew that the dining room was always going to be a significant piece of work, it was just a case of establishing where on the scale of “significant” it was.

So a couple of weeks ago when I was bored one evening, I thought I would just take a “strip” of wallpaper off near the ridge and see what I could find. If you have a look at the picture below (which my daughter says looks like an Ibiza DJ holding headphones to their ear in one hand and doing an air fist pump with the other) the thin bit at the top is the ridge line.

What can you see in the stripped wallpaper area?

The outcome was actually very disappointing as once the paper was removed, what appeared to be underneath was concrete in texture and not slate. Oh well, it was never expected so no loss but at least I know this was the lintel line so started to give me an idea of the size of the potential opening so the inglenook was still a possibility.

Anyway, wind the clock forward to today and my plan was to strip all of this wall back to the plaster so that once the fire was decommissioned I could remove the fire place and fire and start to see what I was working with. To be clear, the plan was “strip the wallpaper on this wall only….

So I started low down on both sides, especially on the right had side as there was clear signs of damp here. Paper was peeling and surface paint was bubbling. You can see from the picture below, to the right of the fireplace is a shelf as the wall recesses back and all the area below the shelf on all 3 faces needed attention, but today I was just going to strip the wallpaper on the wall around the fire place….

The recess under the shelf (in the back corner behind the right hand chair you can see) had a lot of signs of damp

The problem was, as the paper on the right hand side of the chimney breast started peeling, it naturally went around the corner, and as it went around the corner it was clear that the plaster had absorbed a lot of moisture and was compromised and once you started taking it of, well you just had to find out the extent of the problem.

The first sign that the chimney breast was natural stone

As you can see from the picture above, the layers of plaster once peeled back exposed the original stone work. I am not sure how much effort it will be to restore this back, but fortunately time is something that I have plenty of.

All 3 sides will need to be stripped back to remediate the damp

I suspect that the shelf contributed in some form to trapping moisture in the air and not allowing it to free-flow out, probably contributing to the concentration. My current plan is to move the socket up to the ceiling beams for now and get rid of the shelf. This whole area can then be stripped back and probably will be a great place to have a Christmas Tree.

So back to the main wall. Obviously, as the plaster was coming off in chunks at the side, it started to creep around the front and I suddenly got sight of something black. Was this slate? As I gently allowed the plaster to come off, the black area got taller and opening it wider it became apparent that it actually was a lintel. The next thing to find out was whether it was purely ornamental or if it was the lintel that created the framework of the inglenook.

Now remember my plan was to just strip the wallpaper but what I actually ended up with was the picture below.

I know, I have to clear it all up after!

The horizontal aspect appears to be the depth of the lintel and clearing off the mortar on the right hand side later on shows a clear connection into the upright stone pillar running vertically on the right hand side that is starting to be exposed.

The original lip that I exposed on the left hand side, thought to be a concrete lintel is actually a contoured plaster which levered off really easy to show the upper edged of the lintel supporting the upper stone work.

The next step before I go any further is to get the gas fire decommisioned so I can safely remove the current fire surround and see how much block removal is needed and the potential size of the cavity.

If you look very closely at the picture above, on the left hand side, vertically in line with the the left hand edge of the wooden fire place, you will see a small hole about 12 inches up from the mantle. This exposed the original water pipes which terminate in the cupboard to the left hand side. The old airing cupboard is above this so their is the possibility that a range type boiler existed and wouldn’t it be wonderful if it had been bricked in there and not removed?

I will let you know more once the fire is removed.

Plaster, original wallpaper, thick wallpaper over the top with multiple layers of paint. No wonder the walls could not breath!

Final removal of dining room cement plinth

Saturday had a single plan and that was to get the rest of the cement up from the dining room floor and assess the damage. For those of you not following the previous chapter on this, after lifting the dining room carpet, we found the most incredible original welsh slate floor. Unfortunately where the main walkway is, it appears to have worn significantly and to create a level for the carpet, a previous owner had simply built it up with cement straight on top of the slate or so we thought!

Whilst the perimeter edges were OK to remove, the main bulk of the area had two issues. Firstly as I moved closer to the centre, the depth was getting greater and it appeared to be at least an inch and a half, maybe two inches. Secondly I had no knowledge of what was under it. It if was anything like the concaved bit, it would be solid slate and therefore applying to much force or pressure could risk cracking the stone underneath.

The tools mark out the potential area and you can clearly see the mortar base line from the mid point of the bottom running as a diagonal to the right hand edge but the lump hammer

My only option really was to gradually, using a small chisel and mid size hammer, chip away at a number of angles, removing small pieces towards the centre. At one point, putting a chisel under one edge and gradually levering up, saw the final section flex at all of the edges but as I still had slate underneath, any excessive pressure could result in cracking the original layer.

I persevered for about another 30 minutes, then a larger section came away and instead of slate underneath, I could see bare soil! It would appear that this section had been damaged down to the base layer and a section of the slate had been removed.

As it is a significant way from the walls, it was good to see the soil bed very dry

Armed with the knowledge that I now had cement on a soil bed, I could be a little bit more “assertive” and switching to a small handheld lump hammer, using basic percussion strokes (ie whacking it) I was able to break the thick concrete base into smaller fractured sections which were easily removed.

The full tile is 1220 x 600 mm and you can see the extend of the damaged area

Once the full cement area was removed a good inspection of the soil bed showed it to be dry (certainly when you look at the context of the outside ground and the amount of rain we have had). The next stage is to create a temporary wooden frame and top board to allow the rug to safely cover it, then I can look at my options. At the moment I am considering the following:

  1. Replace the whole tile with a new one sourced locally
  2. Clean back the edge in a triangle and replace only the missing area with a custom cut piece of stone (therefore retaining the original piece)
  3. Remove the whole tile and make a feature of the space that bring my “new family and life” into the room – (I am thinking a mosaic tile design)
  4. Clean back the edge in a triangle and replace only the missing area with a feature that brings my “new family and life” into the room such as an evolving cement print of my grand childrens hands and feet (I know what I mean but I cant picture it yet….)

Whatever I do has to fit in with the character of the room. It will mainly be a dining room for family gatherings and you can see from the shot below with the dining room table and light, the style I am aiming for. Once you open up the fireplace behind you can probably get a idea for the direction it is going in.

Yes the yellow will be going and the aim is to open the fireplace up with a nice log burner

New Year 3 day binge! – day 2

Whilst tradition says that Christmas decorations should come down on Twelfth Night, I have always found that the over hang from the Christmas festivities is best packed up quickly. For me, it creates that sense of “new” beginnings and certainly this year it was very apt. One of the lovely elements about this house is the cellar and having only just moved in, I have no plans for it so instead of using the loft as the annual decoration store, it was nice to just get some boxes and pop everything down into the cellar without the hassle of getting loft ladders out etc!

Once that was done, I could crack on with todays decorating and the plan was very much around finishing the Snug off and if possible getting all of the emulsion on the lounge walls. Hopefully that would leave me with a couple of options tomorrow, the main one being starting to unpack the workshop and if I felt inclined I would start the gloss in the lounge but I really wanted the Sunday to be a more relaxing day with a more fluid plan.

The snug work was really straight forward. I had laid down two coats of white emulsion on the places where I had stripped the lifting wallpaper and the two top coloured coats went on really nicely. Once that had dried back I was able to finish off the two skirting boards under these panels then stand back and enjoy the transformation.

The two sides adjacent to the front door have very poor adhesion on the paper and I suspect some form of damp coming from the outside wall. Stripping them back and just applying plaint should allow me to monitor it.

Once I had tidied up and dressed the room, it was time to grab a quick coffee then start on the lounge. The area behind the sofa had a lot of lifting wallpaper and I had started on the walls before it yesterday so knew I had the complex bit coming. The first two short walls around the dining room door were OK but as soon as I came to the corner it was evident that the paper adhesion was poor and even thought I started just cutting sections out it quickly became apparent that the only option was to strip it all back and see the extent of the problem. Whilst a messy task with that underlying fear that I was going to discover my first major issue, the paper came off clean with little damage to the underlying plaster and whilst there was one patch of degradation the underlying walls seemed OK.

Now all of the parts of the jigsaw have slotted together and probably give me something to monitor / address going forward. From what I can see, this area of dampness in the walls is directly above the new floor boards and if you look in the cellar you can see where new supporting walls have been built, I assume to take the weight of the floor joists which had started to rot in the old wall supports. Without specialist investigation confirming it, I suspect it is an occurrence of rising damp with moisture being drawn from the ground where the cellar walls touch the outlying soil.

The walls next to the building works are very black indicating a longer term damp problem I suspect

I will leave the lounge walls to dry out (with a oil filled radiator next to them and also allowing the window open above to let the moisture out) then get a couple of coats of white emulsion down whilst I monitor for 12 months without any paper on them.

This was expected (as damp was highlighted on the structural survey) and my approach was always to blitz each room quickly with a fresh coat of paint, exposing the damp areas for a 12 month monitoring. The extra work prepping these walls put me behind for the day but I felt I had achieved a lot in the lounge so called it a day.

One of the reasons I proceeded with the purchase after reading the survey was the potential of hidden gems. Yesterday I lifted the lounge carpet and found a lovely set of floor boards and the next one was going to be the dining room. The sound and texture underneath the carpet indicates a solid floor and I had banked on maybe a concrete or compacted stone floor but lifting the carpet in two places unearthed I hope something potentially fantastic…

The picture to the right shows a layer of old patterned lino being used as underlay. Whilst decorative it was very brittle so in another section of the floor it came up with the carpet. The picture on the left appears to show original welsh slate flooring. We will see when we lift the whole carpet the extent of the coverage.

Hoping for a hidden gem

So I have managed to get settled in this week. The weekend was spend bringing the workshop over (but more on that later) and the last car loads of clothes and food have been bought across from the farm cottage I have been renting so it was time to start getting the trades out to evaluate my project request against the indicative budget.

With the house having a number of open fireplaces and decommissioned gas fires, I am currently relying on the combi boiler and radiators to heat the house. Apart from the big hallway which is a large space where the heat disappears up the staircase, most of the house heats well although the lounge could do with a bit of a boost. I did have a problem with the timer running at 1/3 speed so every hour only rotated the timer 20 mins (which explains why the heating was not coming on as per how I had set it) but a local company sorted this out for me straight away (many thanks to D.E.W Plumbing and Heating in Blaenau Ffestiniog for sorting this the same day).

So back to the main topic of this post. The fire places. As usual my plan is to get 2 or 3 quotations for all the work and where possible give local trades the opportunity so a quick search found one company locally who were able to come out and give me a view.

My plan was:

  • Lounge – Add a log burner either in the existing fireplace or remove the fire place and create a new hearth further up with an external flue
  • Dining Room – Recommission the existing chimney and fireplace to have an open fire
  • Back bedroom (linked to dinning room chimney stack) – has a lovely open grate that I would love to recommission as an open fire in my bedroom
  • Front bedroom (linked to the lounge chimney stack) – has a lovely open grate that I would like to know if I could recommission as an open fire in the guest room

The initial feedback was that people are now “discouraged” from recommissioning open fires due to fact that they only operate at between 10 and 20% heating efficiency and I was advised that for the two bedrooms probably the best solution for now was just to give them a good clean and make a feature of them. I could always put a small wood burner in the back bedroom as a heat generating feature if I really wanted to.

The lounge was straight forward, the current chimney stack was viable but needed a liner specific for a wood burner as the current one was for a gas installation and the indicative pricing put me just in budget for have the liner fitted, the fireplace and hearth removed and a new one constructed then a nice word burner selected.

So onto the thrust of this article which was the dining room. Initially I was disappointed as I really had my heart set on an occasional open fire but the good news was that the chimney stack once again was viable for a liner. But on inspection a ridge was noticed in the wall at a height of about 6 foot. This was about 9 inches deep and ran 2/3 of the width of the chimney breast. Also going into an adjacent cupboard was a set of water pipes.

You can see the ridge above the current fireplace

The suspicions now are that this fireplace has been significantly closed up and when we open it up we have the potential of finding an original welsh slate lintel and possible the original range (if it was not removed).

This is either going to be an exciting find or a huge disappointment but at the end of the day all I wanted was a small open fire and as I know the flue is viable I can replace that with a nice woodburner and if we find something even more original when we open it up then that really will be a lovely find.

Will keep you all updated as this progresses.