Making the utility room functional

I love my utility room, it has a real “old world” feel about it. You can imaging in times gone by this being the hub of the house. Where all of the old hotel bedding was being laundered or the plates from the restaurant being washed up (well that’s what I see in my mind). It also takes me back to a very vague childproof memory of my Nans house in Bristol, probably very inaccurate but it gives me a warm glow and whether its correct of not, that’s never a bad thing is it?

I had two uses in mind for the utility room. Firstly I wanted to keep the washing up out if the kitchen and secondly it was a good place to have the laundry facilities. Fortunately, the utility room already had a nice of Belfast style sink and also on the run by the window it had enough space for a washing machine, tumble dryer and a slimline dish washer.

It was short of key utilities, i.e. there was not enough plug points and the wet services (drainage and cold water feed) was not set up to feed both a washing machine and dishwasher, plus things like the basic pipework and taps could all do with a good refurbishment.

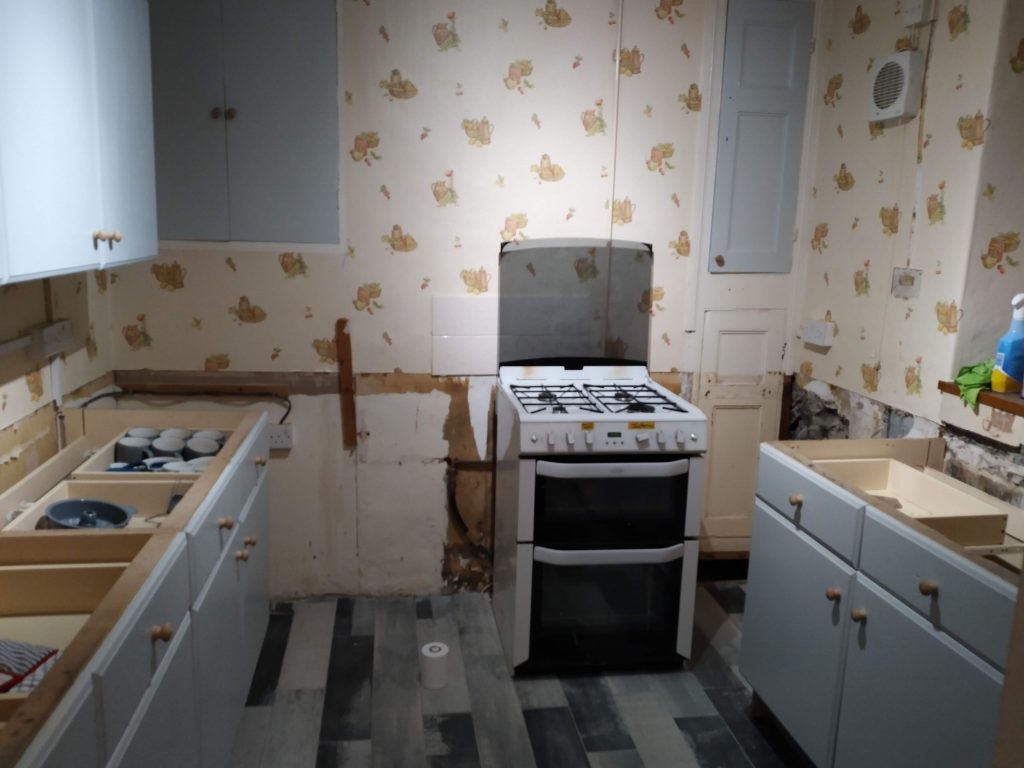
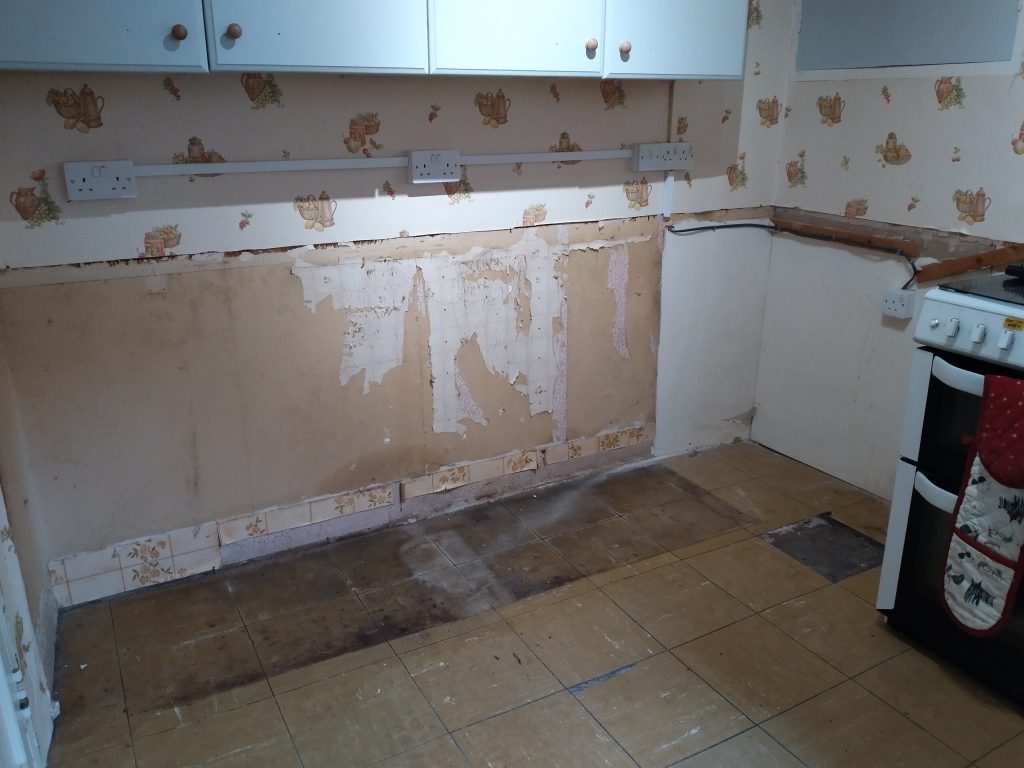
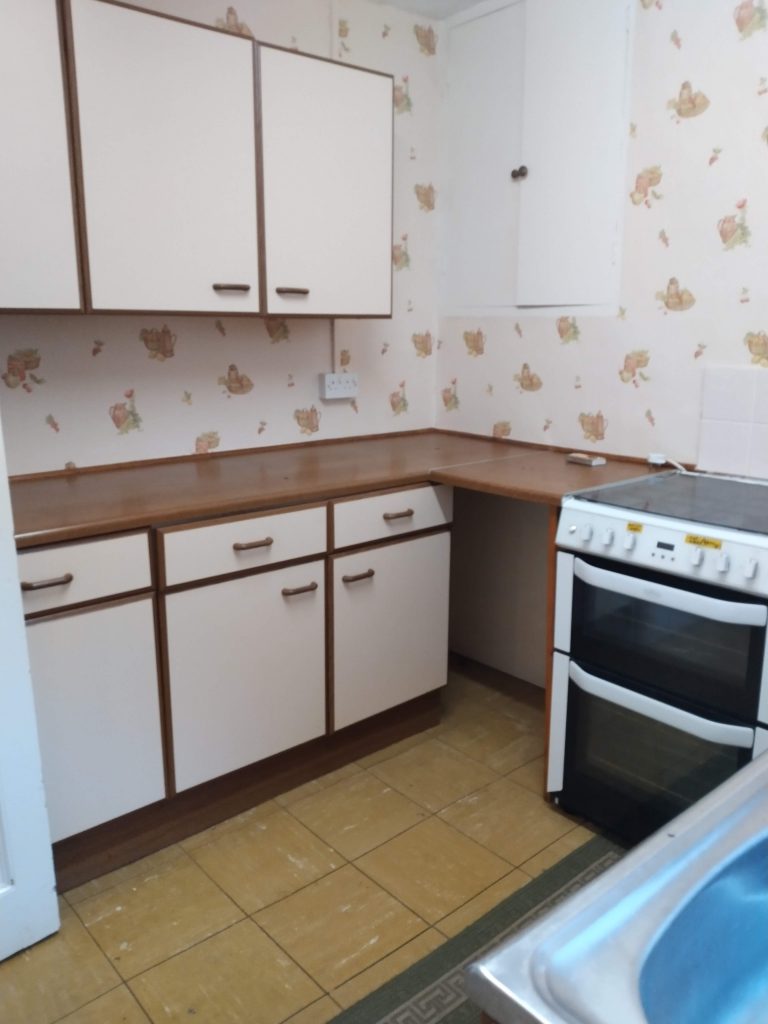
The flooring was an old lino and very stained and the room colour was not to my taste plus the door to the courtyard just outside of the utility room had loads of flaked paint indicating a damp problem. Basically it was like a dog with mange you find at the rescue centre. On the surface looks a sorry state of affairs but you can see the love and potential in it.

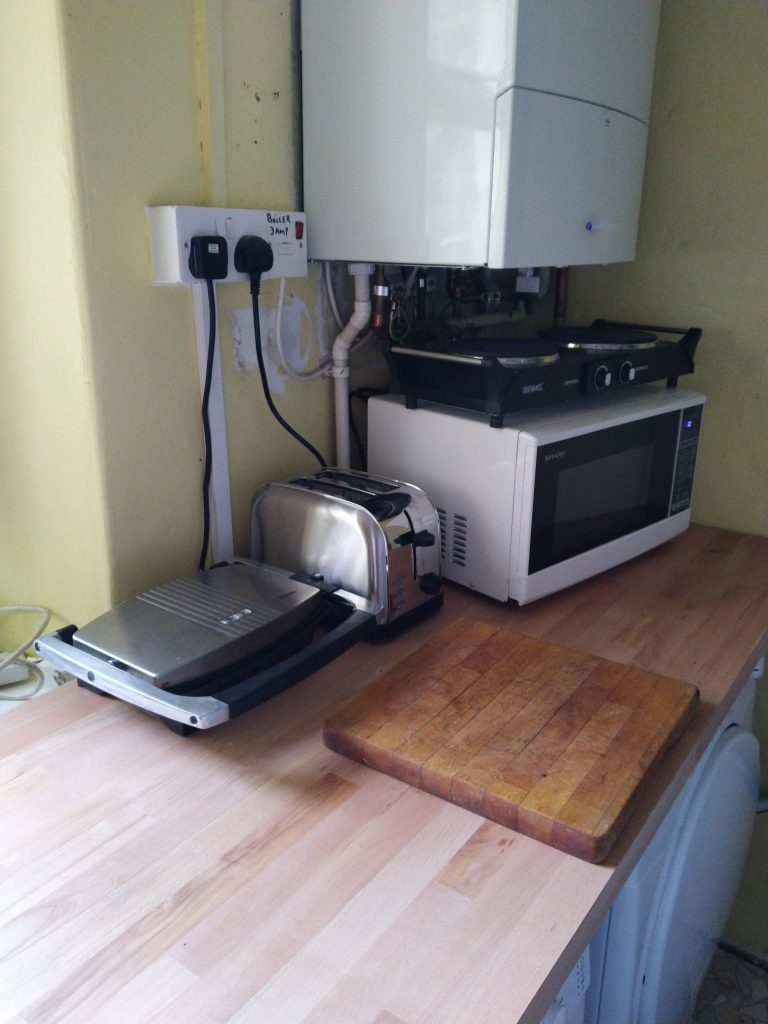
The first step was to get a basic set up working and with a washing machine and dishwasher both needing a water feed and waste plus a tumble dryer and microwave to go in a basic layout was created that allowed me to use the existing stand pipe for the washing machine and then loop the waste for the dishwasher over the sink. Whilst I had both a hot and cold feed for washing machine, I actually needed two cold feeds so I was able to find a Y adapter from Screwfix that allowed me to run two cold feeds off the existing outlet. This would be fine until I got the plumbing sorted.

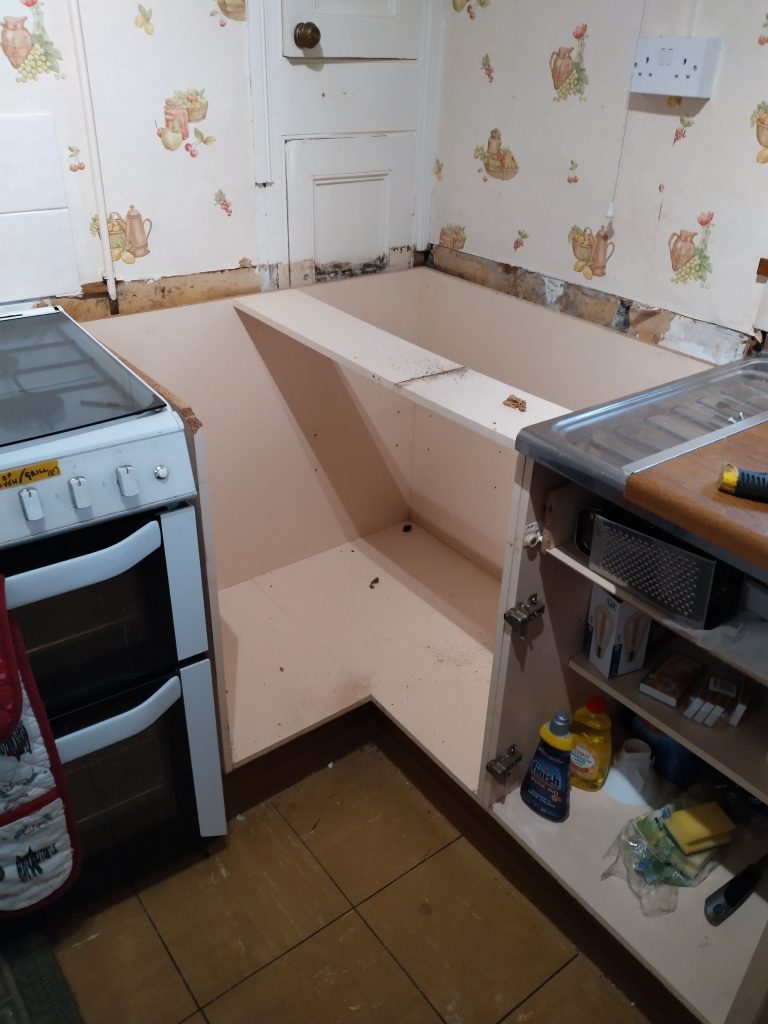
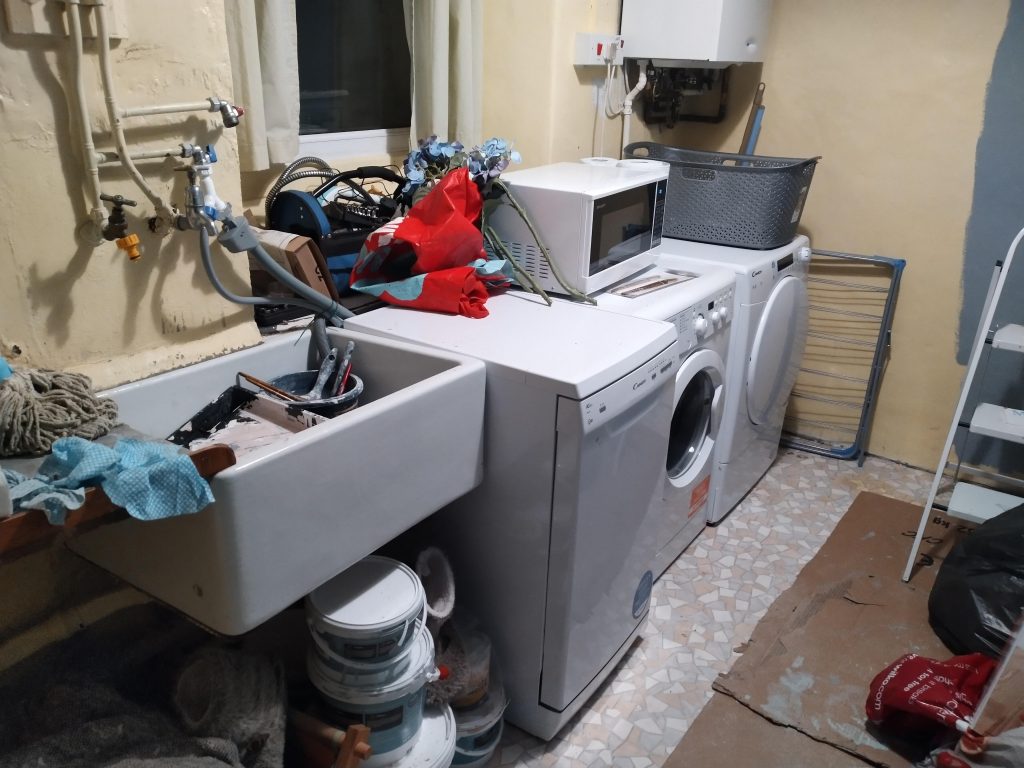
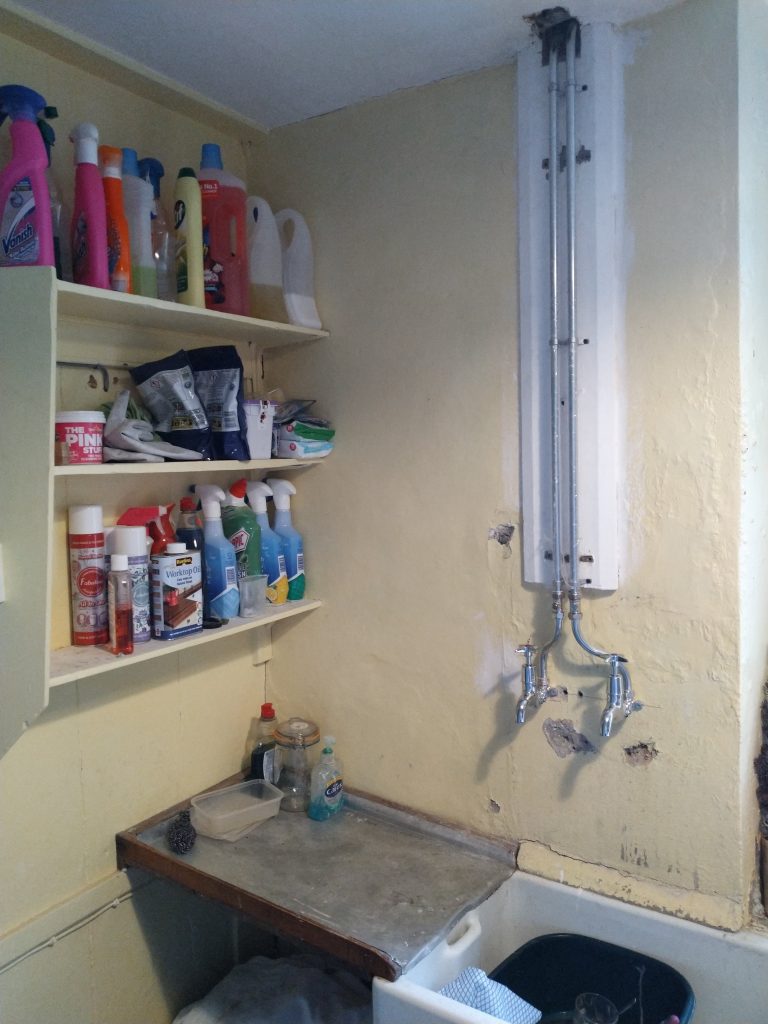
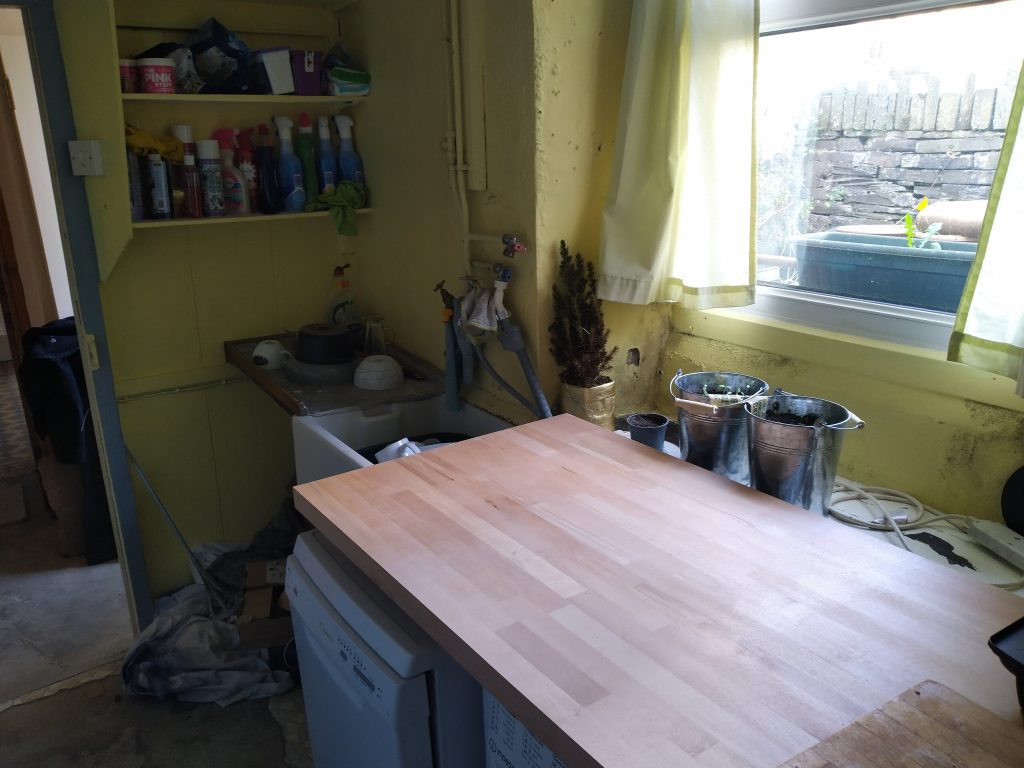
You can see from the picture below the complex plumbing over the sink that will need tidying up and the original yellow walls with the new grey going on in the background, oh and loads of open paint tubs under the sink! This was definitely being used as a dumping ground at this phase.

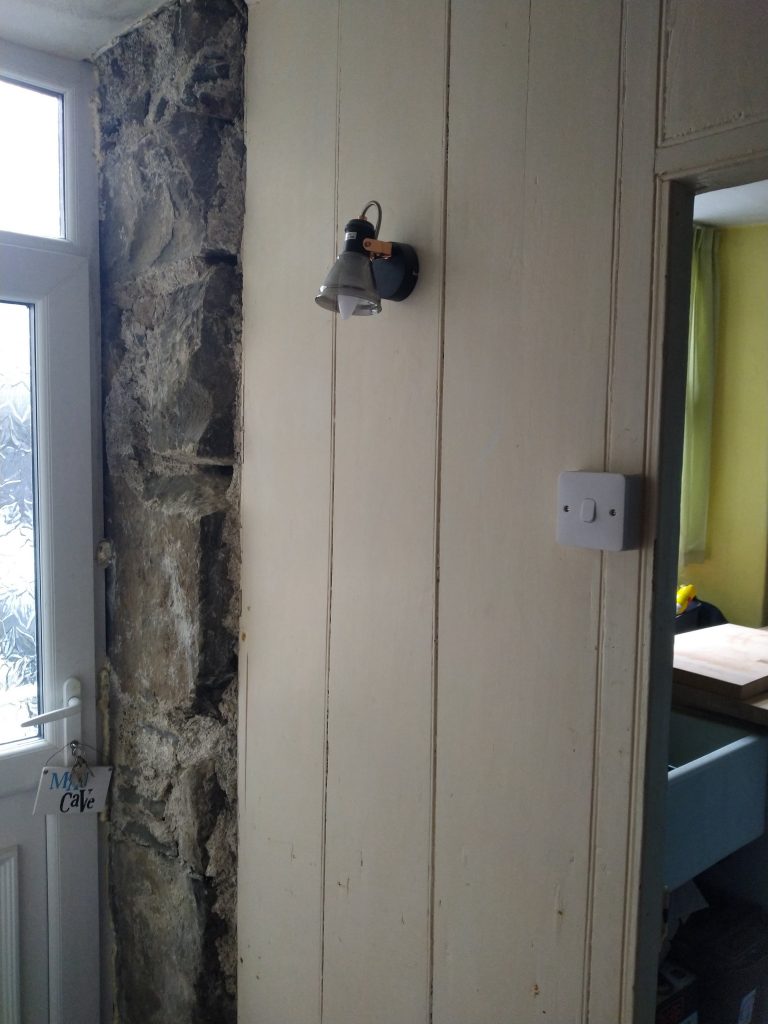
Once the basic layout was sorted, I could then turn my attention to getting all of the utilities as I required them. The first one to get sorted was the electrics as the sparks was the first one booked. Basically in this room it was just a case of adding a couple for additional double socket units to power the washing machines etc and also remove the existing fluorescent tube and change it for a ceiling rose so I could hang a bulb and light shade. Also just outside the utility room in the small hallway by the back door, I wanted an additional light and after finding a nice industrial style bulkhead light that fitted the character of the house, an additional switched feed was wired in to complete the lighting in this area.

A simple grey lampshade to compliment the walls – the uplighter was there purely to add some extra light when we were painting!
A little bit of light in rear hallway plus all of the stonework exposed now the plaster has been removed (following the roof leak!)

Once the electrics had been completed, the next job was to get the plumbing sorted and this has quite a list as follows:

  • Assess main route in and ensure that the main stop cocks turn freely. This ended up having a new main feed routed and a new stop cock
  • Decommission all of the pipework above the sink (taps and hot and cold feeds)
  • Create two new cold water feeds below work surface level for the washing machine and dishwasher
  • Add an additional stand pipe to the waste below work surface level for the dishwasher
  • Re run new hot and cold (stainless) water pipes to the sink and fit new BIP wall mounted taps
  • Put new waste trap onto Belfast Sink
  • Fit outdoor tap
New clean lines on the sink tap plumbing, just making good on the walls to sort out before they are painted

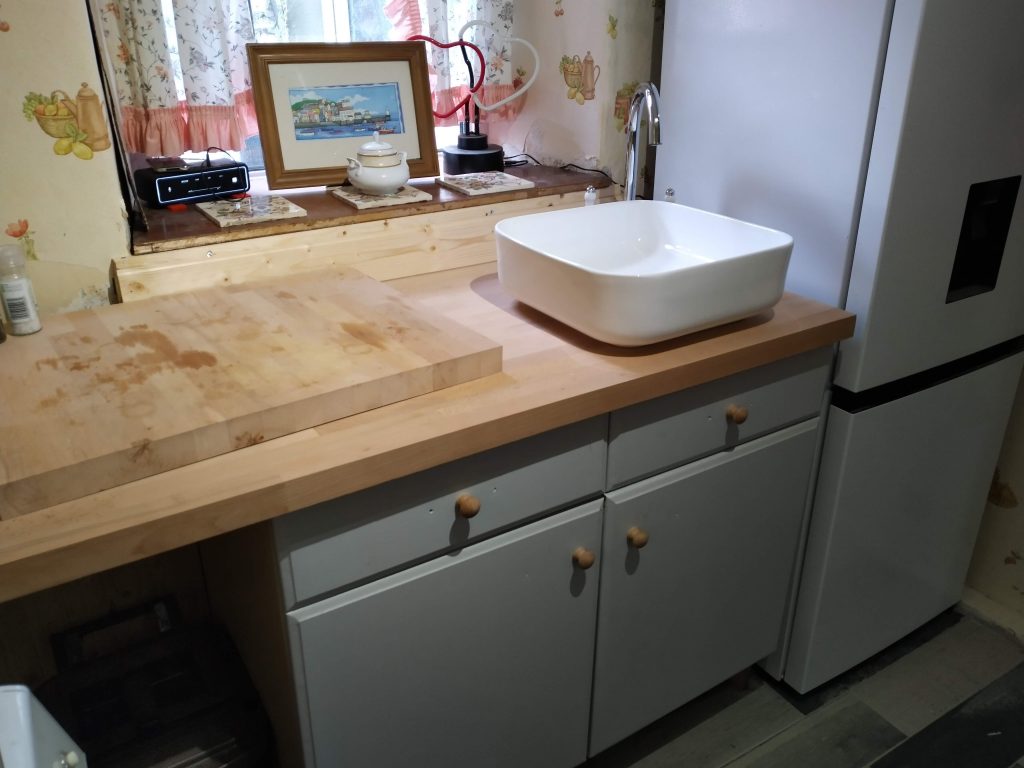
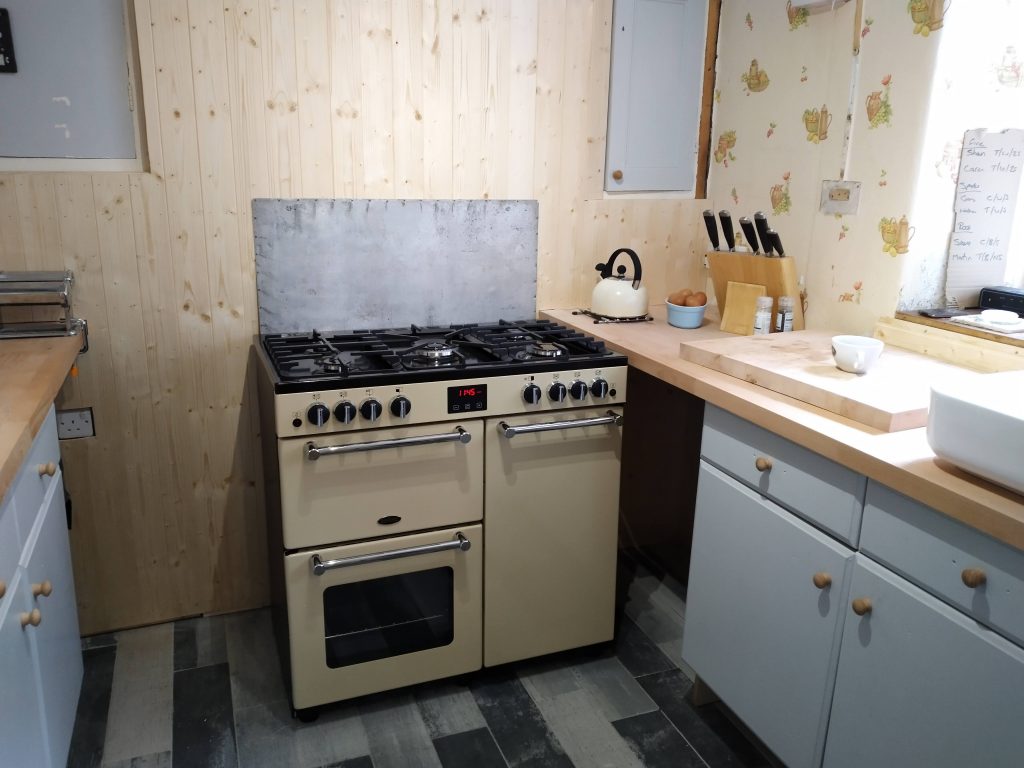
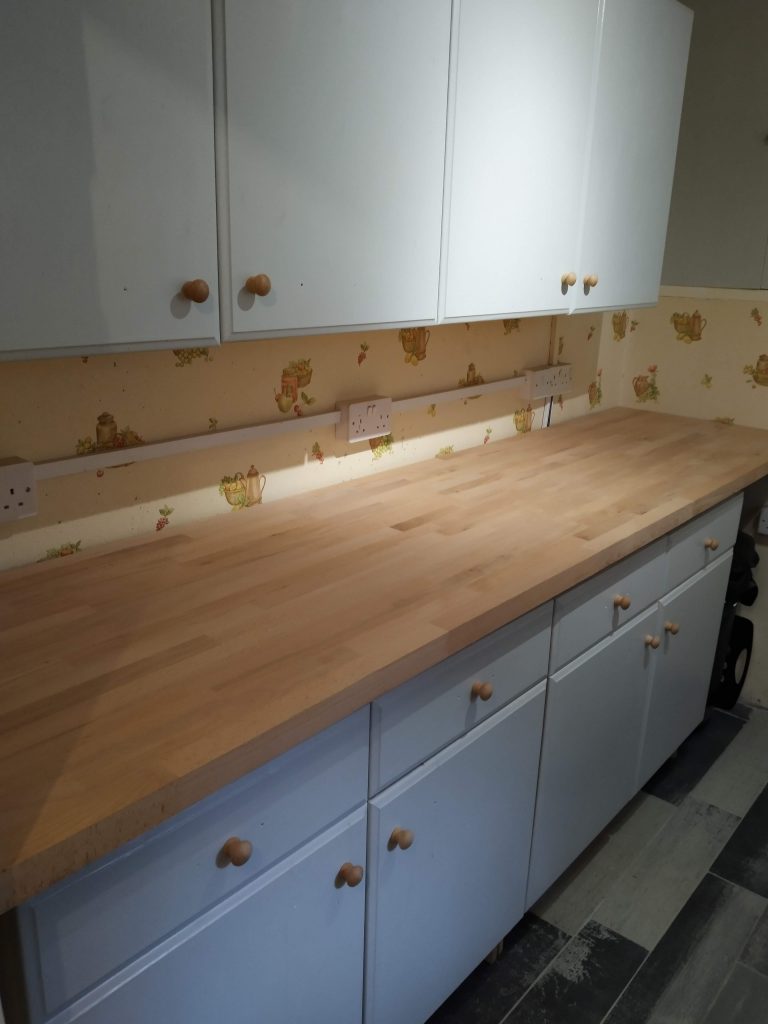
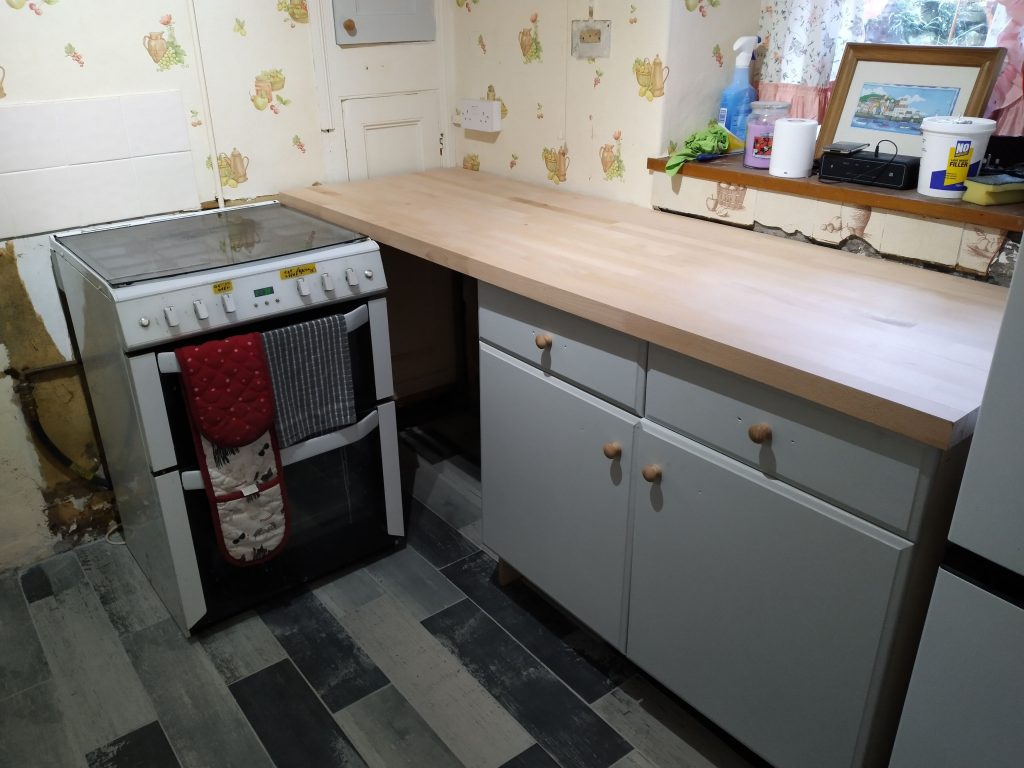
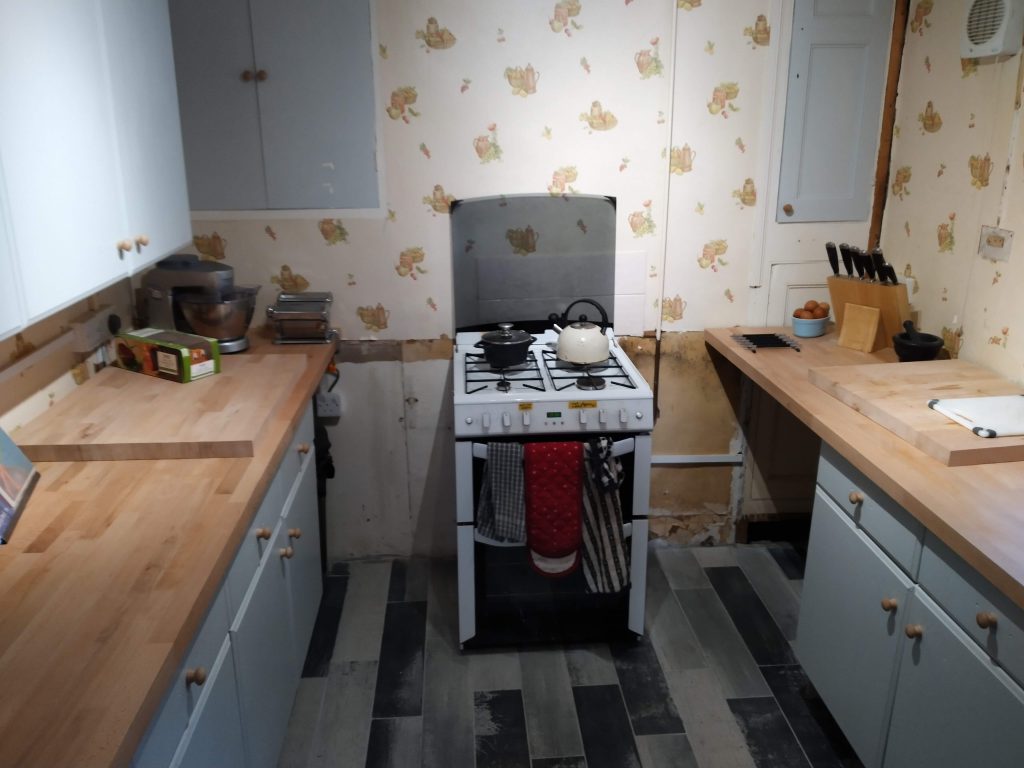
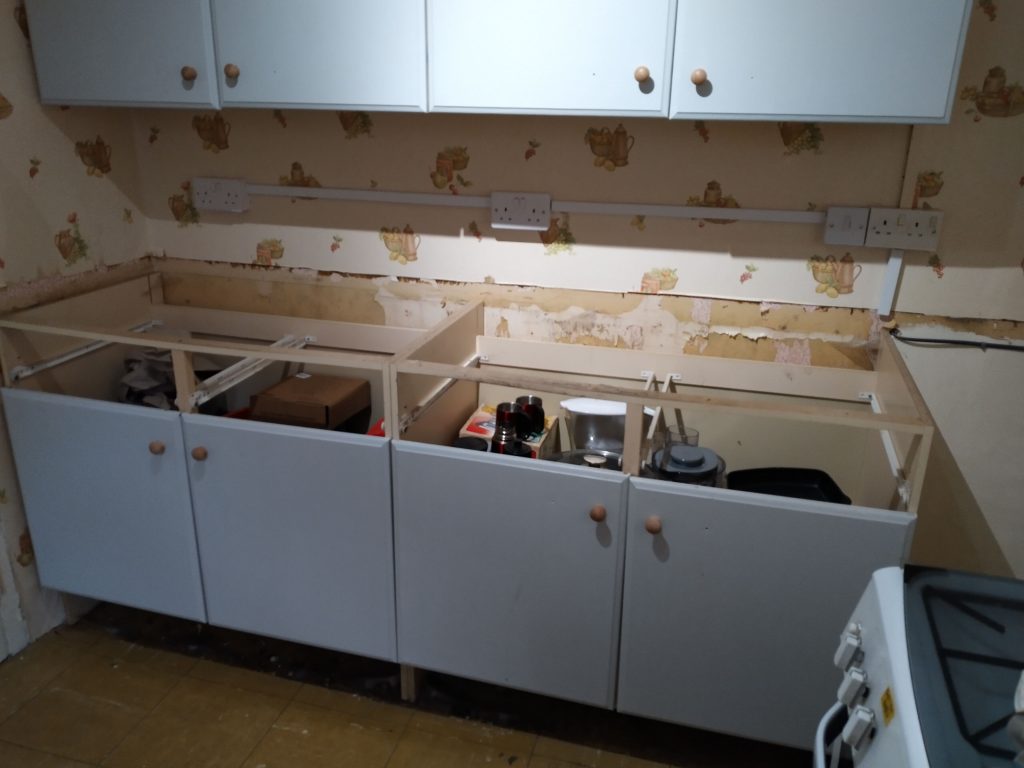
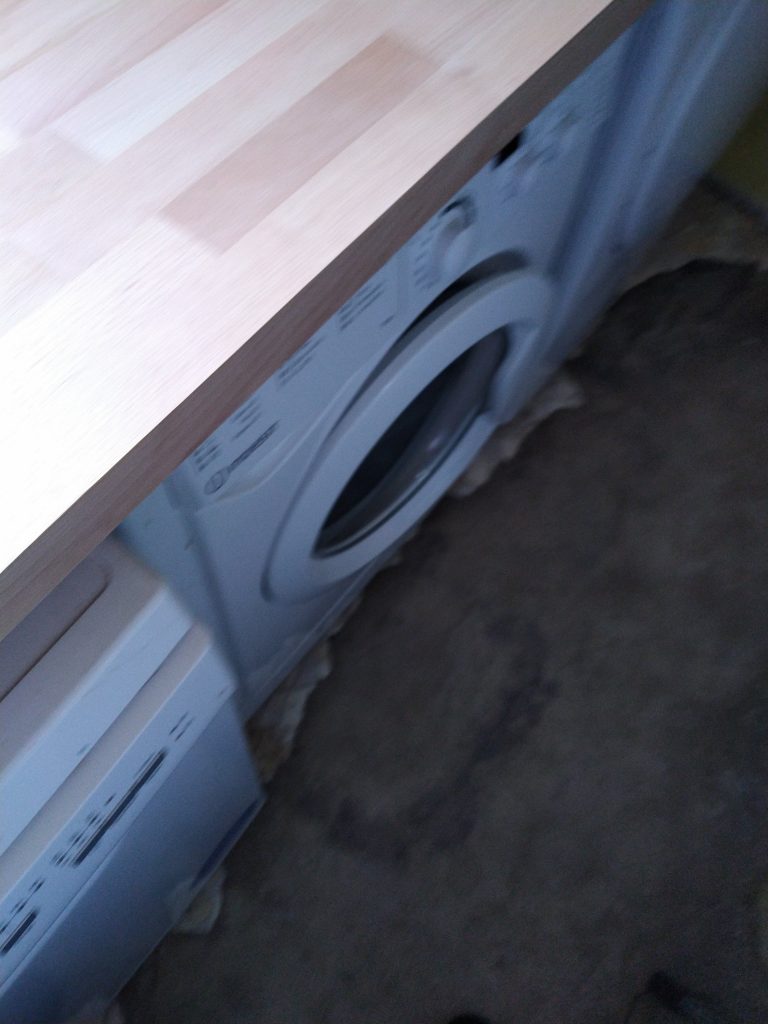
Obviously I was not going to leave the appliances freestanding and not make use of the space on top but I was unsure whether to go with solid wood worktops or patterned laminate. The actual lenght was 210 cm so off the shelf 2m was just so short. Luckily the kitchen needed a 180cm run so I was able to get a 4m solid Birch work top and cut that to size for both rooms. Due to the height of the appliances and the low window sill my method of supporting the worktop was limited so I have actually settled on a simple solution. Using offcuts from the 40mm battens used in the kitchen I have been able to cut “lifters” which basically sit on the top of the dishwasher and tumble dryer and then the worktop just sits on top of this. This allows the washing machine which is the middle appliance to have enough space to vibrate its heart away without affecting the worktop and also creates really good air flow for the tumble dryer.

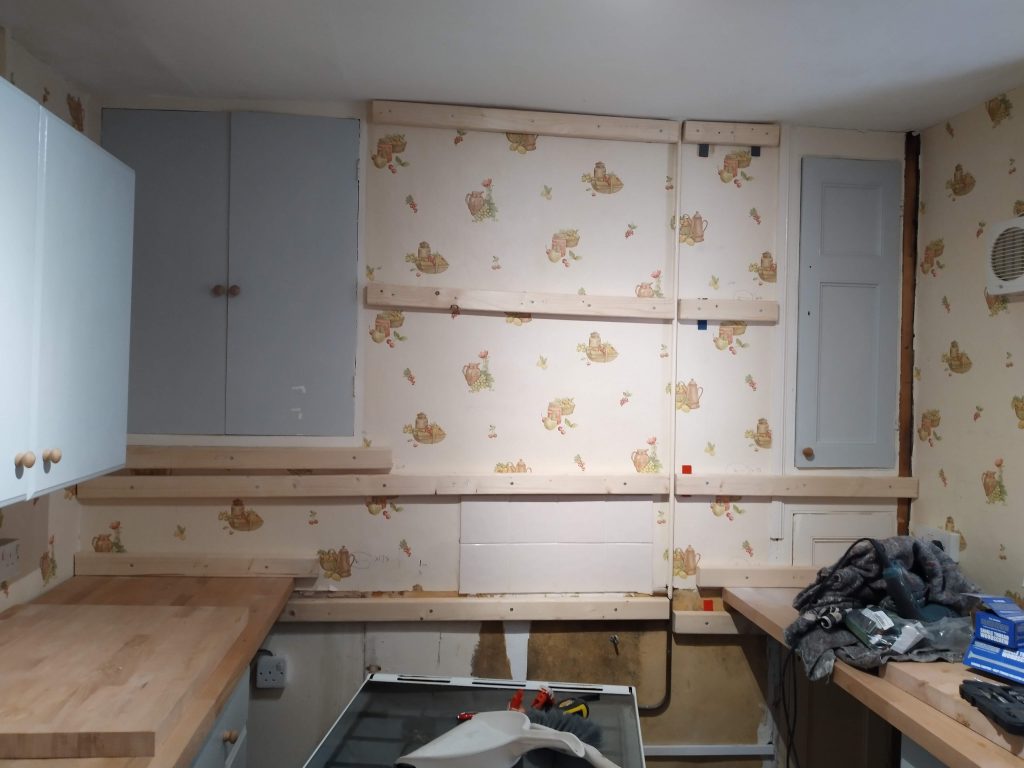
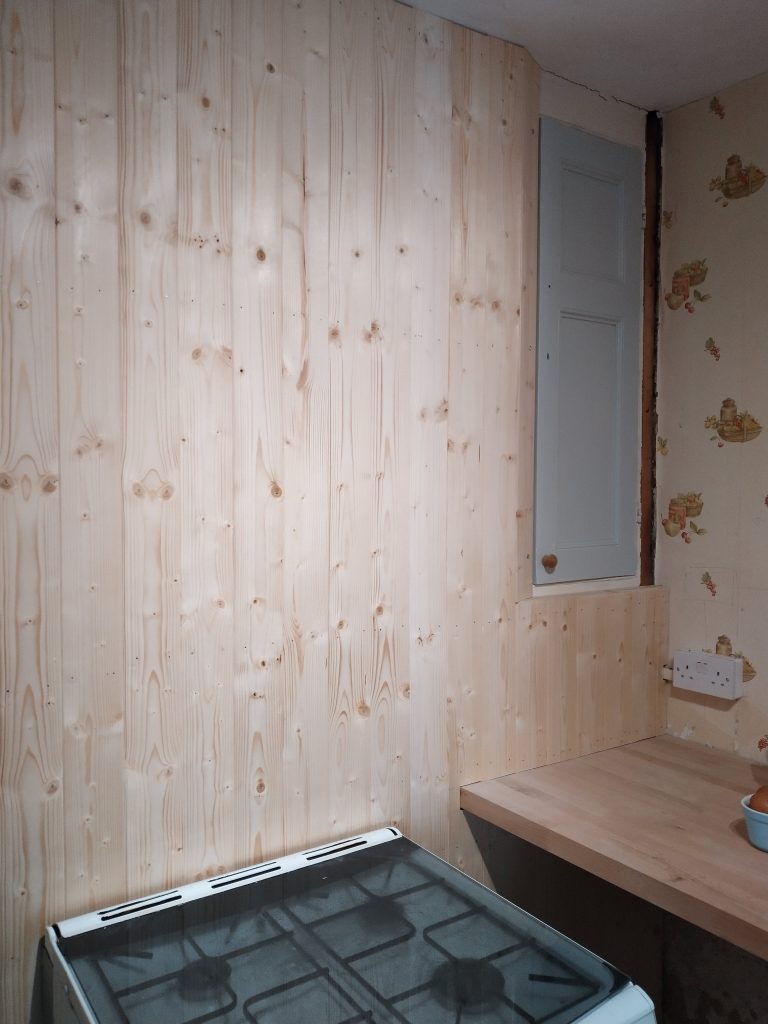
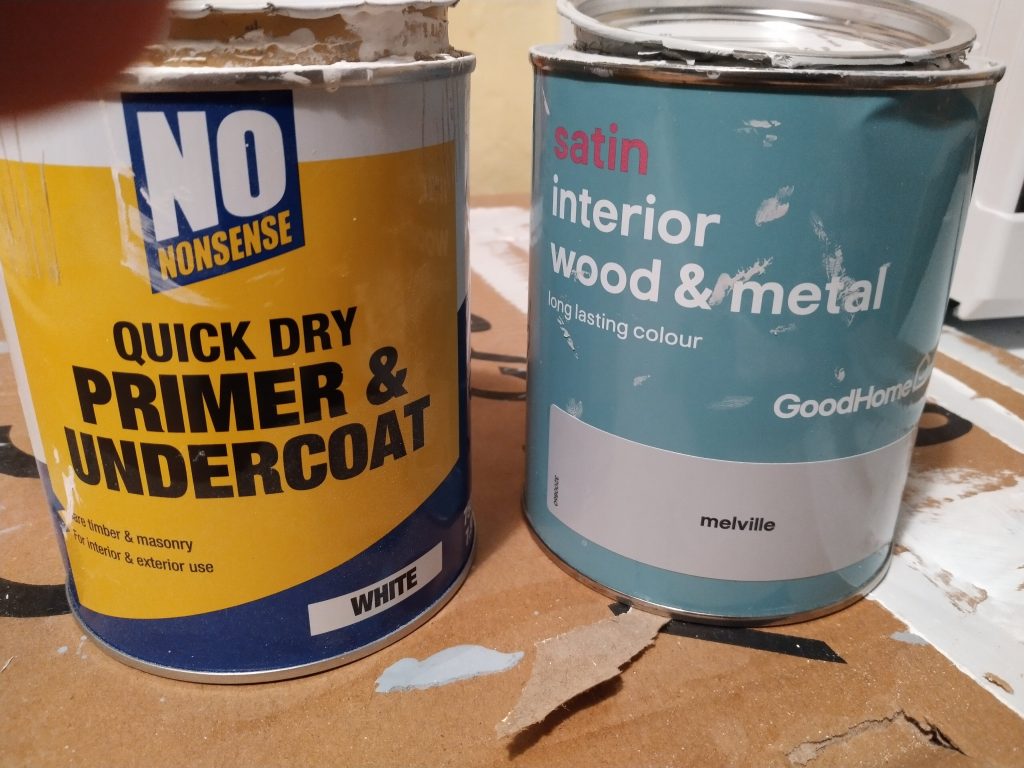
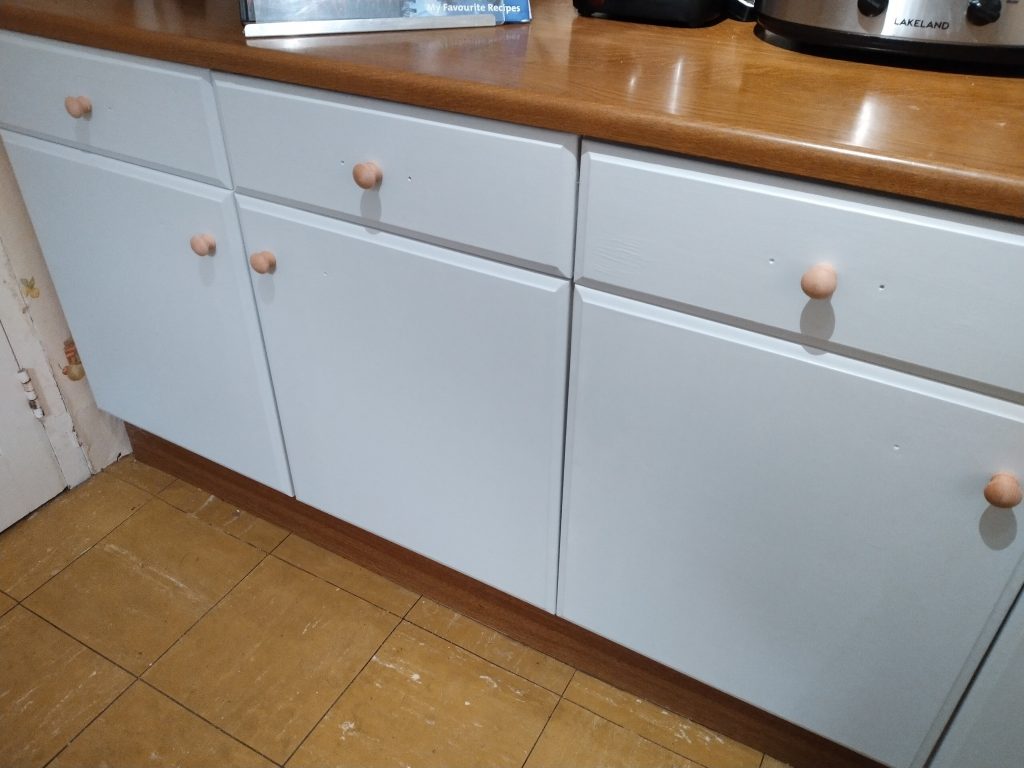
So the next step was to turn my attention to the paintwork and this is where my daughter had her eye in. As she is a mad fan of Mrs Hinch (who I believe is some sort of cleaning guru?), she wanted to theme the utility room and turning it into a domestic bliss palace with a colour palate in keeping with the period restoration we are trying to achieve throughout the house. She ended up going with a mid grey on the walls and then picked up the wooden panelling with a sort of duck egg blue

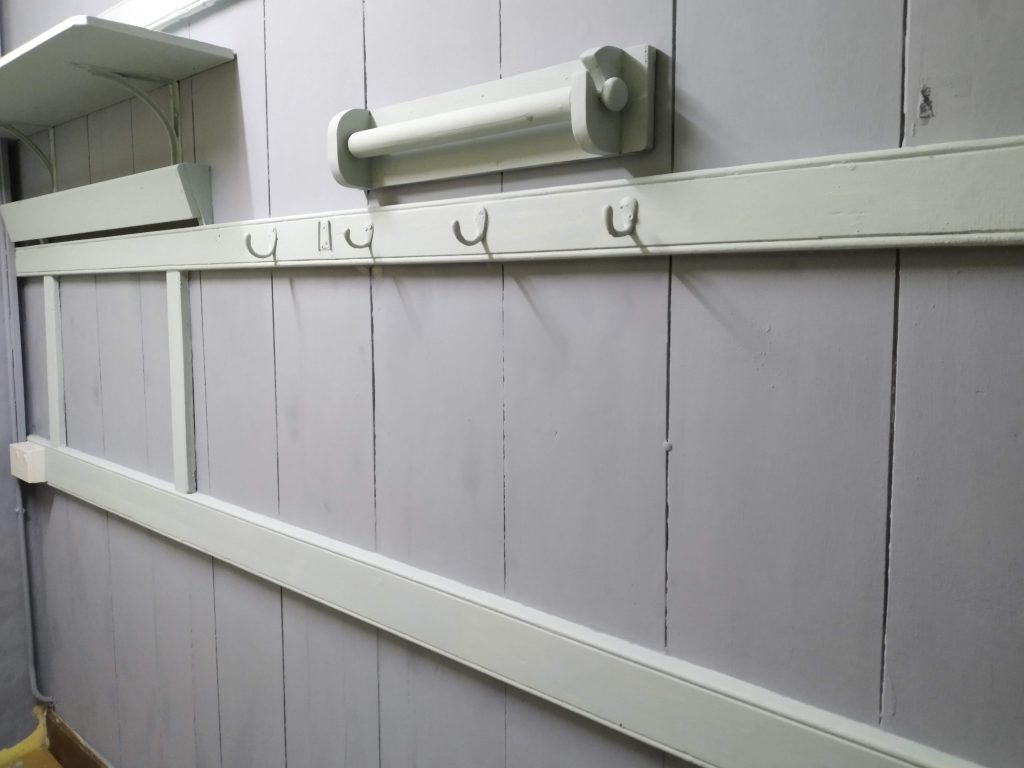
There is still quite a lot of work to do around the window and sink side, and the area where all of the cleaning materials are kept but with two of the walls done now it is really starting to take shape.

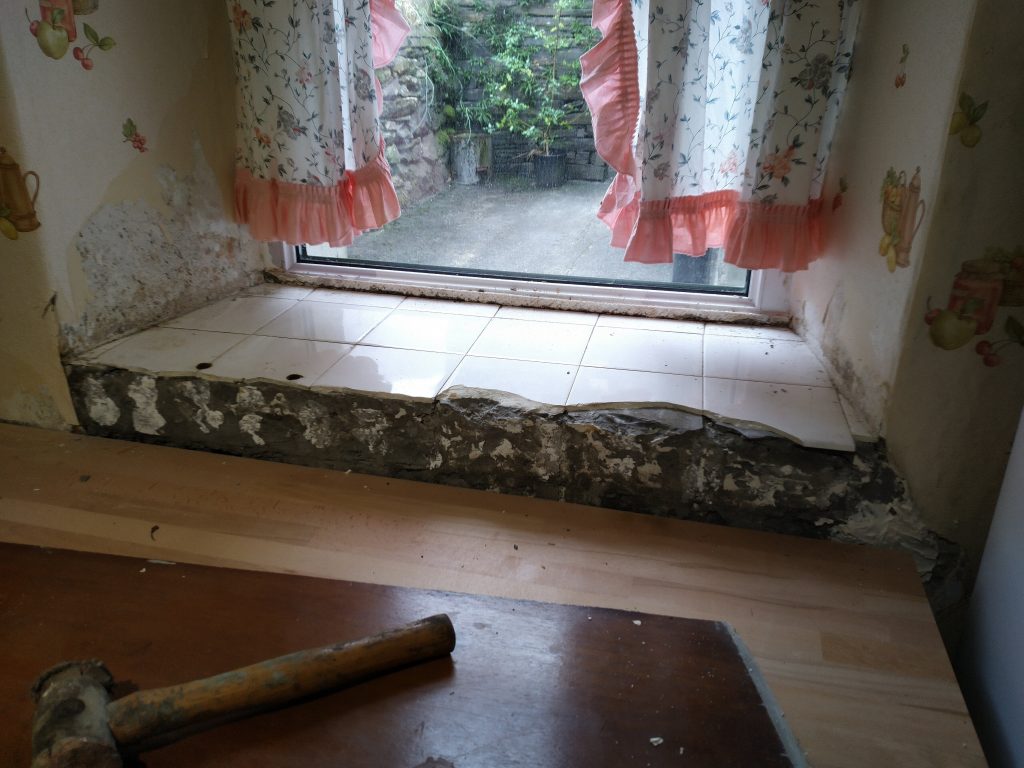
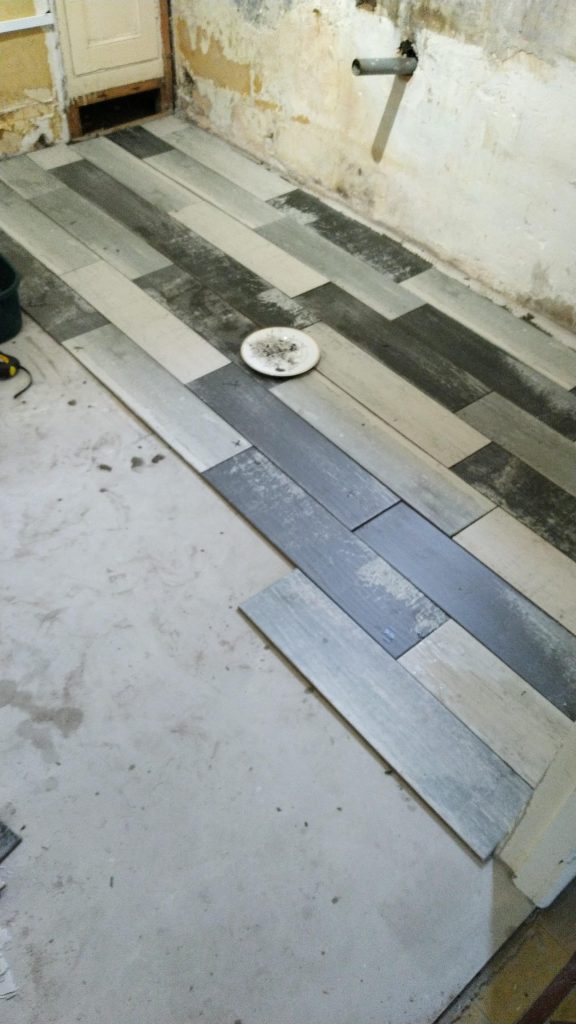
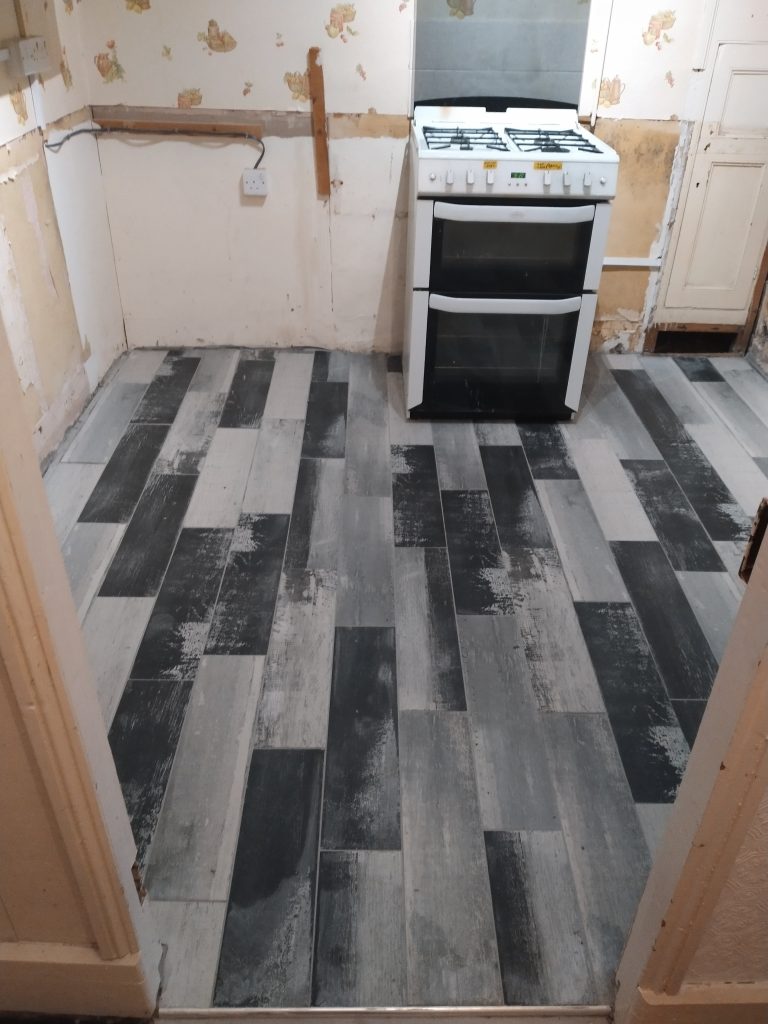
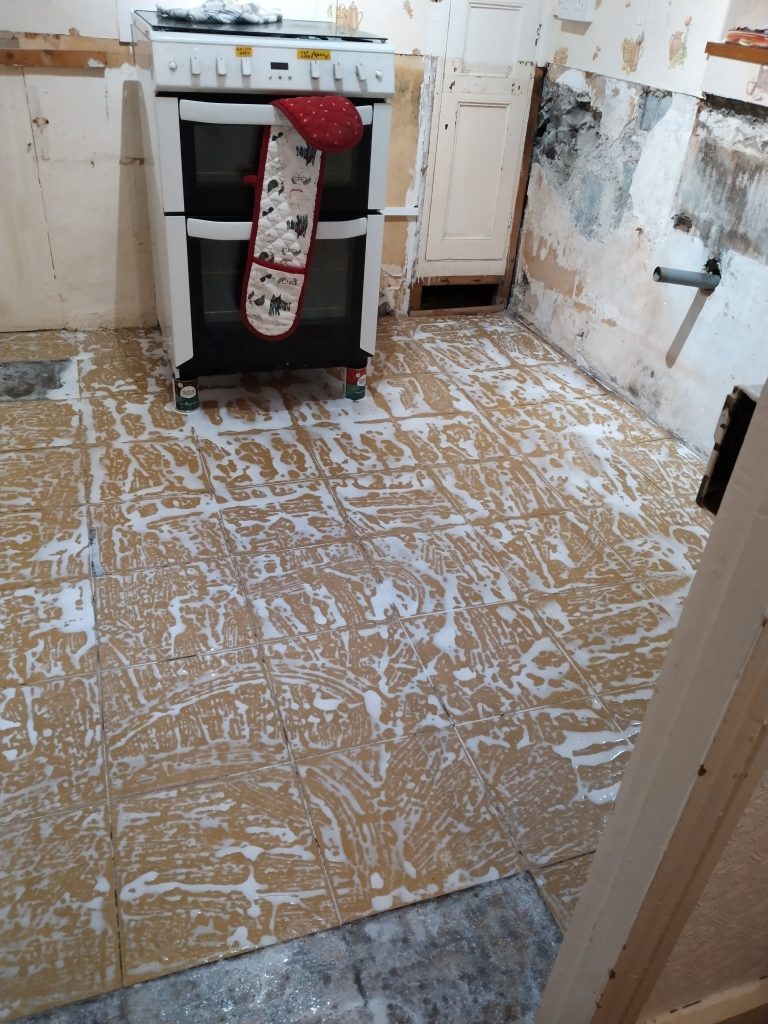
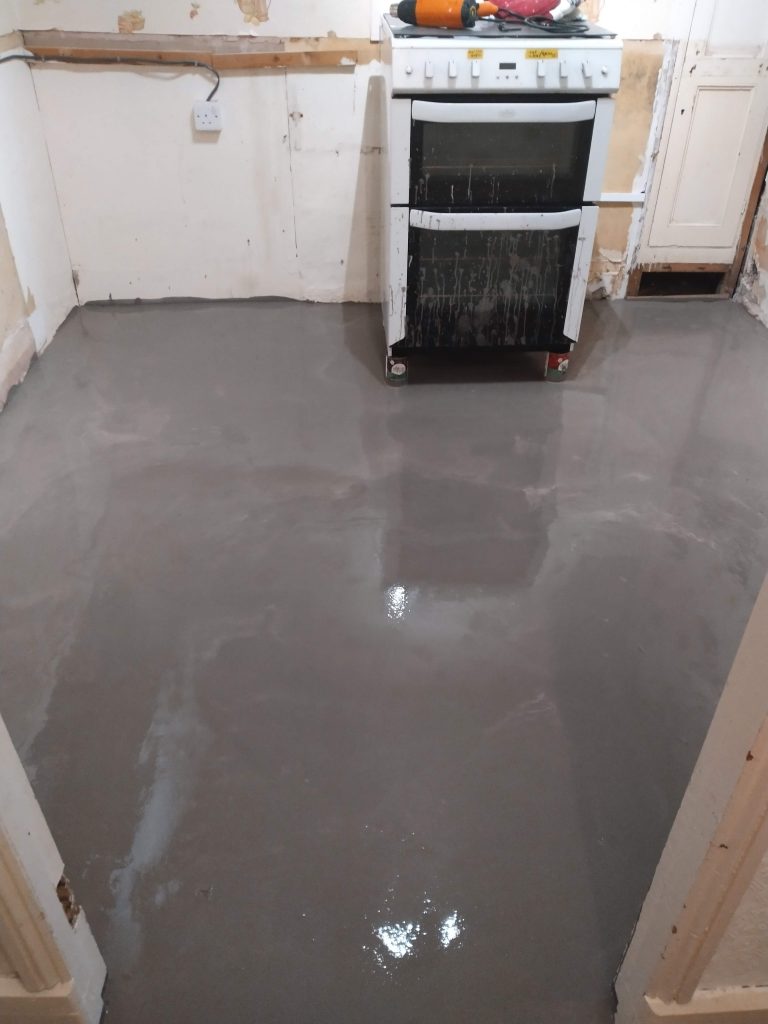
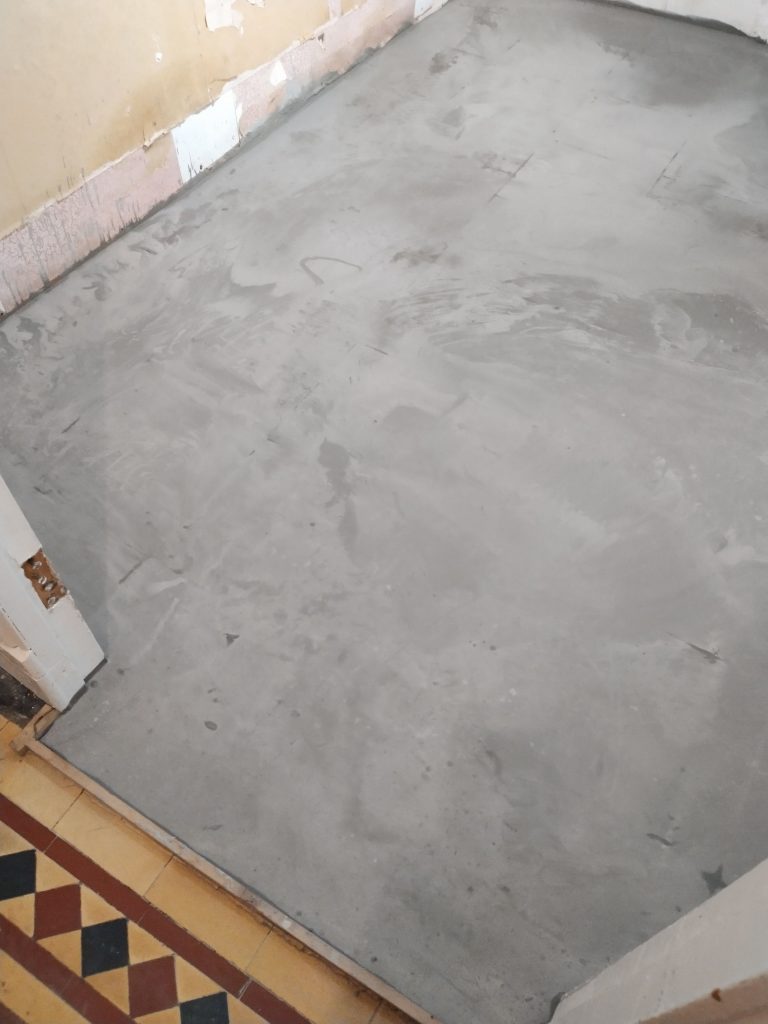
The final thing to sort out will be the flooring as originally this was covered with very old lino. When this was lifted the floor underneath was very wet as it has no chance to breath.

Quite a shock when the flooring was lifted but it dried out very quickly

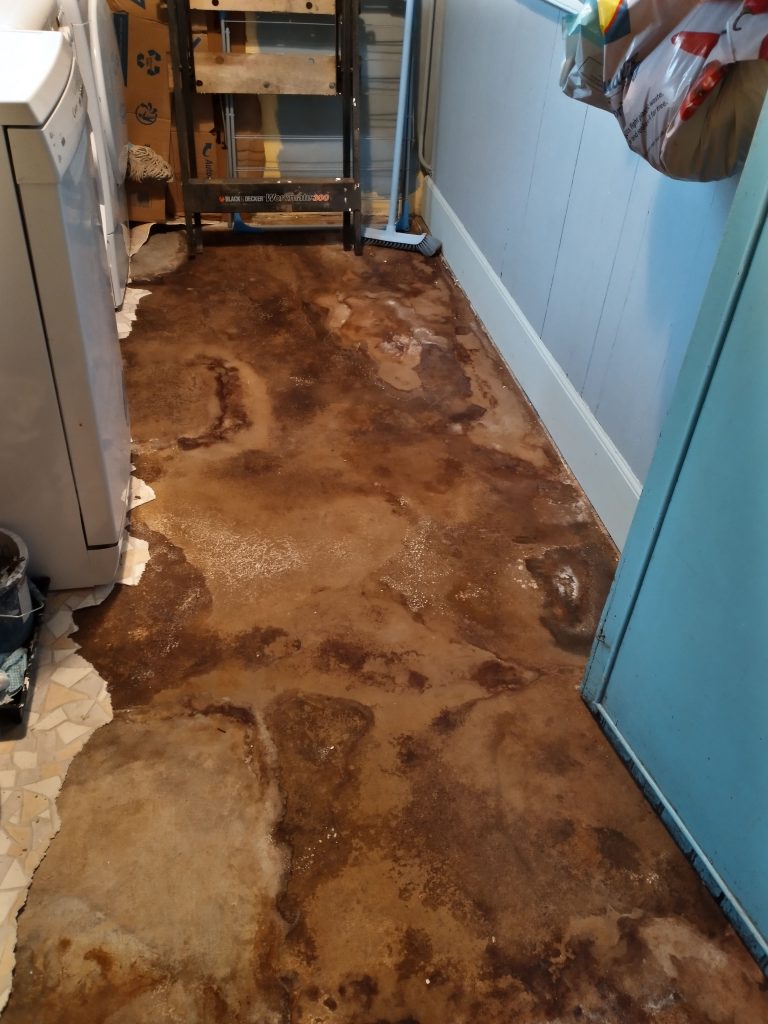
I suspect the floor is the same construction as the dining room which is slate slabs l laid straight onto soil (the utility room is actually created from a simple stud wall separating off part of the old dinning room) so it is logical to assume that the flooring is an extension of that. The problem is, a concrete screed has been laid over the top of it but in some places this is quite thin and you can see some slate tile profiles breaking through. I had left the floor to breath and within a few weeks it had dried out and has stayed dry even with very cold and wet conditions outside so the next decision is how to dress it. I am tempted to get some good quality floor paint just to make it presentable and then next year attempt to take the screed back to uncover the original slate tiles. If I find that there is not full coverage of the original slate tiles or I am mistaken I can then relevel it and maybe lay new tiles down.

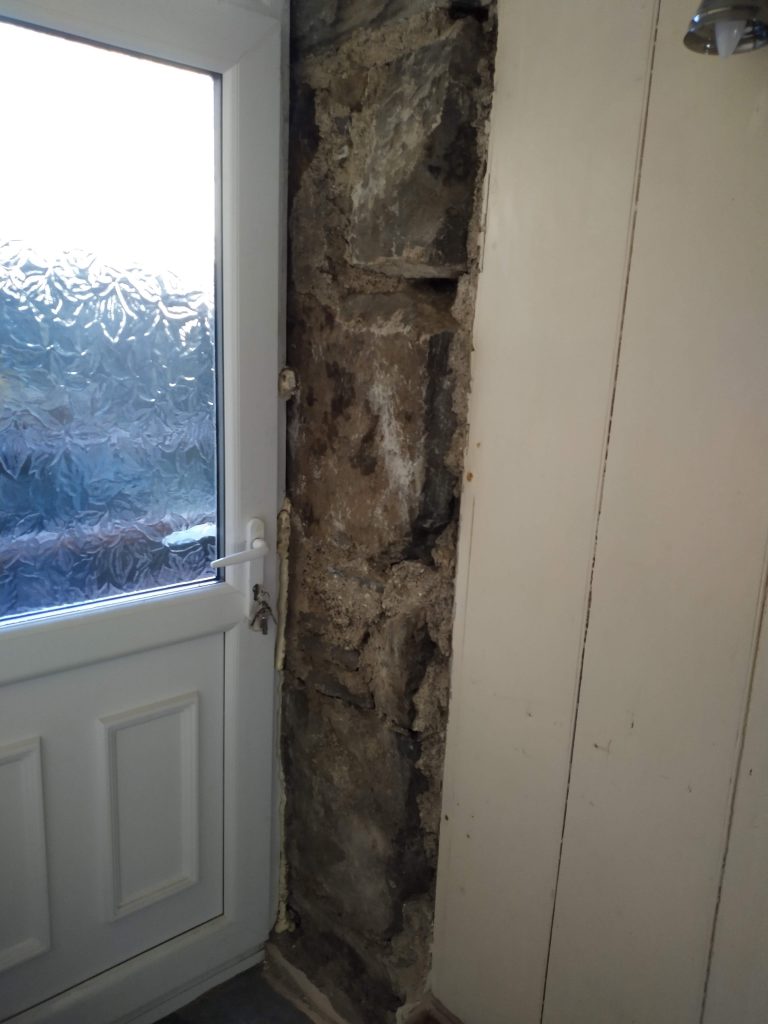
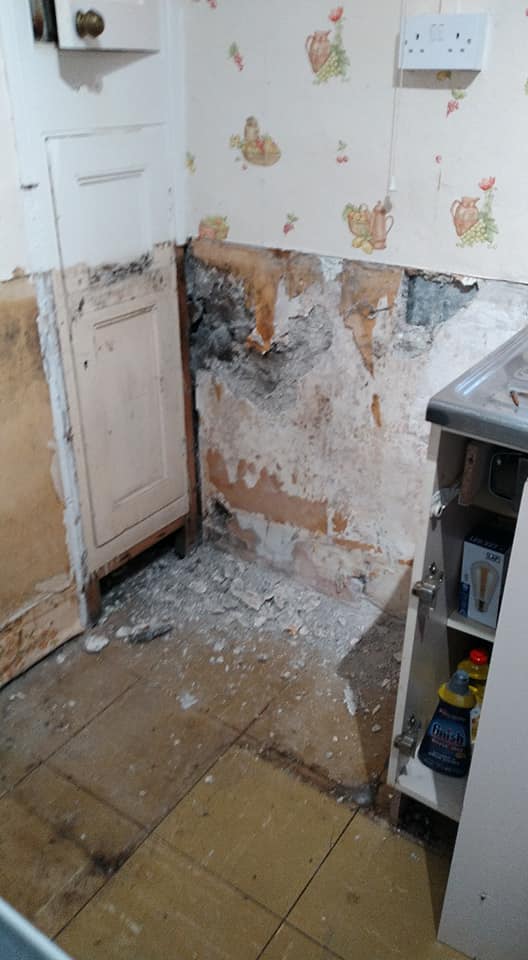
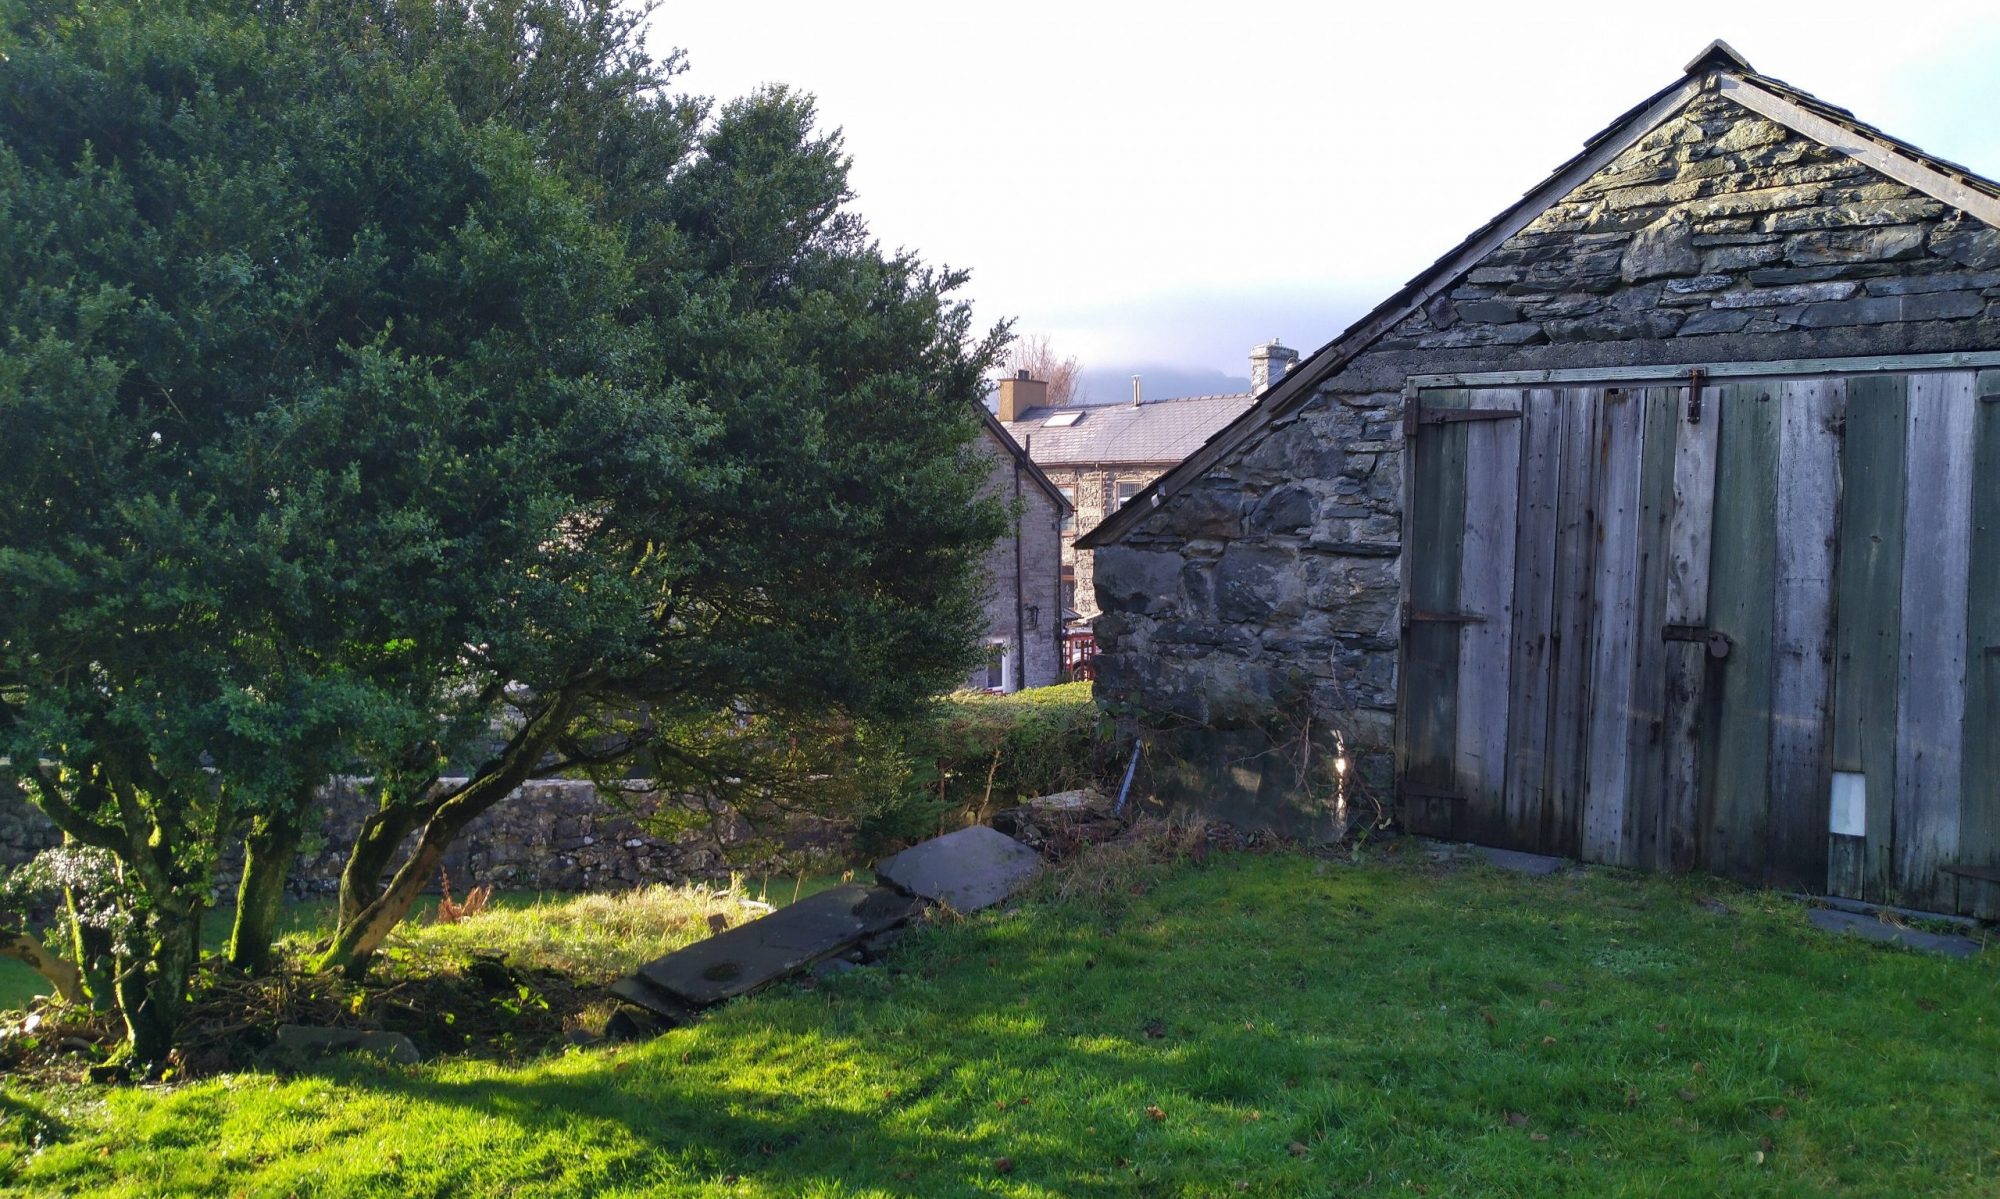
Whilst we are in the Utility Room area, it is worth mentioning the wall by the back door. This was another area that had been highlighted with damp on the structural survey and was indirectly in the vicinity of the valley which we knew was leaking. Bearing in mind once I had exposed the wall upstairs, I knew that on an average rainfall over night I was getting about 2 litres of water in, this would have been following a number of fall lines to dissipate and I suspect that some was tracking the floor structure above and finding its way behind the plaster by the back door. Once again, removing the blown plaster showed a lot of wet stone but some fantastic size pieces which once cleaned up will make a nice feature I think.

Some of these stones are huge!

Finishing the kitchen off

Once the flooring was down, the units in and the worktops fitted, it was time to move my attention onto the wall covering. The current wallpaper whilst “quirky” was not to my long term taste and therefore an alternative was needed. My vision was to go back to a more traditional country kitchen type style so I chose softwood cladding. The benefit of this was also going to be that all of the exposed cables which currently run in plastic conduit, the water pipes which come down from the ceiling and the gas pipe which was exposed on the wall could be hidden behind the panelling and give a much more cleaner look.

I had never attempted panelling before so this was going to be a huge learning journey, but I understood the basics, which was to lay down horizontal battens at the top and bottom, then at approx 500mm gaps, plus where there were plug sockets etc, add additional battens around these to support the cuts. I decided that the battens would be screwed into the wall as opposed to “grap adhesive”, mainly because all of the cables etc were exposed so there was no risk of drilling into anything plus long term I knew that they would not be coming away from the wall!

Laying down the battens on the back wall

Laying down the battens was actually quite time consuming and as a ratio of battens vs panelling per wall I would say 2/3 of the time was on the battening. This was quite a surprise as I envisaged the battens being the quicker part?

Once the battens were up, it was then just a case of cutting the panels to length and then using hidden head pins, with two per batten to secure it into place. Whilst I tried to be diligent with the lengths, I knew that at the ceiling point and where it joined the worktops I was going to use finishing strips so in some cases and where the ceiling was uneven etc small gaps were present. Cutting around the power boxes, fused spurs and powered vent was a bit fussy at times but this does mean that a lot of these now look flush fitting. I suspect when I get to painting the panels, a small amount of decorators caulk will come into play but I did try to get these cut outs as accurate as possible to limit the amount of caulking that would be needed.

The creative part of this phase of the kitchen was trying to work out how to deal with the joins at the walls but also around the two fitted cupboards and around the window. To be honest, I had no plan and it was really a case of as I got to each challenge, evaluating the options and then adjusting the framework or width of the panel to create both a clean join but also minimise the need for additional finishing strips which could deviate away from the final look.

The window was going to be a challenge in its own right as it was an irregular shape with uneven walls and with it having a large cavity due to the thick walls, also had a very deep sill.

The starting point was to take the sill off (which was basically a large piece of cut and stained wood with a finishing strip at the front) and in doing this I was surprised to discover white tiles underneath. Unfortunately these were cracked and secured with very heady duty cement and even after an hour of trying to remove them very little progress was made.

One hour with a range of hammers and chisels!

With this knowledge I stood back and looked at the window as a whole to create my plan! Whilst the cladding is fixed, I wanted aspects of the kitchen to be able to change with the seasons or as my tastes changed so for the window cavity and sill I have the idea of tiled panels, By this I mean fixing battens to the sides and top of the window cavity then creating panels of tiles on thin ply which can then be screwed to the battens using some nice small head screws. In a similar way I am planning to cover the cracked tiles on the sill with a new piece of wood which will either be painted, stained or tiled but once again can be changed. I quite like the idea of having some Christmas panels that can go up and seasonal things like that. I suspect this area is going to be an ongoing experiment as it is new skills I will be developing but at least the bulk of the kitchen is done by this stage and useable and its not like I am short of time!

With the cladding up and a plan for the window area, I could now get the sink and taps fitted. This was the only part of the kitchen where I was using external trades as plumbing is something I have never tackled. I have a basic set of rules in life when it comes to DIY (whether that’s the house or car maintenance) and that is stay clear of anything that could kill me or cause a lot of damage which for me is electrics, plumbing and car brakes!

Originally I was going to go for a half bowl sink as the plan is for all of the washing up etc to be done in the utility room but I wanted running water and a sink in the kitchen for the odd occasion when water and waste would be needed. The problem was, I am not a huge fan of stainless steel sinks and there were very few other sinks (whether recess or flush fit) that I liked. Then I stumbled across a sink for a bathroom that sat on top of the worktop and explored some of the options available, This gave me a lot more options and whilst slightly larger footprint of a half bowl, fitted in with the style I was trying to create. It also gave me good flexibility with the choice of taps to go to a more traditional look. There was one downside, they commonly were porcelain type sinks for bathrooms and therefore whilst being suitable for the majority of tasks I wanted in the kitchen (small amounts of washing up, water for the coffee machine, washing salad and veg, water at hand for cooking, filling saucepans and for recipes), I suspect that if I was draining boiling water from veggies straight off the range there would be a small risk that it could crack the sink. The utility room with a large Belfast sink is next door to the kitchen so I was happy to accept that trade off.

{update} the sink has now been in for about 2 months and it defiantly was the right move. It suits the kitchen perfectly and the trade off of draining veggies in the utility room has not been a problem at all.

Once all of that was done I could (at last) order the cooker. Now whilst I would have loved to have put a proper Rayburn or Aga in, I did not want the fuss of venting but also with servicing companies being short on the ground I wanted something reliable and easy to maintain if it went wrong. With the house being on gas mains and having both a gas and electric oven in my last house I liked the flexibility of cooking on both heat sources so I wanted to source a multifuel range with a gas and electric oven. I had the option of 90, 100 and 110 cm ranges but as I wanted to use the worktop on the left hand side and have access to the cupboard on the back wall, I wanted to maintain the space and the gain between the 90 cm and the 110 cm was basically an extra 2 rings and a slightly larger oven. In the end I went for a 90 cm multifuel gas range which had 5 rings, a gas oven, separate gas grill and a tall vertical fan oven I had a couple of brands to choose from and ended up going for a Belling Kensington in cream. Now what I did not think through was the cladding! I had cut out holes to allow access to the gas pipes and their was a 13 amp socket for the ignition etc but my old gas cooker had a flip up glass lid that basically created the “splash back” and what I was not aware of was the regulations for open gas flames and the minimal distance from combustible materials so I was surprised when the delivery drivers (who also do the gas safe install) said they could not install it as the range was going straight against wood!

Panic!!!!!!!!!!!!

I basically had about 20 minutes whist they disconnected the old one and unpacked the new one so I was left with a decision of find something in the garage suitable to make a splashback in 20 minutes or get them to take it away and rebook (which would cost me) or get them to take my old one away, put the new on in place but not connect then rebook (which would cost me).

Now at this stage I was pretty sure there was nothing in the garage but as the previous owners had left a lot of materials in there I might get lucky. And I did!!!! There was a panel of 2-3 mm metal large enough to meet the regs as a splashback so 10 minutes with an cutting disc on the angle grinder and smoothing off the edges with a file resulted in a makeshift rustic splashback that allowed the Gas Safe fitter to install and sign off the paperwork. The question now is do I keep the aged metal splash back for character, paint if or create a tiled splash back later on?

Not bad for a quick improvised splashback!

Well that’s the bulk of the fit out covered. Hopefully by the time I do the next chapter of this blog I should be covering off colour schemes, edge trim, plug flaps and skirting.

Floor down and worktops in

Its been a manic week! As well as the roofer here, the sparks and the guys knocking out the fireplaces I’ve been flat out trying to get the kitchen fitted. The last update was that the self levelling floor was down so the next step was to lay the tiles, get the base units back in and fit the worktops.

The last time I laid flooring tiles was probably 15 years ago and all I could remember was the cuts and the mess from grouting plus living with the odd tile for 15 years that had a dull hollow sound when I walked over it (where I had not bedded it down properly) and as that always got on my nerves I did not want to make that mistake again.

One of the key decision to make was the flooring type and I had quickly set my heart of tiles as opposed to lino. I don’t dislike lino, but I had never put lino down before but also I have had a couple of people I know split or scag their lino and once its down its a big effort to replace it, especially with the kitchen built in so I stuck with tiles. I was very much working to a budget and once I had worked out my square meterage it gave me a price point of about £12 to £15 per sq m. I also had a style in mind and after searching around found what I wanted in B&Q. The product is described as Worn Wood Grey Matt Wood Effect Porcelain Floor tile and they come in packs of 11 as 600 x 150mm tiles. I have never ordered tiles before on-line, having always visiting the shop to view them first but with the current travel restrictions in place I bit the bullet and ordered myself 5 packs plus adhesive, grout, spreaders, mixing bucket and mixing paddle and once it turned up realised I had incorrectly calculated the number of boxes needed and had to order another 3 boxes!

So it was time to start putting the tiles down and as the bag of tile cement said it would go off after 20 mins of mixing, I estimated that for me, that was probably no more that 3 or 4 runs of tiles (with each run being 4 full tiles and one cut) so I decided to forward prepare 5 runs and then 1/4 of a bag of cement.

Pre cutting and laying out the tiles before mixing the cement

This wasn’t a bad estimate to be honest but what I did learn in this forward prep stage was that in laying the tiles out in advance, I did have one high spot and 3 or 4 low spots in the floor. Obviously the self levelling was not perfect in a couple of spots and I think hindsight for the future would be to buy an additional bag of self leveller and make up a final thinner mix to do a final skim after the main one had set but I wanted to crack on so I took the high spot off using a coarse belt on a belt sander and for the low spots, marked the tiles up with lines and crosses to denote the spots that were low and during the laying down I compensated for this with extra cement.

I don’t know if it is the done thing? but I certainly found (especially where I had used extra cement to build up the low spot) that bedding the tile with a few gentle taps with a soft head leather face mallet seated the tiles better.

I slowly worked across the room pre cutting runs and making up small batches of cement and this allowed me to do the floor over 3 evenings. Once everything had cured I then found my nightmare! One tile, slap bang in the middle of the floor had a hollow tone when tapped. Right in the main walk way and I know it was going to bug me so I had no choice but to crack it with the mallet, gently chisel it out without damaging the surrounding tiles, clear out the cement back to the floor then reseat a new tile with a good bed of cement, giving it a good tap with the leather a mallet to make sure. Checking the next day, no hollow tone so I could now go about the grouting.

Once again, the whole grouting process was a bit of a vague memory. I could remember you used a sort of squeegee to force the grout down the gaps and then scrape any overflow off but that was about it! Luckily, that is the basic technique and armed with a couple of bags of grey grout and a new bucket and grouting squeegee I was surprised how quick it was to grout the 9 sq m. I had also bought a “finishing tool” which was basically a bit of plastic with a small plastic ball on the end (about the size of a large ball-bearing) which you ran along the joint at the end to get that perfect curved finish.

Even though units are going in, I wanted to tile the whole floor in case I ever change the layout

All that was left was to let it dry a bit then 3 or 4 runs over with a damp cloth and mop combination to remove the surface reside on the tiles. Standing back one it had all dried, I was really pleased with the result.

To save a bit of cash, I had planned to re-use the existing wall and base units. I had already painted the doors and now it was just a case of repositioning the base units where I wanted them. I was restricted by the location of the gas pipe and the waste pipe (although I can get the water pipes re-ran) so kept to the two base units on the left hand side and the single unit on the right hand side. The cooker was then going to go across the end facing wall.

The cooker will be replaced with a gas range cooker and the item on the floor to the left of the current cooker marks the end point of a 90 cm range which means I can easily access the cupboard and use the work unit to the left

I had also ordered new beech worktops from an online company (House of Worktops) with a view of cutting these to fit myself. As there will be panelling going on and I am bringing this down to the work top (as opposed to behind) then putting a beading strip on, any errors I might make in terms of being a few mill out will be covered up!

The right hand side was easy, as this was 192 cm off of a 2m work top but the left hand side was a bit more troublesome as the walls are uneven and looking at it side on, whilst the edge facing the right had wall was at a clean right angle, the other side wall facing edge was actually a small obtuse angle. Measuring the walls, there was a 4 cm difference between the rear and front edges so when marking the cut I had to be careful with the piece of guide wood to make sure I got this right.

My next challenge was what to use to cut it! I had both a jigsaw and a circular saw. The circular saw would go through it easy but I was worried about the brutality of the first contact causing visible damage. The jigsaw would be cleaner but the wood was quite dense so it would be harder and there is always the risk of blade flex giving you a lopsided cut.

I did a test cut a few cm off the end of the waste part I knew I was going to have and as expected, due to my lack of experience, the ripsaw caught and caused a small amount of damage so I decided to do the cuts with the jigsaw.

I did have a bit of worktop spare (after fitting the utility room one as well) so I used this to make some custom size chopping boards. Once the worktops had been oiled and the chopping boards placed, I think the end result works really well?

You can start to visualise the final result with cladding on the walls and a nice range cooker?

The next step is to panel the walls to hide all of the existing pipes and cables (and also to give that traditional cottage kitchen feel) and to get the sink and taps fitted.

Kitchen strip out and self level flooring down

The last kitchen I fitted from scratch was probably over 15 years ago, but apart from getting in a plumber is to do the wets and someone to connect the gas for the oven and hob, I managed to do the rest including the new floor so when I realised that Glan Gors was going to need one, to be honest it was one part of the restoration I was actually really forward to getting my hand dirty on.

This weekend was the start of the main strip out. I have next weekend clear to tackle the flooring so I really needed to crack on and strip the kitchen out and self level the floor to allow it to dry and cure.

The first step was to empty all of the units, strip out the work top and then to store them in another part of the house. I had already repainted the doors, so when they go back in they just need a really good deep clean but moving the carcasses out allowed me to check that they were still solid and they definitely have quite a few years left in them.

Of course, its OK stripping out the kitchen but you need to have somewhere to cook, so the next step was to set up the temporary kitchen in the utility room. I had spent the last 12 month living in a lovely farm cottage with a small kitchen made up of an oven and a little portable electric 2 ring hob, so I had mastered the art of cooking meals that only need two rings. Fingers crossed this will only be for a couple of weeks, but I have planned my meals to work around this so once again, a good incentive to crack on.

The existing floor tiles have a strong indication that they may contain asbestos. I have researched this and whilst you can get tests done, removal even by specialist companies can leave a residue as the asbestos also exists in the glue. Having asked around the common advise was to “encapsulate it”. This basically involves covering it with a self levelling screed, ensuring it is all covered then lay the new floor on top of the screed. As I will not be drilling into the floor this seemed the logical thing to do. The only thing you need to be aware of is that if you plan to sell the house you need to declare this. Not a problem, I’m not looking to sale….

So the next step was to give the floor a really good clean. Mop, floor cleaning solution and plenty of hot water made sure that the years build up of grime under the work surfaces was shifted then all that was needed next was to a mix a 50/50 PVA and water solution and give the existing flooring a coating. I continue to read conflicting information about this step, some people saying it is not needed, others saying it allows the self leveller to bond better. I thought I would go with the applying it route and created the mix and then applied it.

I forgot to mention, the kitchen has a gas cooker and whilst this is being replaced once the kitchen is fitted out it was still connected so the self leveler needs to go down with this in place. My only option was to stand it up on four tins and allow the leveler to run underneath then once its cured, move the cooker off and back fill the small holes.

My first time at a PVA bonding layer. Not sure if this is right or not!

So wind the clock forward 12 hours, and I wake up to most of the PVA dried with just a couple of patches left where either it was a low point and liquid had gathered or I had been over generous with the brush. I quickly smoothed these out and left them to dry so that in the afternoon I could set about self levelling and this is where the messy fun started.

The kitchen is approx 2.7m square so that calculates out as 7.29 sq m. I had 2 bags of self leveling compound which cover 5 sq m each at a depth of 3mm, a large 45 litre mixing bucket, a drill powered mixing paddle and a large float. The bags said they only needed 4 litres of water per 20 kg bag which seemed hardly any but once it was mixed up you could see the volume bulk up. I thought it best to mix it up in the kitchen and really I should have covered the cooker! but as it will be going at some point I didn’t stress about the splatter, I can give it a quick clean once the floor has hardened.

My dilemma was as I knew I needed both bags, did I mix both together, or get the first bag down to cover the first half of the floor then quickly mix the second bag and blend it in. I went with the latter and worked quickly, trying to get use to the large float sticking flat due to the surface tension and also having to manoeuvre over partly laid self leveler as the second bucket went down and spots on the first part of the floor needed a top up!

Two bags of self leveler later…

I went back to check a few hours later and I am pleased to say it was good to its word on the bag which said you could walk on it within 3 hours as you can see the change of colour below. All in all, a satisfactory result!

[Footnote: when laying the tiles, I did have a slight dip in the middle, so for all of those home DiY people attempting this for the first time I would suggest running a thin batten at each edge of the room and the middle and level them using a spirit level, then fill and shutter in 2 sections. Once dry, remove the middle channel and fill in]

I had to make a judgement call on how far out the door to extend the screed. The shuttering contains it up to the original tiles then the kitchen tiles will run to the door opening and the gap between will be painted with black floor paint to match the run to the left.

Door fronts and right hand strip out

I am still waiting on the plumber to give me a date to disconnect the taps as they have no inline isolator valves and as I don’t trust my own skills with a plumbing system I don’t know (especially how reliable the stop cock is) I am happy to wait. In the mean time I am continuing to prep the kitchen to a stage where I can lay the new floor and start building from the ground up.

In the mean time I have been able to progress refurbishing the door and drawer fronts. As you may recall, originally I was going to replace the whole kitchen but as the main carcasses were solid and the basic layout gave me a good starting point it seemed logical to try and upcycle by changing the colour scheme.

I have never attempted this before but looking at a number of online groups, these types of things are becoming more common and it would allow me to choose a pastel colour scheme as well as learning a new skill and if it was effective, I could always change the colour scheme in later years. I wanted a duck egg blue as my base and in the end I settled for B&Q’s own brand GoodHome satin paint in a colour scheme called Melville. I had never painted with an undercoat before so had no point of reference so I just read around some reviews and ended up buying No Nonsense from Screw Fix as I had an online order being processed and just added it to the basket.

The process was actually very straight forward. Remove the doors, give them a good clean (I used a good general purpose kitchen cleaner although a lot of people use sugar soap), use the belt sander to give the surface a quick rough up then two coats of undercoat and 2 coats of top coat. I would not say the finish is perfect, in fact I have some drip lines on the edges and on a couple of doors more noticeable brush strokes but at the end of the day I am planning a rustic country kitchen where maybe a hundred years ago kitchens were refreshed with more primitive brushes so I was not striving for perfection. Maybe in a few years time I can take a couple of doors off and attempt a fresh top coat with light fine grit sanding to see if I can improve my technique but for now I am actually really happy with the result.

Handles were purchased from Screwfix and work really well

The original kitchen had long handles with double drill points but I wanted simple Beech knobs to compliment the new Beech worktops I will be buying. I managed to source some from Screwfix which work really well but I have to find a way to mask the additional drill holes. I have a few ideas which are works in progress so more on that at a later date.

Now that the door fronts are done, the carcasses are ready to have the old worktop removed once the taps are disconnected, then I can make a start on the flooring.

But even before that, I had to remove the cornet unit. The picture you can see above is the left hand side of the kitchen and the picture below is the right hand side. I wanted to lose the corner unit and put a wider range cooker in in the same location as the current cooker so the unit had to go.

Removing the old worktop made the rest of the removal nice an easy

Dismantling the unit was fairly straight forward, the hard part was as the cooker is connected to the gas I had limited wriggle room at the start but careful maneuvering left me with a nice big gap as you can see below.

My next challenge is to work out what to do with the lower door. It has not been opened since the kitchen was fitted and has shelves to the full depth. If you look at the paint line that will be in line with the new worktop level so I am thinking about splitting the door so the top section can be utilised. The wall is going to be refaced with wooden cladding and then painted in a complimentary colour scheme but I do need to assess this wall as it faces the outside of the house and as you can see, some plaster has been removed to see the general condition.

All in all I am happy with the progress the kitchen is taking and I hope its going to be a lovely feature of the house.

Starting the kitchen

One obvious aspect when viewing the house was that the kitchen had to go! It was functional and all working but certainly not to my taste as it was dated in its style and the layout was not how I would have it set up. My key “want” was to separate the “cooking” from the washing up and having a good sized utility room with a sink and place for a dishwasher, I wanted to move that aspect of life out of the kitchen and only have a small sink in the kitchen for food prep etc. I also wanted a small range style cooking appliance. Ideally I would love to have gone to a solid fuel Rayburn but researching it, it would be in my case “form over function” so I put that thought to one side and moved towards a nice range style cooker. I have fitted Ikea kitchens before and my experiences in terms of ease of fit and longevity has been good. My aim was to get sparks/plumber to do all the services work and then I would fit the kitchen and new flooring around their first and second fix cycles.

So that was the plan, and the budget allowed it. Their were some fixed costs that would need to be replaced regardless of my approach (such as the flooring, worktops, sink and taps) but the replacement of the units and doors (c £650 cost) was going to be a replace old with new where the only benefit was changing the looks of the doors. Looking at keeping the carcases (as these were solid) and just replacing the doors gave me 3 options to consider which were; upcycle the existing doors, buy online replacements as they were standard size or make the doors myself from scratch. The potential cost saving was attractive and I did like the idea of trying a bit of upcycling and it seems to becoming more common place and would allow me to colour the doors in the manner that I had visualised for the kitchen as opposed to being tied to on-line options only. Worse case if it did not fit in or I found the doors not to be hard wearing, it would be straight forward to replace the base units at a later date due to the modular design I was taking.

The floor was an easy decision, it was going! It was dated lino and very worn with an unlevel base so the simple option was once the kitchen was stripped, lay a good quality latex based self levelling compound and then lay some nice ceramic tiles. I had done this in my previous house so was happy with my skill level to do this, My main decision here was to chose a style of tile that blended with the original flooring in the hallway and also to decide whether I finished it directly against the hallway flooring (which actually was past the door opening) or have a small black slate effect strip separating the two.

My next thought moved onto the wall, and I had already decided what I wanted here. Pastel coloured painted tongue and grooved panels. I know this would mean fitting all of this from scratch but would be a great skill to learn as it would encompass a lot of techniques. And from a cost viewpoint is not that expensive.

So back to the cabinet doors, and at this stage I am going to go down the upcycle route. I had two doors in a cabinet that was not going to be used based on the new layout so I could use this as a tester in terms of prep, rubbing back, undercoat binding and top coat finish and an initial test actually gave a really nice finish and even if it only lasts me 3 years, will be a new skill I have learns and saved me a bit of cash which I can redirect into some areas where the budget needed it more.

As the corner unit is going, I could use the doors as my tester

The worktops were a simple decision, in my last house I had solid wood (which I chopped directly on top of… arghhh I hear some of you shouting)! I actually had a 2 star Michelin chef who I was fortunate enough to work with help me design my last kitchen and it was he who encouraged me to allow work surfaces to become “used” in their look. Have a plastic chopping board for meat and fish but for veg prep, just spray down with an Anti Bac spray and prep straight onto the worktop. No risk of chopping board slip and endless space. That’s my plan again and with solid Beech worktops being an economical option and me being happy to cut them to size I think that is where I am going.

As the kitchen in mainly going to be used for cooking, the current sink will be removed and a small half basin put in, mainly for food prep but in order to do the flooring properly the base units with the sink will need to be removed. As the taps seem to have no in-line isolators I will probably take the opportunity to get them capped off with an isolator higher up and then once the main kitchen is removed and rebuilt I can get a more natural run of the pipes.

Finally cooking. Once I had settled on a range style cooker it was really about fuel type and size. I prefer gas over electric and the main sizes are 90, 100 and 110 cm. My original plan was to locate the cooker in the back right hand corner running against the wall that has the window but that would lose me about 1m of work surface. With the gas point in that corner my options were limited but by turning the cooker 90 deg and placing it on the wall opposite the door way (as the current one is) but losing the extended piece in the picture below that links to the left hand side, I think I can maximise the use of space and have a very functional design.

Final position will be the same but with the corner unit cut back so the cooker moves right a bit and the extension to the left will be gone