Whilst tradition says that Christmas decorations should come down on Twelfth Night, I have always found that the over hang from the Christmas festivities is best packed up quickly. For me, it creates that sense of “new” beginnings and certainly this year it was very apt. One of the lovely elements about this house is the cellar and having only just moved in, I have no plans for it so instead of using the loft as the annual decoration store, it was nice to just get some boxes and pop everything down into the cellar without the hassle of getting loft ladders out etc!
Once that was done, I could crack on with todays decorating and the plan was very much around finishing the Snug off and if possible getting all of the emulsion on the lounge walls. Hopefully that would leave me with a couple of options tomorrow, the main one being starting to unpack the workshop and if I felt inclined I would start the gloss in the lounge but I really wanted the Sunday to be a more relaxing day with a more fluid plan.
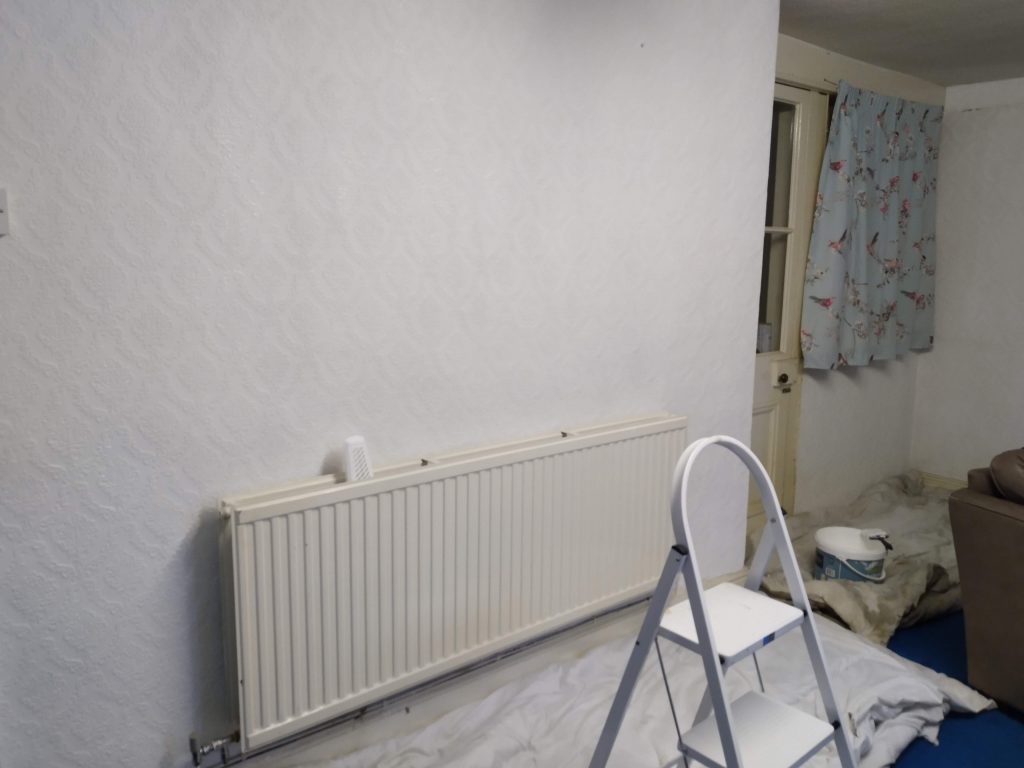
The snug work was really straight forward. I had laid down two coats of white emulsion on the places where I had stripped the lifting wallpaper and the two top coloured coats went on really nicely. Once that had dried back I was able to finish off the two skirting boards under these panels then stand back and enjoy the transformation.
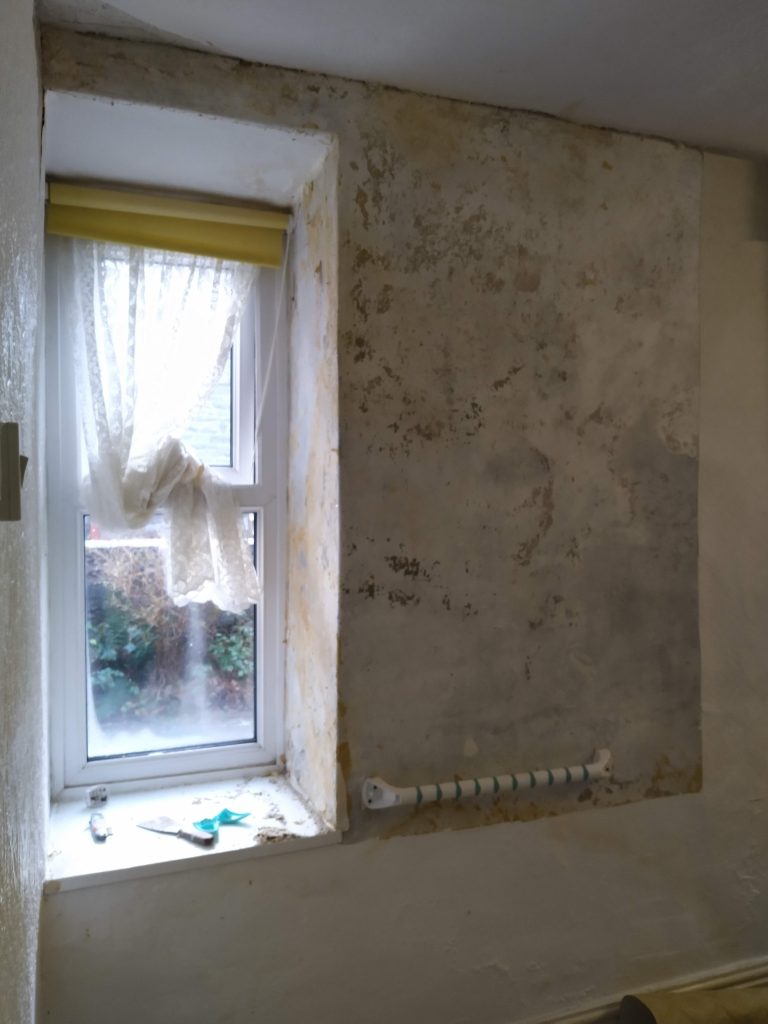
Once I had tidied up and dressed the room, it was time to grab a quick coffee then start on the lounge. The area behind the sofa had a lot of lifting wallpaper and I had started on the walls before it yesterday so knew I had the complex bit coming. The first two short walls around the dining room door were OK but as soon as I came to the corner it was evident that the paper adhesion was poor and even thought I started just cutting sections out it quickly became apparent that the only option was to strip it all back and see the extent of the problem. Whilst a messy task with that underlying fear that I was going to discover my first major issue, the paper came off clean with little damage to the underlying plaster and whilst there was one patch of degradation the underlying walls seemed OK.

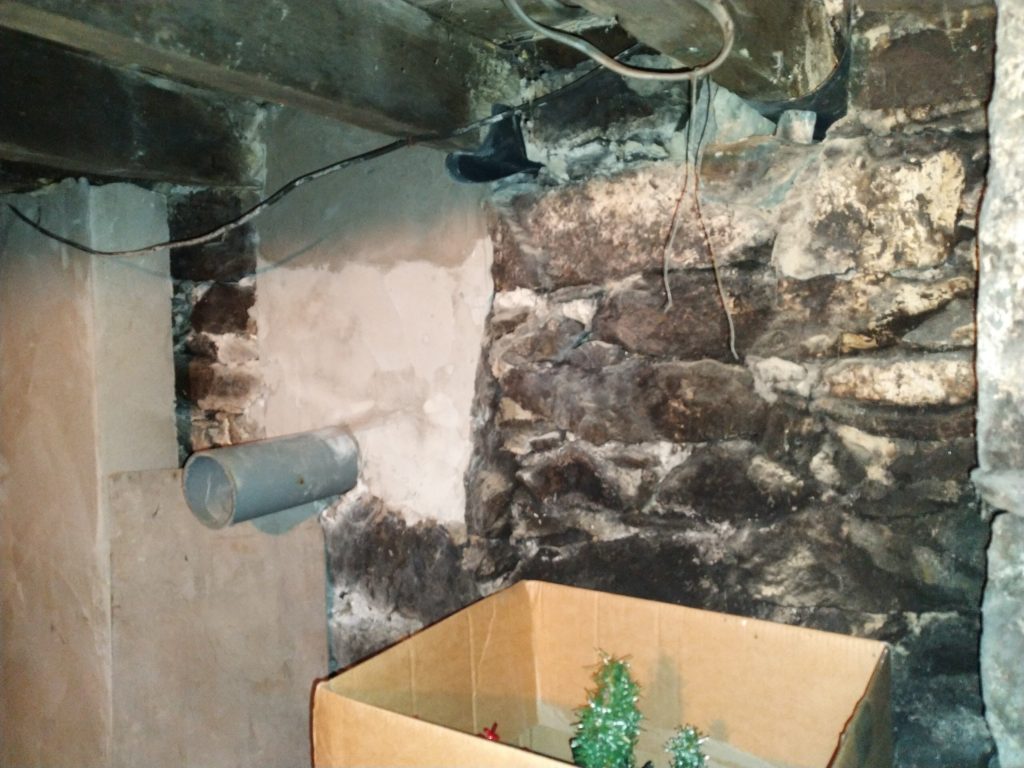
Now all of the parts of the jigsaw have slotted together and probably give me something to monitor / address going forward. From what I can see, this area of dampness in the walls is directly above the new floor boards and if you look in the cellar you can see where new supporting walls have been built, I assume to take the weight of the floor joists which had started to rot in the old wall supports. Without specialist investigation confirming it, I suspect it is an occurrence of rising damp with moisture being drawn from the ground where the cellar walls touch the outlying soil.
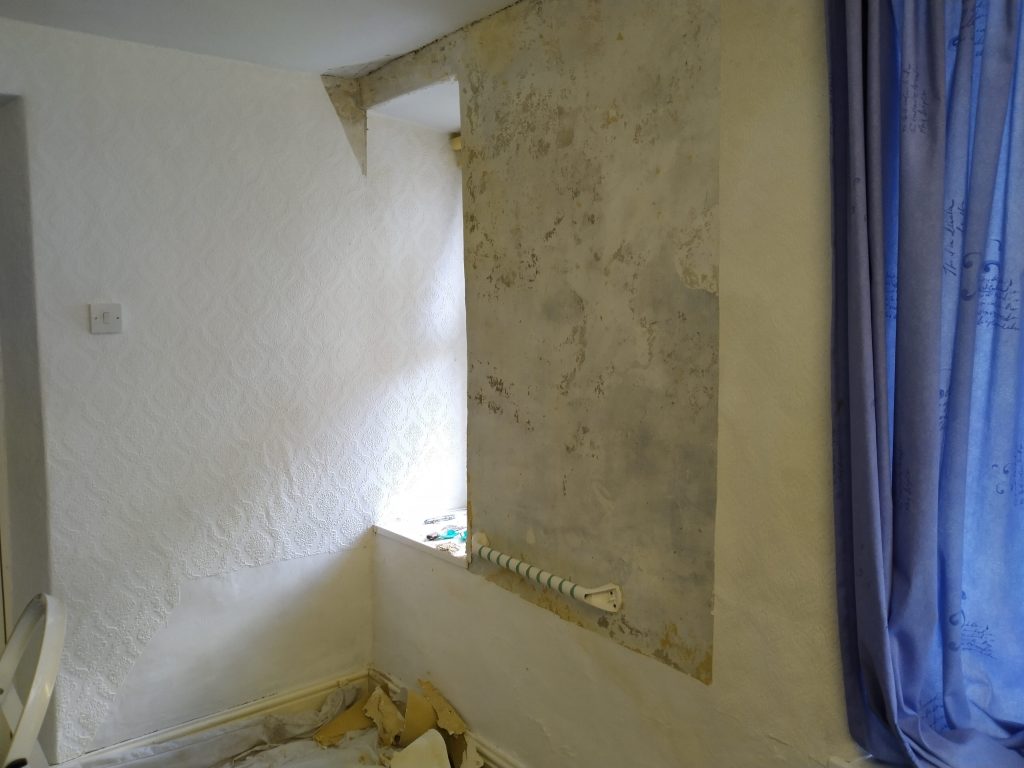
I will leave the lounge walls to dry out (with a oil filled radiator next to them and also allowing the window open above to let the moisture out) then get a couple of coats of white emulsion down whilst I monitor for 12 months without any paper on them.
This was expected (as damp was highlighted on the structural survey) and my approach was always to blitz each room quickly with a fresh coat of paint, exposing the damp areas for a 12 month monitoring. The extra work prepping these walls put me behind for the day but I felt I had achieved a lot in the lounge so called it a day.
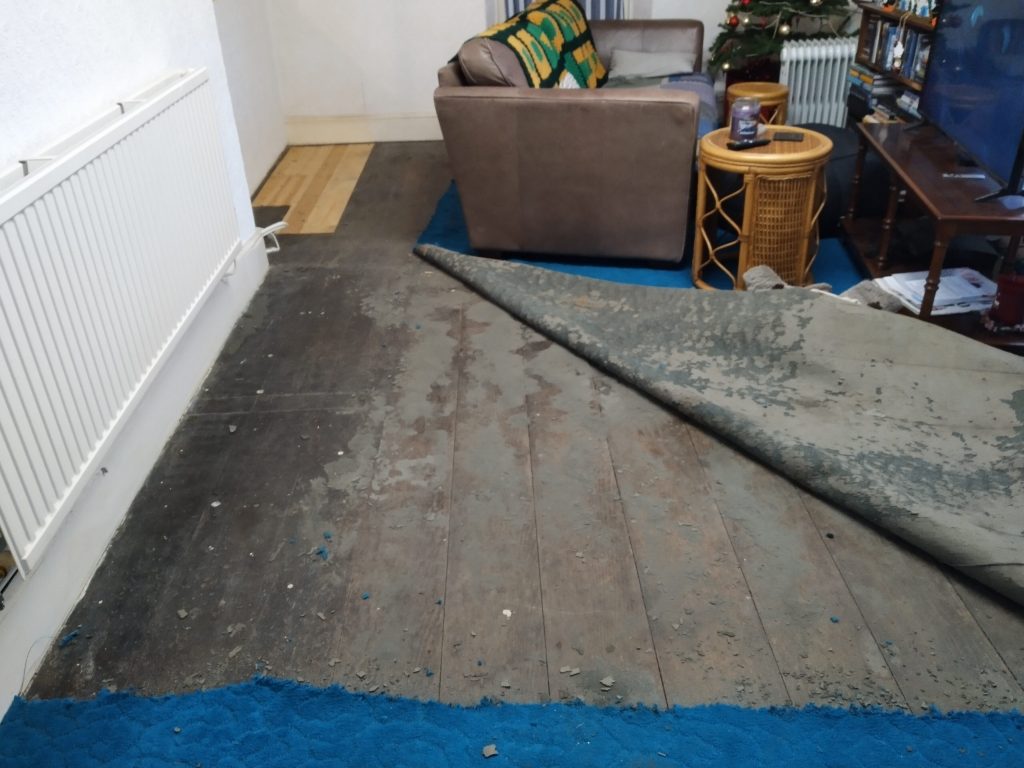
One of the reasons I proceeded with the purchase after reading the survey was the potential of hidden gems. Yesterday I lifted the lounge carpet and found a lovely set of floor boards and the next one was going to be the dining room. The sound and texture underneath the carpet indicates a solid floor and I had banked on maybe a concrete or compacted stone floor but lifting the carpet in two places unearthed I hope something potentially fantastic…
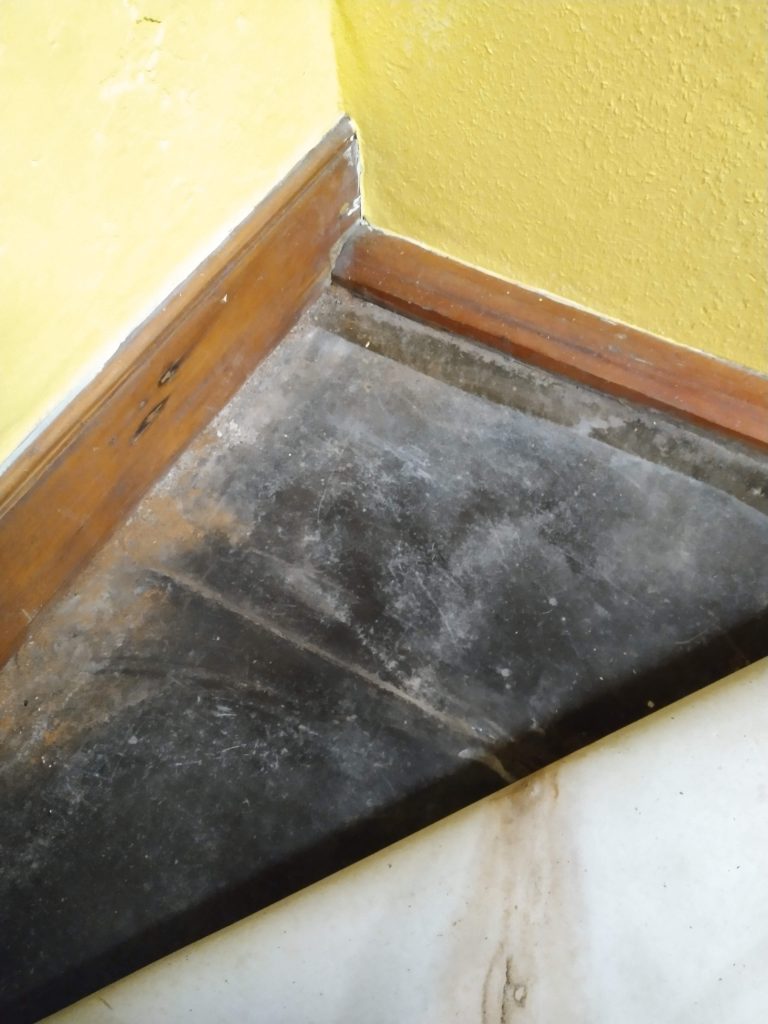
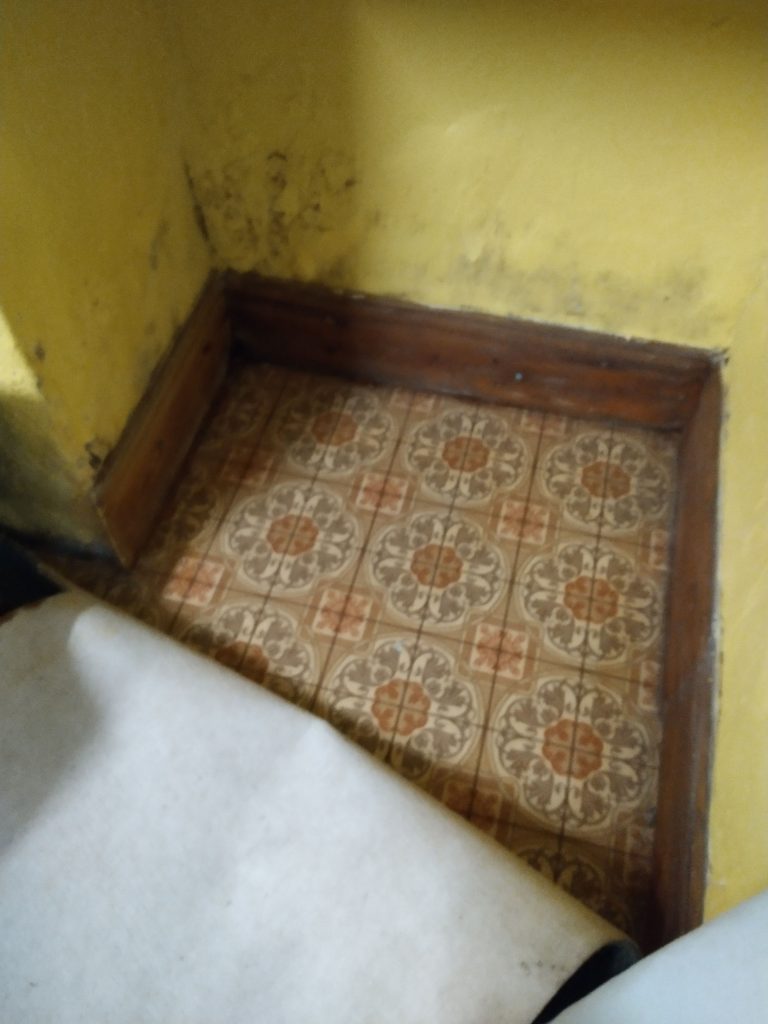
The picture to the right shows a layer of old patterned lino being used as underlay. Whilst decorative it was very brittle so in another section of the floor it came up with the carpet. The picture on the left appears to show original welsh slate flooring. We will see when we lift the whole carpet the extent of the coverage.