I am still waiting on the plumber to give me a date to disconnect the taps as they have no inline isolator valves and as I don’t trust my own skills with a plumbing system I don’t know (especially how reliable the stop cock is) I am happy to wait. In the mean time I am continuing to prep the kitchen to a stage where I can lay the new floor and start building from the ground up.
In the mean time I have been able to progress refurbishing the door and drawer fronts. As you may recall, originally I was going to replace the whole kitchen but as the main carcasses were solid and the basic layout gave me a good starting point it seemed logical to try and upcycle by changing the colour scheme.
I have never attempted this before but looking at a number of online groups, these types of things are becoming more common and it would allow me to choose a pastel colour scheme as well as learning a new skill and if it was effective, I could always change the colour scheme in later years. I wanted a duck egg blue as my base and in the end I settled for B&Q’s own brand GoodHome satin paint in a colour scheme called Melville. I had never painted with an undercoat before so had no point of reference so I just read around some reviews and ended up buying No Nonsense from Screw Fix as I had an online order being processed and just added it to the basket.
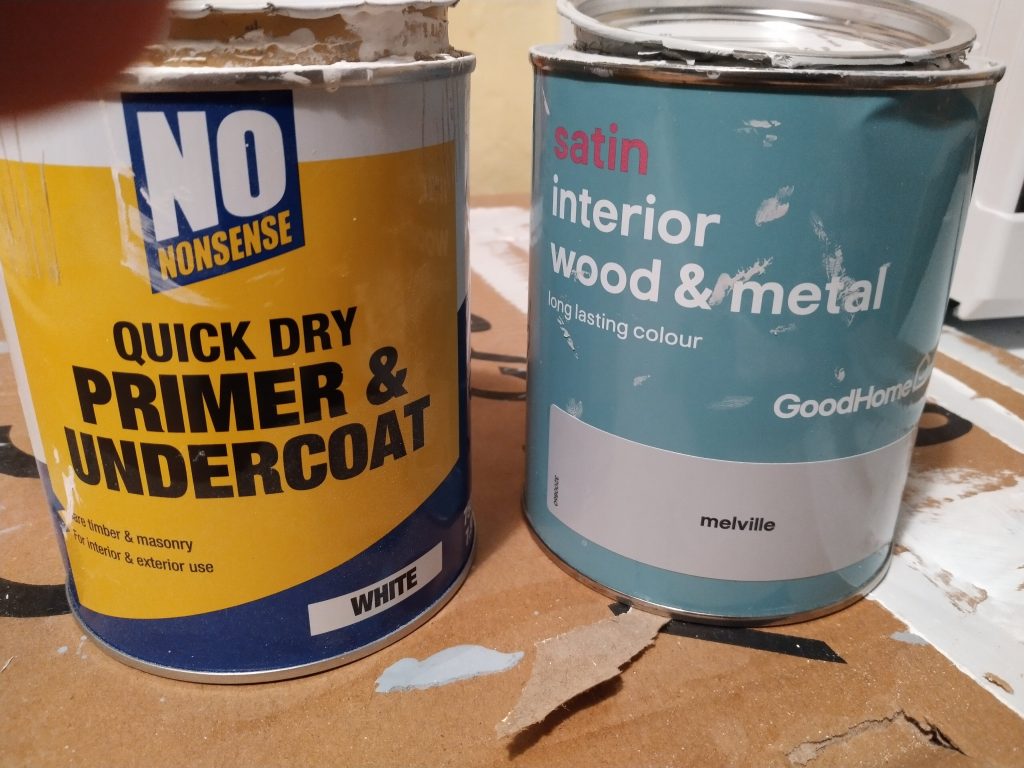
The process was actually very straight forward. Remove the doors, give them a good clean (I used a good general purpose kitchen cleaner although a lot of people use sugar soap), use the belt sander to give the surface a quick rough up then two coats of undercoat and 2 coats of top coat. I would not say the finish is perfect, in fact I have some drip lines on the edges and on a couple of doors more noticeable brush strokes but at the end of the day I am planning a rustic country kitchen where maybe a hundred years ago kitchens were refreshed with more primitive brushes so I was not striving for perfection. Maybe in a few years time I can take a couple of doors off and attempt a fresh top coat with light fine grit sanding to see if I can improve my technique but for now I am actually really happy with the result.
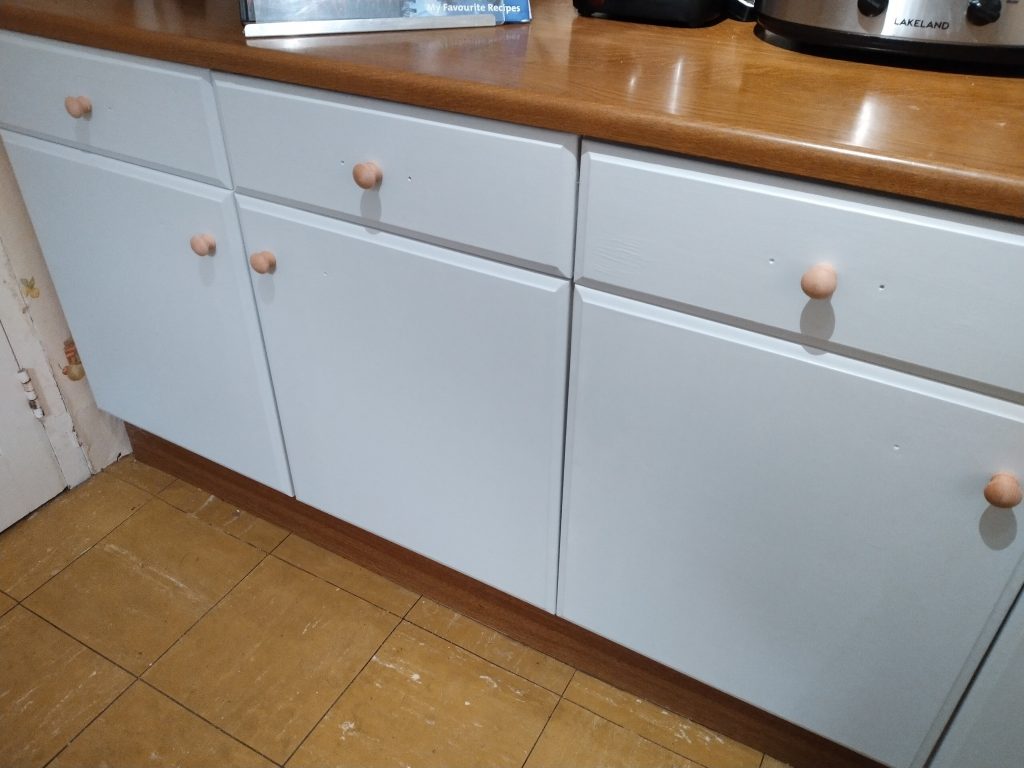
The original kitchen had long handles with double drill points but I wanted simple Beech knobs to compliment the new Beech worktops I will be buying. I managed to source some from Screwfix which work really well but I have to find a way to mask the additional drill holes. I have a few ideas which are works in progress so more on that at a later date.
Now that the door fronts are done, the carcasses are ready to have the old worktop removed once the taps are disconnected, then I can make a start on the flooring.
But even before that, I had to remove the cornet unit. The picture you can see above is the left hand side of the kitchen and the picture below is the right hand side. I wanted to lose the corner unit and put a wider range cooker in in the same location as the current cooker so the unit had to go.
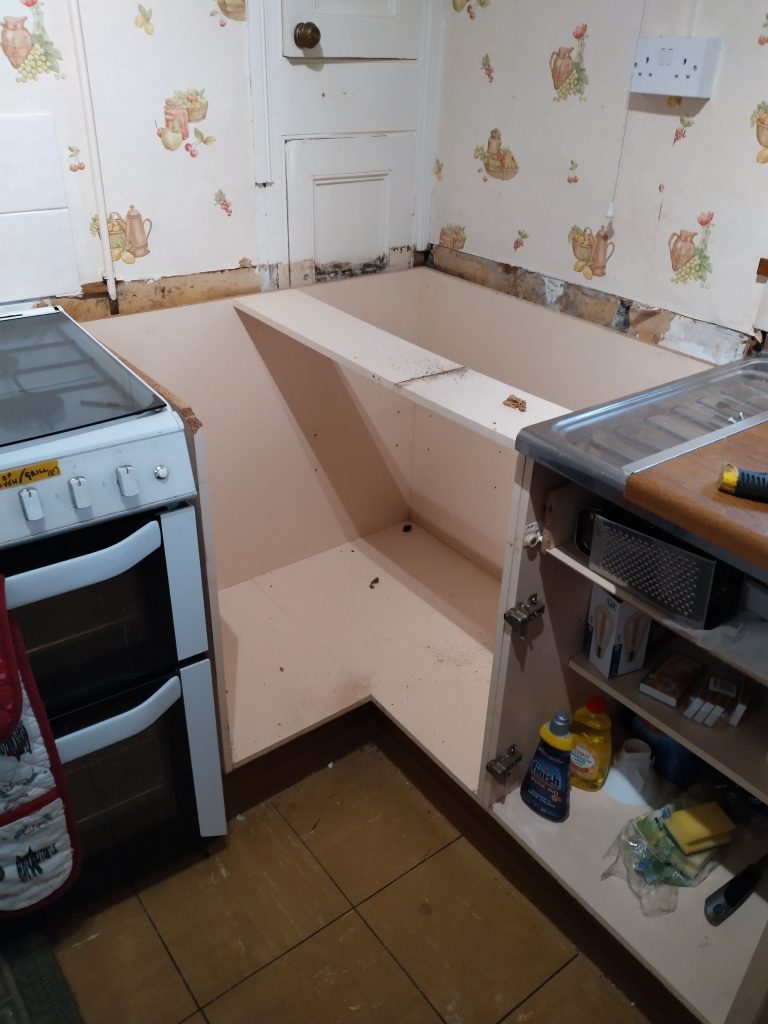
Dismantling the unit was fairly straight forward, the hard part was as the cooker is connected to the gas I had limited wriggle room at the start but careful maneuvering left me with a nice big gap as you can see below.
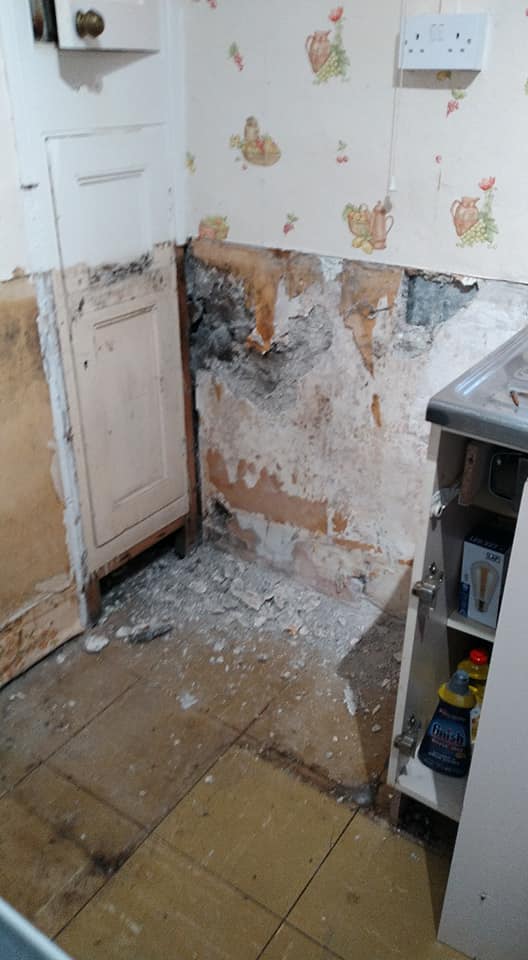
My next challenge is to work out what to do with the lower door. It has not been opened since the kitchen was fitted and has shelves to the full depth. If you look at the paint line that will be in line with the new worktop level so I am thinking about splitting the door so the top section can be utilised. The wall is going to be refaced with wooden cladding and then painted in a complimentary colour scheme but I do need to assess this wall as it faces the outside of the house and as you can see, some plaster has been removed to see the general condition.
All in all I am happy with the progress the kitchen is taking and I hope its going to be a lovely feature of the house.
