Once the flooring was down, the units in and the worktops fitted, it was time to move my attention onto the wall covering. The current wallpaper whilst “quirky” was not to my long term taste and therefore an alternative was needed. My vision was to go back to a more traditional country kitchen type style so I chose softwood cladding. The benefit of this was also going to be that all of the exposed cables which currently run in plastic conduit, the water pipes which come down from the ceiling and the gas pipe which was exposed on the wall could be hidden behind the panelling and give a much more cleaner look.
I had never attempted panelling before so this was going to be a huge learning journey, but I understood the basics, which was to lay down horizontal battens at the top and bottom, then at approx 500mm gaps, plus where there were plug sockets etc, add additional battens around these to support the cuts. I decided that the battens would be screwed into the wall as opposed to “grap adhesive”, mainly because all of the cables etc were exposed so there was no risk of drilling into anything plus long term I knew that they would not be coming away from the wall!
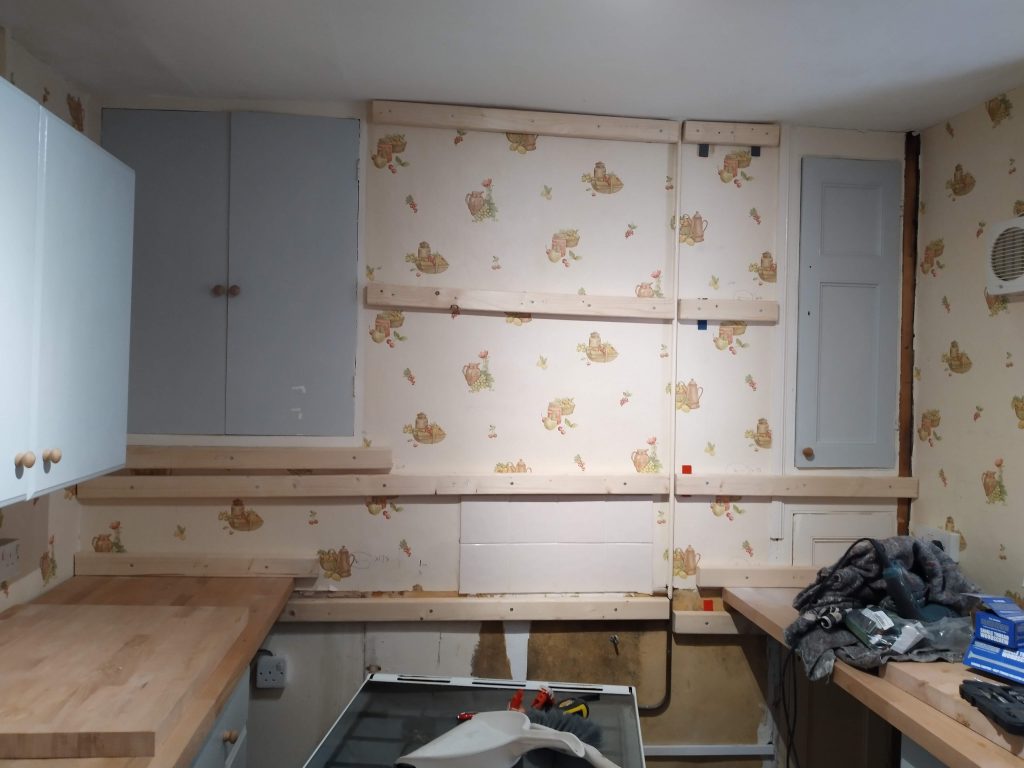
Laying down the battens was actually quite time consuming and as a ratio of battens vs panelling per wall I would say 2/3 of the time was on the battening. This was quite a surprise as I envisaged the battens being the quicker part?
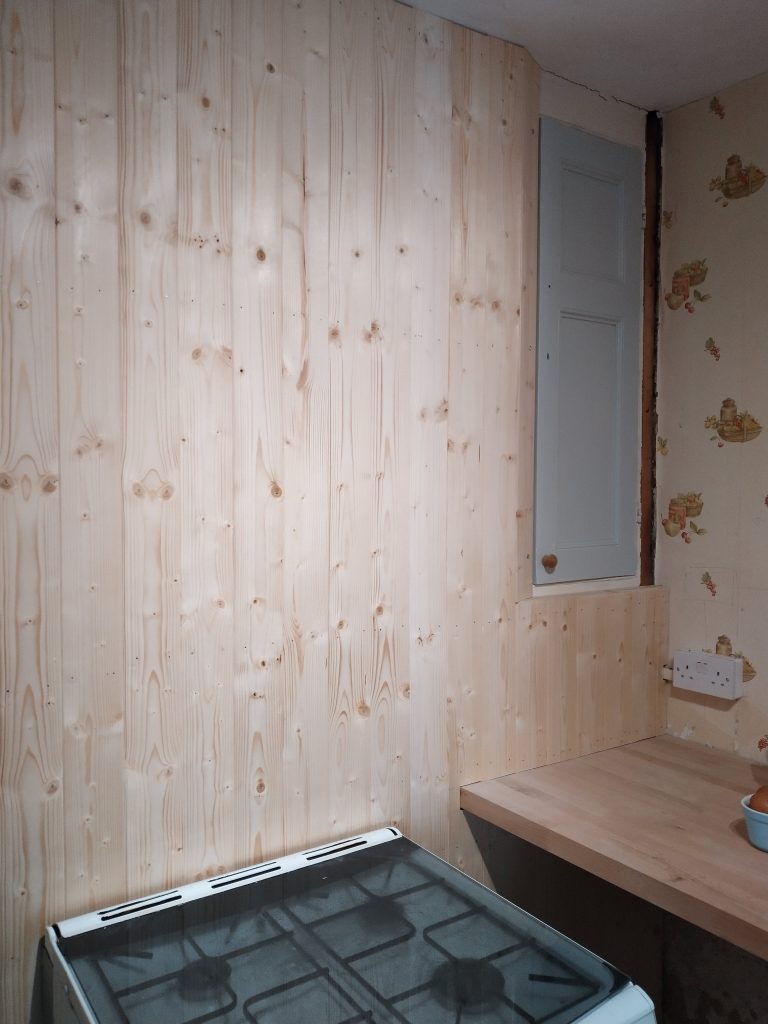
Once the battens were up, it was then just a case of cutting the panels to length and then using hidden head pins, with two per batten to secure it into place. Whilst I tried to be diligent with the lengths, I knew that at the ceiling point and where it joined the worktops I was going to use finishing strips so in some cases and where the ceiling was uneven etc small gaps were present. Cutting around the power boxes, fused spurs and powered vent was a bit fussy at times but this does mean that a lot of these now look flush fitting. I suspect when I get to painting the panels, a small amount of decorators caulk will come into play but I did try to get these cut outs as accurate as possible to limit the amount of caulking that would be needed.
The creative part of this phase of the kitchen was trying to work out how to deal with the joins at the walls but also around the two fitted cupboards and around the window. To be honest, I had no plan and it was really a case of as I got to each challenge, evaluating the options and then adjusting the framework or width of the panel to create both a clean join but also minimise the need for additional finishing strips which could deviate away from the final look.
The window was going to be a challenge in its own right as it was an irregular shape with uneven walls and with it having a large cavity due to the thick walls, also had a very deep sill.
The starting point was to take the sill off (which was basically a large piece of cut and stained wood with a finishing strip at the front) and in doing this I was surprised to discover white tiles underneath. Unfortunately these were cracked and secured with very heady duty cement and even after an hour of trying to remove them very little progress was made.
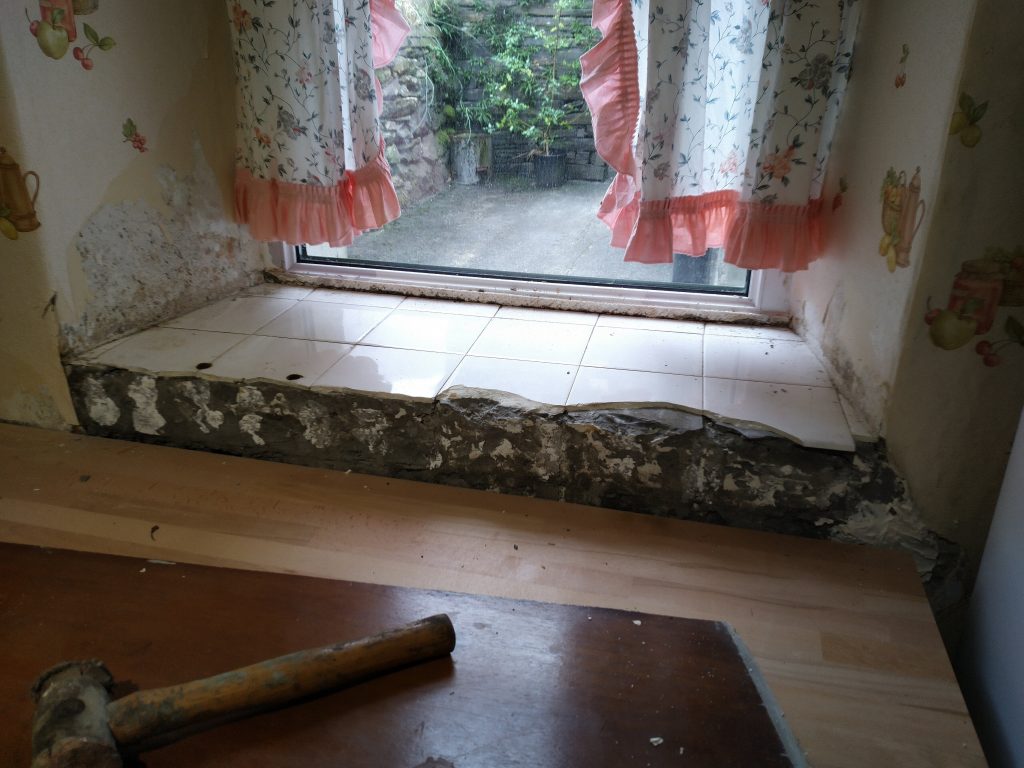
With this knowledge I stood back and looked at the window as a whole to create my plan! Whilst the cladding is fixed, I wanted aspects of the kitchen to be able to change with the seasons or as my tastes changed so for the window cavity and sill I have the idea of tiled panels, By this I mean fixing battens to the sides and top of the window cavity then creating panels of tiles on thin ply which can then be screwed to the battens using some nice small head screws. In a similar way I am planning to cover the cracked tiles on the sill with a new piece of wood which will either be painted, stained or tiled but once again can be changed. I quite like the idea of having some Christmas panels that can go up and seasonal things like that. I suspect this area is going to be an ongoing experiment as it is new skills I will be developing but at least the bulk of the kitchen is done by this stage and useable and its not like I am short of time!
With the cladding up and a plan for the window area, I could now get the sink and taps fitted. This was the only part of the kitchen where I was using external trades as plumbing is something I have never tackled. I have a basic set of rules in life when it comes to DIY (whether that’s the house or car maintenance) and that is stay clear of anything that could kill me or cause a lot of damage which for me is electrics, plumbing and car brakes!
Originally I was going to go for a half bowl sink as the plan is for all of the washing up etc to be done in the utility room but I wanted running water and a sink in the kitchen for the odd occasion when water and waste would be needed. The problem was, I am not a huge fan of stainless steel sinks and there were very few other sinks (whether recess or flush fit) that I liked. Then I stumbled across a sink for a bathroom that sat on top of the worktop and explored some of the options available, This gave me a lot more options and whilst slightly larger footprint of a half bowl, fitted in with the style I was trying to create. It also gave me good flexibility with the choice of taps to go to a more traditional look. There was one downside, they commonly were porcelain type sinks for bathrooms and therefore whilst being suitable for the majority of tasks I wanted in the kitchen (small amounts of washing up, water for the coffee machine, washing salad and veg, water at hand for cooking, filling saucepans and for recipes), I suspect that if I was draining boiling water from veggies straight off the range there would be a small risk that it could crack the sink. The utility room with a large Belfast sink is next door to the kitchen so I was happy to accept that trade off.
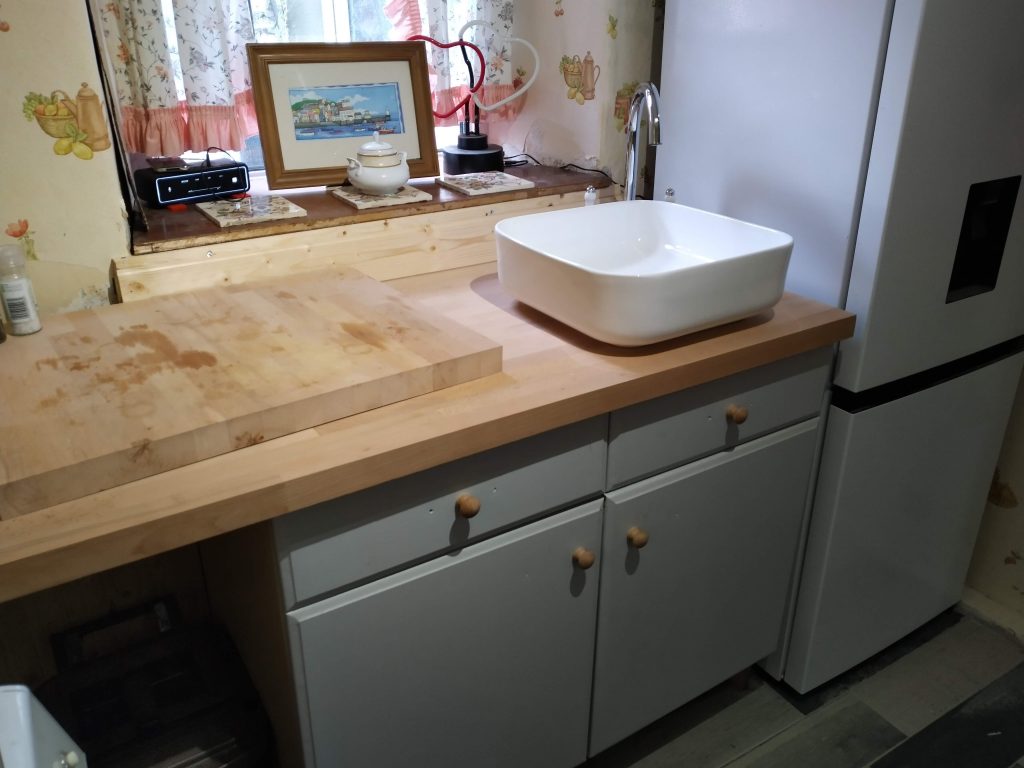
{update} the sink has now been in for about 2 months and it defiantly was the right move. It suits the kitchen perfectly and the trade off of draining veggies in the utility room has not been a problem at all.
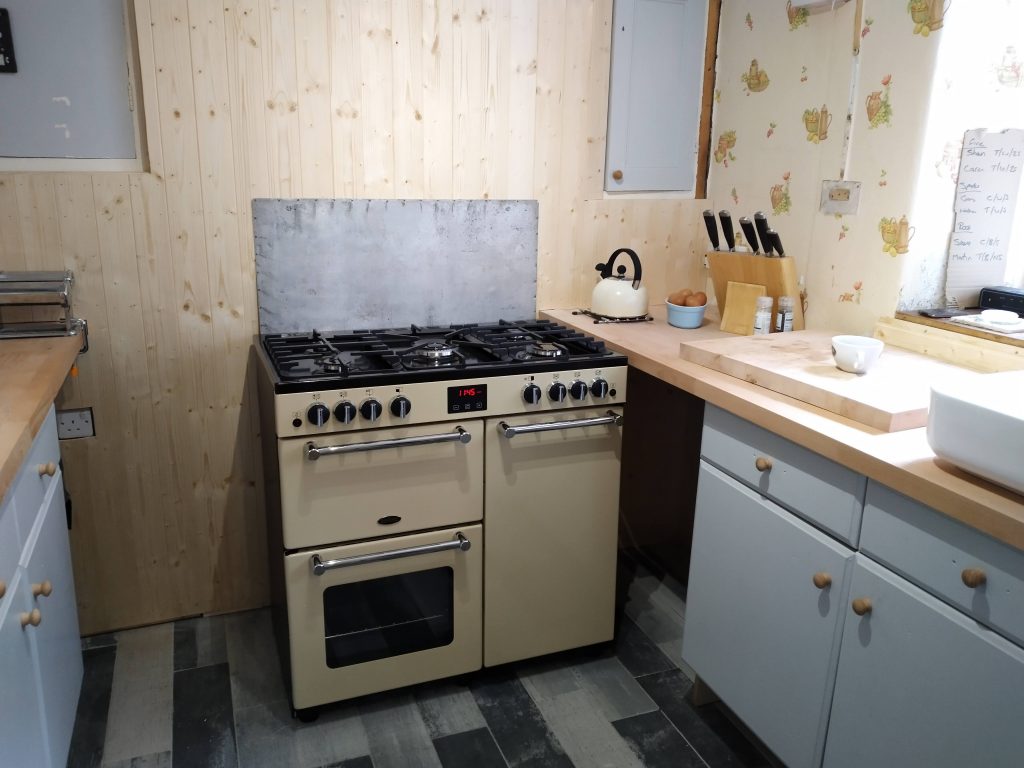
Once all of that was done I could (at last) order the cooker. Now whilst I would have loved to have put a proper Rayburn or Aga in, I did not want the fuss of venting but also with servicing companies being short on the ground I wanted something reliable and easy to maintain if it went wrong. With the house being on gas mains and having both a gas and electric oven in my last house I liked the flexibility of cooking on both heat sources so I wanted to source a multifuel range with a gas and electric oven. I had the option of 90, 100 and 110 cm ranges but as I wanted to use the worktop on the left hand side and have access to the cupboard on the back wall, I wanted to maintain the space and the gain between the 90 cm and the 110 cm was basically an extra 2 rings and a slightly larger oven. In the end I went for a 90 cm multifuel gas range which had 5 rings, a gas oven, separate gas grill and a tall vertical fan oven I had a couple of brands to choose from and ended up going for a Belling Kensington in cream. Now what I did not think through was the cladding! I had cut out holes to allow access to the gas pipes and their was a 13 amp socket for the ignition etc but my old gas cooker had a flip up glass lid that basically created the “splash back” and what I was not aware of was the regulations for open gas flames and the minimal distance from combustible materials so I was surprised when the delivery drivers (who also do the gas safe install) said they could not install it as the range was going straight against wood!
Panic!!!!!!!!!!!!
I basically had about 20 minutes whist they disconnected the old one and unpacked the new one so I was left with a decision of find something in the garage suitable to make a splashback in 20 minutes or get them to take it away and rebook (which would cost me) or get them to take my old one away, put the new on in place but not connect then rebook (which would cost me).
Now at this stage I was pretty sure there was nothing in the garage but as the previous owners had left a lot of materials in there I might get lucky. And I did!!!! There was a panel of 2-3 mm metal large enough to meet the regs as a splashback so 10 minutes with an cutting disc on the angle grinder and smoothing off the edges with a file resulted in a makeshift rustic splashback that allowed the Gas Safe fitter to install and sign off the paperwork. The question now is do I keep the aged metal splash back for character, paint if or create a tiled splash back later on?
Well that’s the bulk of the fit out covered. Hopefully by the time I do the next chapter of this blog I should be covering off colour schemes, edge trim, plug flaps and skirting.