Its been a manic week! As well as the roofer here, the sparks and the guys knocking out the fireplaces I’ve been flat out trying to get the kitchen fitted. The last update was that the self levelling floor was down so the next step was to lay the tiles, get the base units back in and fit the worktops.
The last time I laid flooring tiles was probably 15 years ago and all I could remember was the cuts and the mess from grouting plus living with the odd tile for 15 years that had a dull hollow sound when I walked over it (where I had not bedded it down properly) and as that always got on my nerves I did not want to make that mistake again.
One of the key decision to make was the flooring type and I had quickly set my heart of tiles as opposed to lino. I don’t dislike lino, but I had never put lino down before but also I have had a couple of people I know split or scag their lino and once its down its a big effort to replace it, especially with the kitchen built in so I stuck with tiles. I was very much working to a budget and once I had worked out my square meterage it gave me a price point of about £12 to £15 per sq m. I also had a style in mind and after searching around found what I wanted in B&Q. The product is described as Worn Wood Grey Matt Wood Effect Porcelain Floor tile and they come in packs of 11 as 600 x 150mm tiles. I have never ordered tiles before on-line, having always visiting the shop to view them first but with the current travel restrictions in place I bit the bullet and ordered myself 5 packs plus adhesive, grout, spreaders, mixing bucket and mixing paddle and once it turned up realised I had incorrectly calculated the number of boxes needed and had to order another 3 boxes!
So it was time to start putting the tiles down and as the bag of tile cement said it would go off after 20 mins of mixing, I estimated that for me, that was probably no more that 3 or 4 runs of tiles (with each run being 4 full tiles and one cut) so I decided to forward prepare 5 runs and then 1/4 of a bag of cement.
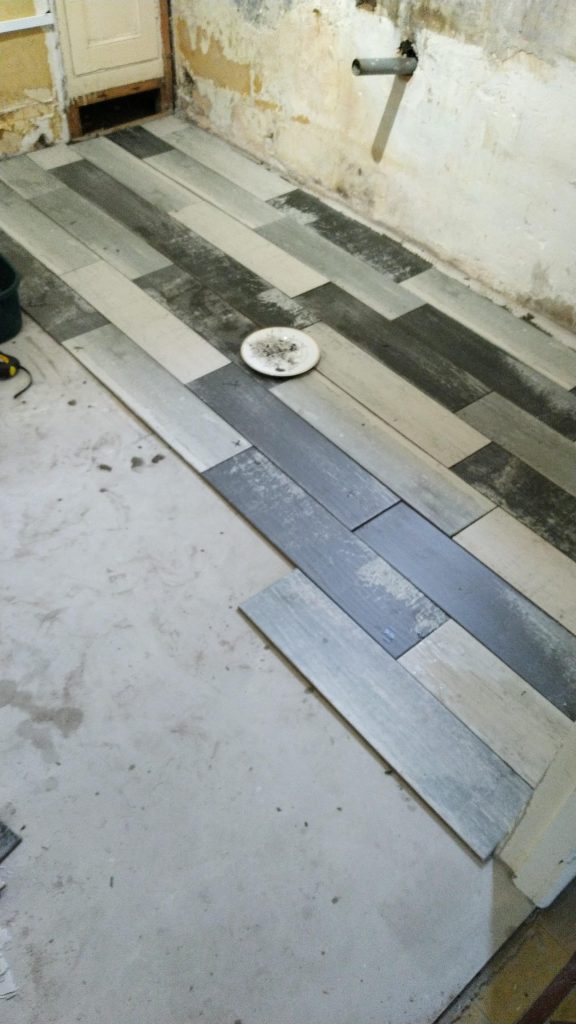
This wasn’t a bad estimate to be honest but what I did learn in this forward prep stage was that in laying the tiles out in advance, I did have one high spot and 3 or 4 low spots in the floor. Obviously the self levelling was not perfect in a couple of spots and I think hindsight for the future would be to buy an additional bag of self leveller and make up a final thinner mix to do a final skim after the main one had set but I wanted to crack on so I took the high spot off using a coarse belt on a belt sander and for the low spots, marked the tiles up with lines and crosses to denote the spots that were low and during the laying down I compensated for this with extra cement.
I don’t know if it is the done thing? but I certainly found (especially where I had used extra cement to build up the low spot) that bedding the tile with a few gentle taps with a soft head leather face mallet seated the tiles better.
I slowly worked across the room pre cutting runs and making up small batches of cement and this allowed me to do the floor over 3 evenings. Once everything had cured I then found my nightmare! One tile, slap bang in the middle of the floor had a hollow tone when tapped. Right in the main walk way and I know it was going to bug me so I had no choice but to crack it with the mallet, gently chisel it out without damaging the surrounding tiles, clear out the cement back to the floor then reseat a new tile with a good bed of cement, giving it a good tap with the leather a mallet to make sure. Checking the next day, no hollow tone so I could now go about the grouting.
Once again, the whole grouting process was a bit of a vague memory. I could remember you used a sort of squeegee to force the grout down the gaps and then scrape any overflow off but that was about it! Luckily, that is the basic technique and armed with a couple of bags of grey grout and a new bucket and grouting squeegee I was surprised how quick it was to grout the 9 sq m. I had also bought a “finishing tool” which was basically a bit of plastic with a small plastic ball on the end (about the size of a large ball-bearing) which you ran along the joint at the end to get that perfect curved finish.
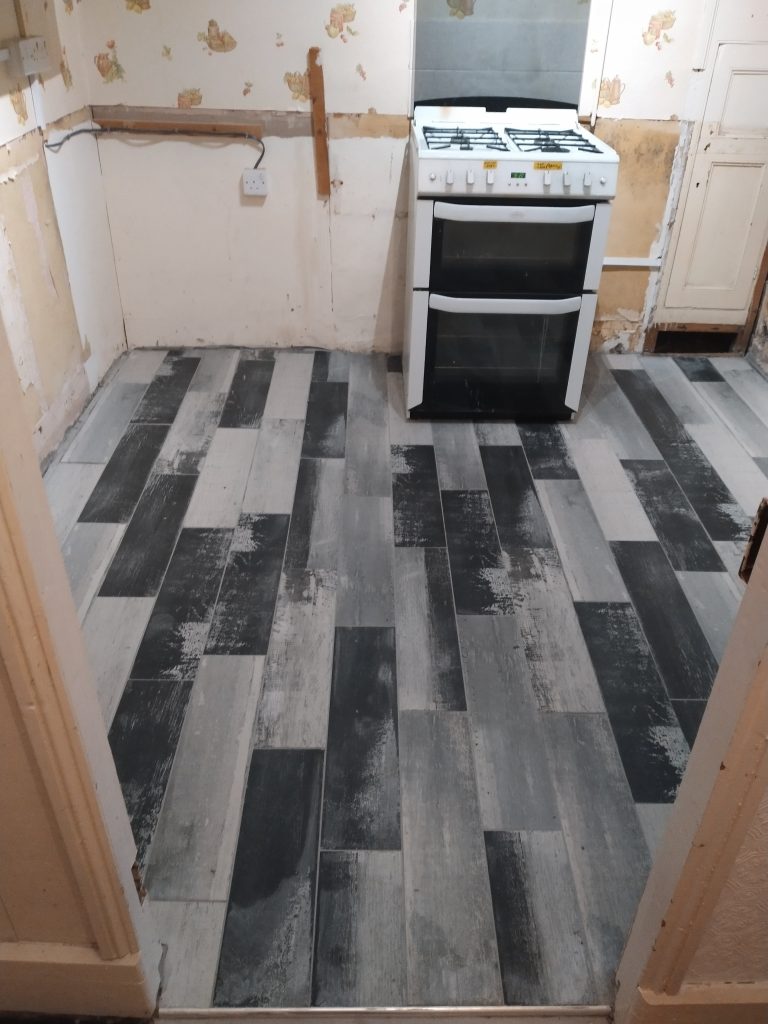
All that was left was to let it dry a bit then 3 or 4 runs over with a damp cloth and mop combination to remove the surface reside on the tiles. Standing back one it had all dried, I was really pleased with the result.
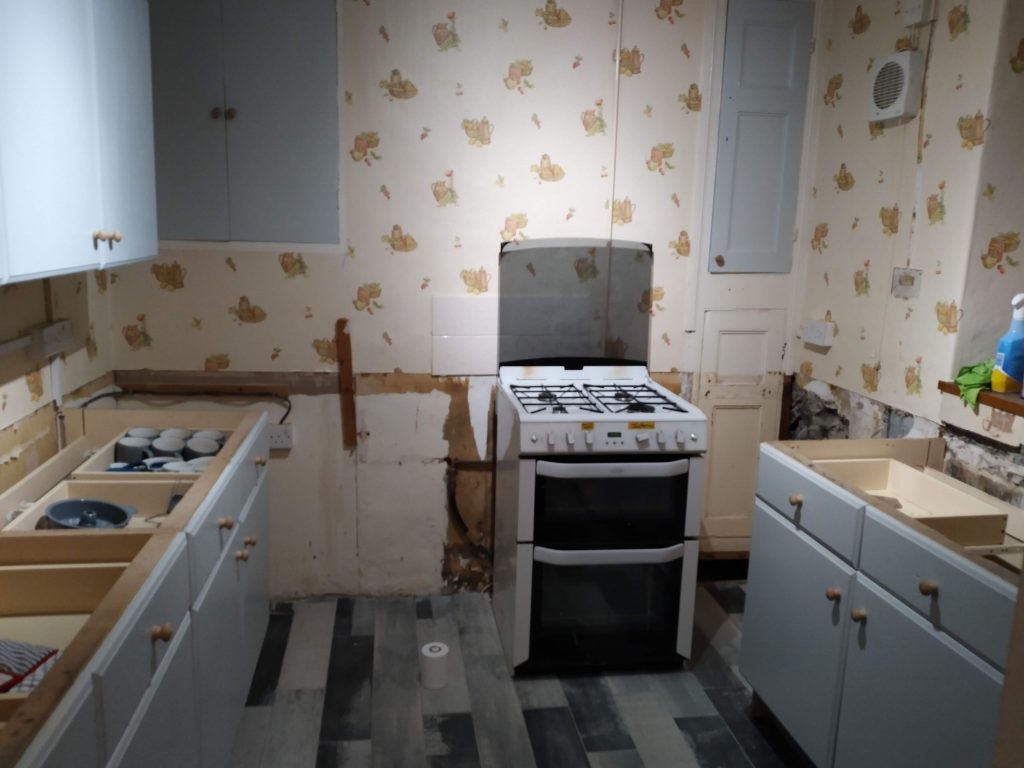
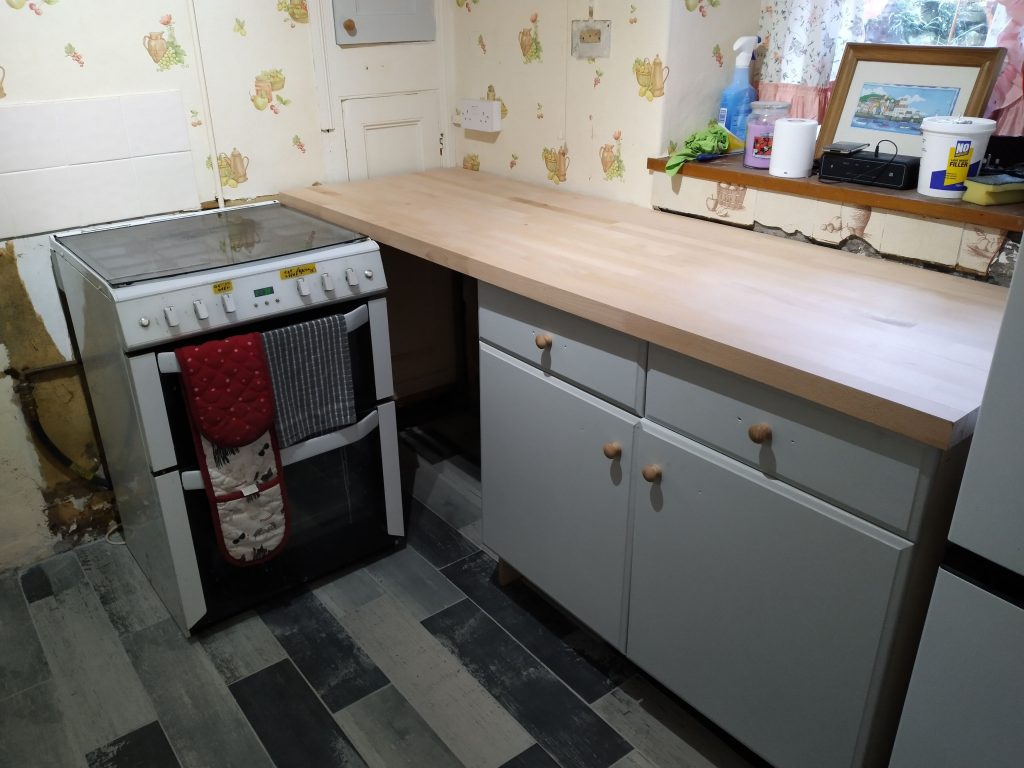
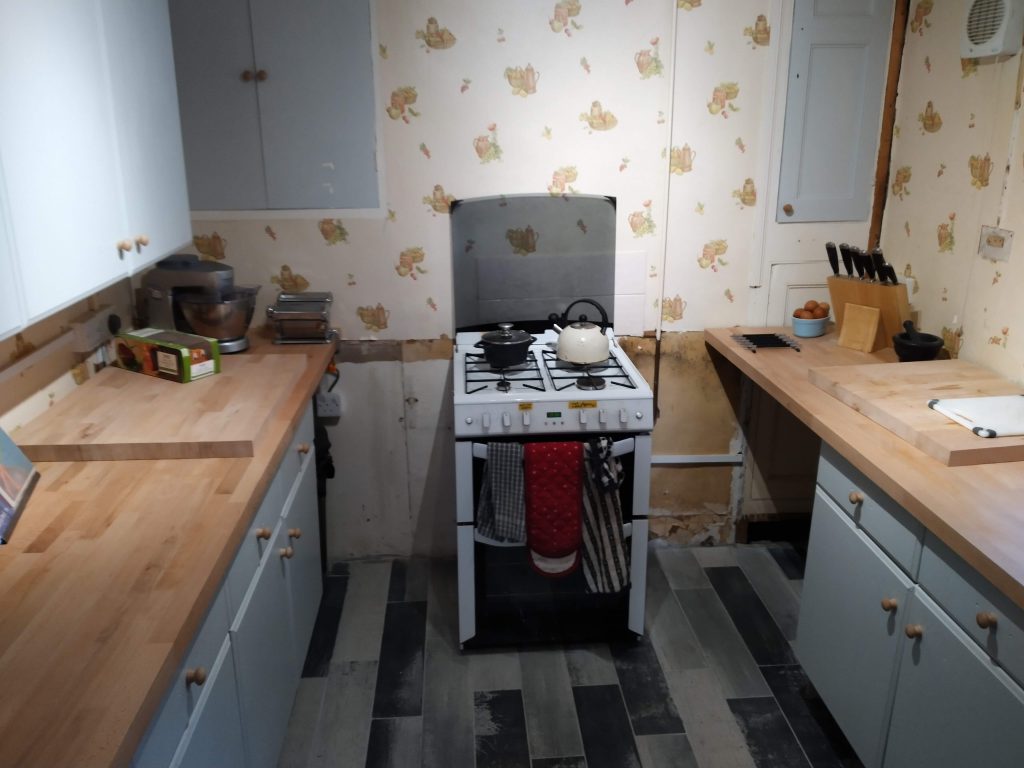
To save a bit of cash, I had planned to re-use the existing wall and base units. I had already painted the doors and now it was just a case of repositioning the base units where I wanted them. I was restricted by the location of the gas pipe and the waste pipe (although I can get the water pipes re-ran) so kept to the two base units on the left hand side and the single unit on the right hand side. The cooker was then going to go across the end facing wall.
I had also ordered new beech worktops from an online company (House of Worktops) with a view of cutting these to fit myself. As there will be panelling going on and I am bringing this down to the work top (as opposed to behind) then putting a beading strip on, any errors I might make in terms of being a few mill out will be covered up!
The right hand side was easy, as this was 192 cm off of a 2m work top but the left hand side was a bit more troublesome as the walls are uneven and looking at it side on, whilst the edge facing the right had wall was at a clean right angle, the other side wall facing edge was actually a small obtuse angle. Measuring the walls, there was a 4 cm difference between the rear and front edges so when marking the cut I had to be careful with the piece of guide wood to make sure I got this right.
My next challenge was what to use to cut it! I had both a jigsaw and a circular saw. The circular saw would go through it easy but I was worried about the brutality of the first contact causing visible damage. The jigsaw would be cleaner but the wood was quite dense so it would be harder and there is always the risk of blade flex giving you a lopsided cut.
I did a test cut a few cm off the end of the waste part I knew I was going to have and as expected, due to my lack of experience, the ripsaw caught and caused a small amount of damage so I decided to do the cuts with the jigsaw.
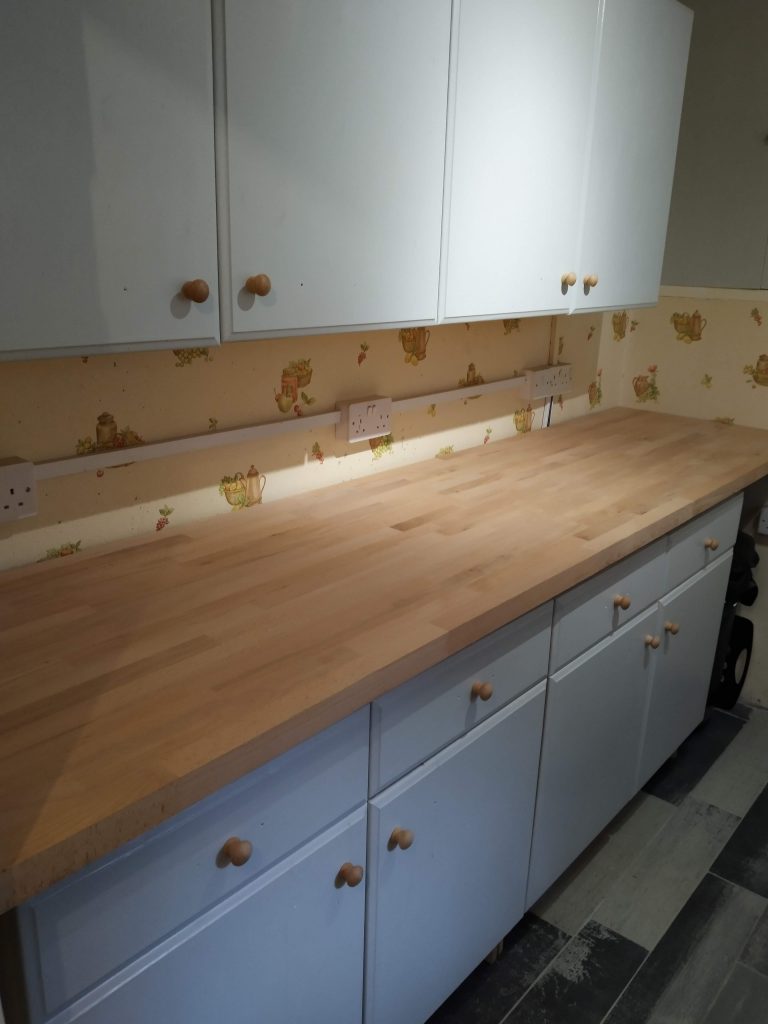
I did have a bit of worktop spare (after fitting the utility room one as well) so I used this to make some custom size chopping boards. Once the worktops had been oiled and the chopping boards placed, I think the end result works really well?
The next step is to panel the walls to hide all of the existing pipes and cables (and also to give that traditional cottage kitchen feel) and to get the sink and taps fitted.