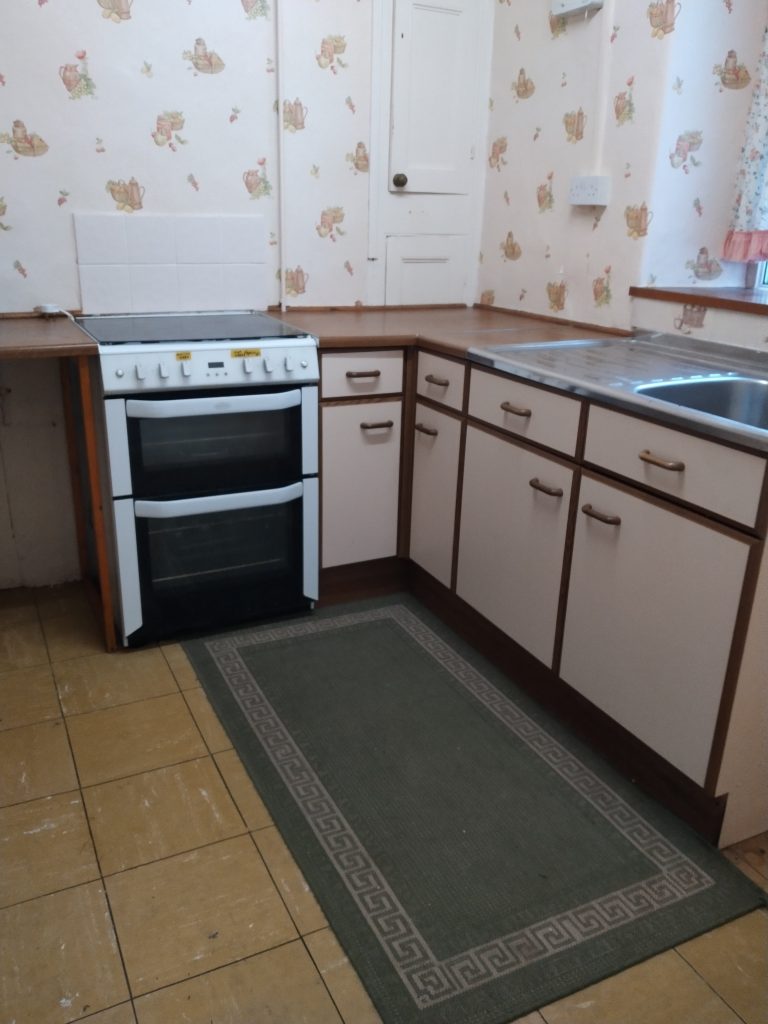
One obvious aspect when viewing the house was that the kitchen had to go! It was functional and all working but certainly not to my taste as it was dated in its style and the layout was not how I would have it set up. My key “want” was to separate the “cooking” from the washing up and having a good sized utility room with a sink and place for a dishwasher, I wanted to move that aspect of life out of the kitchen and only have a small sink in the kitchen for food prep etc. I also wanted a small range style cooking appliance. Ideally I would love to have gone to a solid fuel Rayburn but researching it, it would be in my case “form over function” so I put that thought to one side and moved towards a nice range style cooker. I have fitted Ikea kitchens before and my experiences in terms of ease of fit and longevity has been good. My aim was to get sparks/plumber to do all the services work and then I would fit the kitchen and new flooring around their first and second fix cycles.
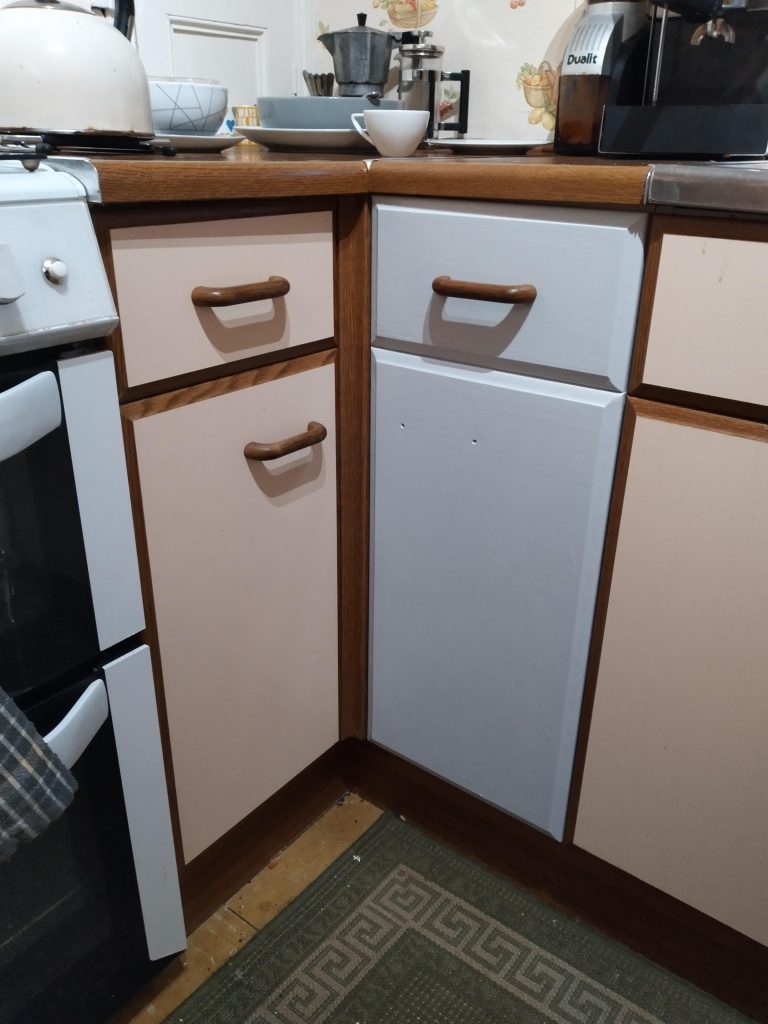
So that was the plan, and the budget allowed it. Their were some fixed costs that would need to be replaced regardless of my approach (such as the flooring, worktops, sink and taps) but the replacement of the units and doors (c £650 cost) was going to be a replace old with new where the only benefit was changing the looks of the doors. Looking at keeping the carcases (as these were solid) and just replacing the doors gave me 3 options to consider which were; upcycle the existing doors, buy online replacements as they were standard size or make the doors myself from scratch. The potential cost saving was attractive and I did like the idea of trying a bit of upcycling and it seems to becoming more common place and would allow me to colour the doors in the manner that I had visualised for the kitchen as opposed to being tied to on-line options only. Worse case if it did not fit in or I found the doors not to be hard wearing, it would be straight forward to replace the base units at a later date due to the modular design I was taking.
The floor was an easy decision, it was going! It was dated lino and very worn with an unlevel base so the simple option was once the kitchen was stripped, lay a good quality latex based self levelling compound and then lay some nice ceramic tiles. I had done this in my previous house so was happy with my skill level to do this, My main decision here was to chose a style of tile that blended with the original flooring in the hallway and also to decide whether I finished it directly against the hallway flooring (which actually was past the door opening) or have a small black slate effect strip separating the two.
My next thought moved onto the wall, and I had already decided what I wanted here. Pastel coloured painted tongue and grooved panels. I know this would mean fitting all of this from scratch but would be a great skill to learn as it would encompass a lot of techniques. And from a cost viewpoint is not that expensive.
So back to the cabinet doors, and at this stage I am going to go down the upcycle route. I had two doors in a cabinet that was not going to be used based on the new layout so I could use this as a tester in terms of prep, rubbing back, undercoat binding and top coat finish and an initial test actually gave a really nice finish and even if it only lasts me 3 years, will be a new skill I have learns and saved me a bit of cash which I can redirect into some areas where the budget needed it more.
The worktops were a simple decision, in my last house I had solid wood (which I chopped directly on top of… arghhh I hear some of you shouting)! I actually had a 2 star Michelin chef who I was fortunate enough to work with help me design my last kitchen and it was he who encouraged me to allow work surfaces to become “used” in their look. Have a plastic chopping board for meat and fish but for veg prep, just spray down with an Anti Bac spray and prep straight onto the worktop. No risk of chopping board slip and endless space. That’s my plan again and with solid Beech worktops being an economical option and me being happy to cut them to size I think that is where I am going.
As the kitchen in mainly going to be used for cooking, the current sink will be removed and a small half basin put in, mainly for food prep but in order to do the flooring properly the base units with the sink will need to be removed. As the taps seem to have no in-line isolators I will probably take the opportunity to get them capped off with an isolator higher up and then once the main kitchen is removed and rebuilt I can get a more natural run of the pipes.
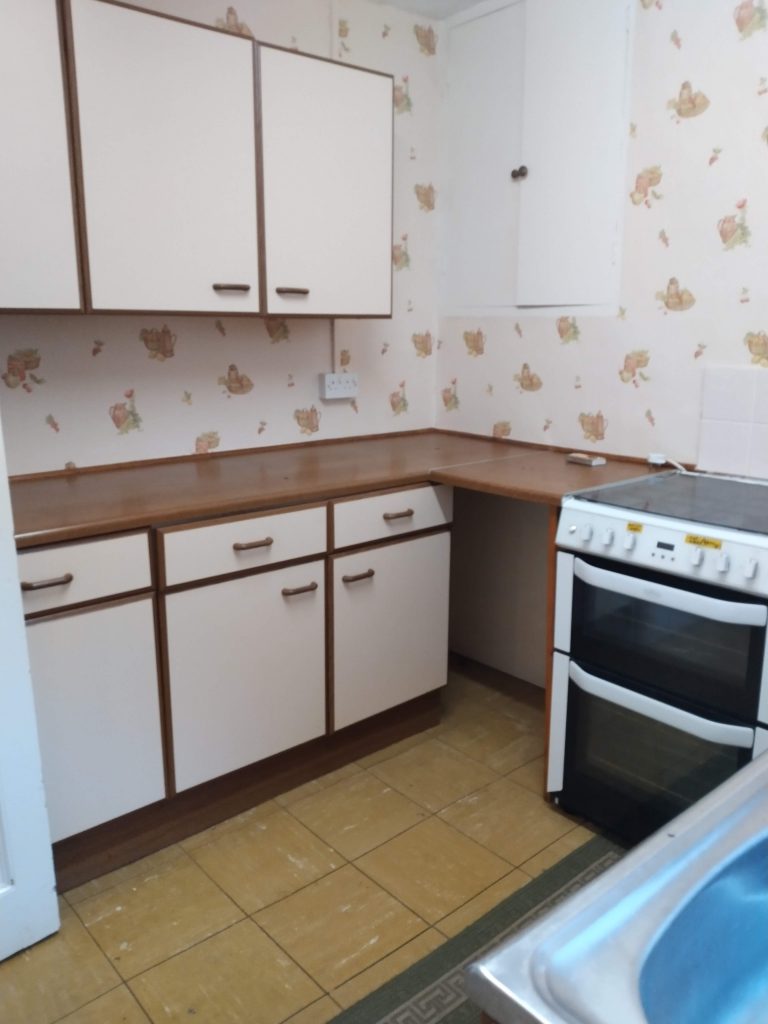
Finally cooking. Once I had settled on a range style cooker it was really about fuel type and size. I prefer gas over electric and the main sizes are 90, 100 and 110 cm. My original plan was to locate the cooker in the back right hand corner running against the wall that has the window but that would lose me about 1m of work surface. With the gas point in that corner my options were limited but by turning the cooker 90 deg and placing it on the wall opposite the door way (as the current one is) but losing the extended piece in the picture below that links to the left hand side, I think I can maximise the use of space and have a very functional design.